Hi,
Perhaps a better way to approach this would be to use a thrower and to ‘throw’ the content onto all 4 video screens. Please see below:
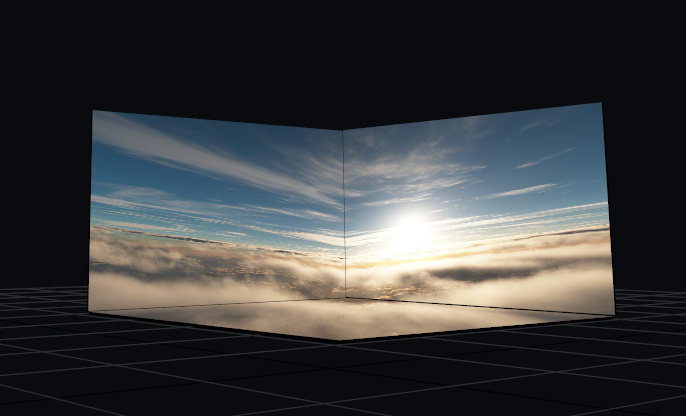
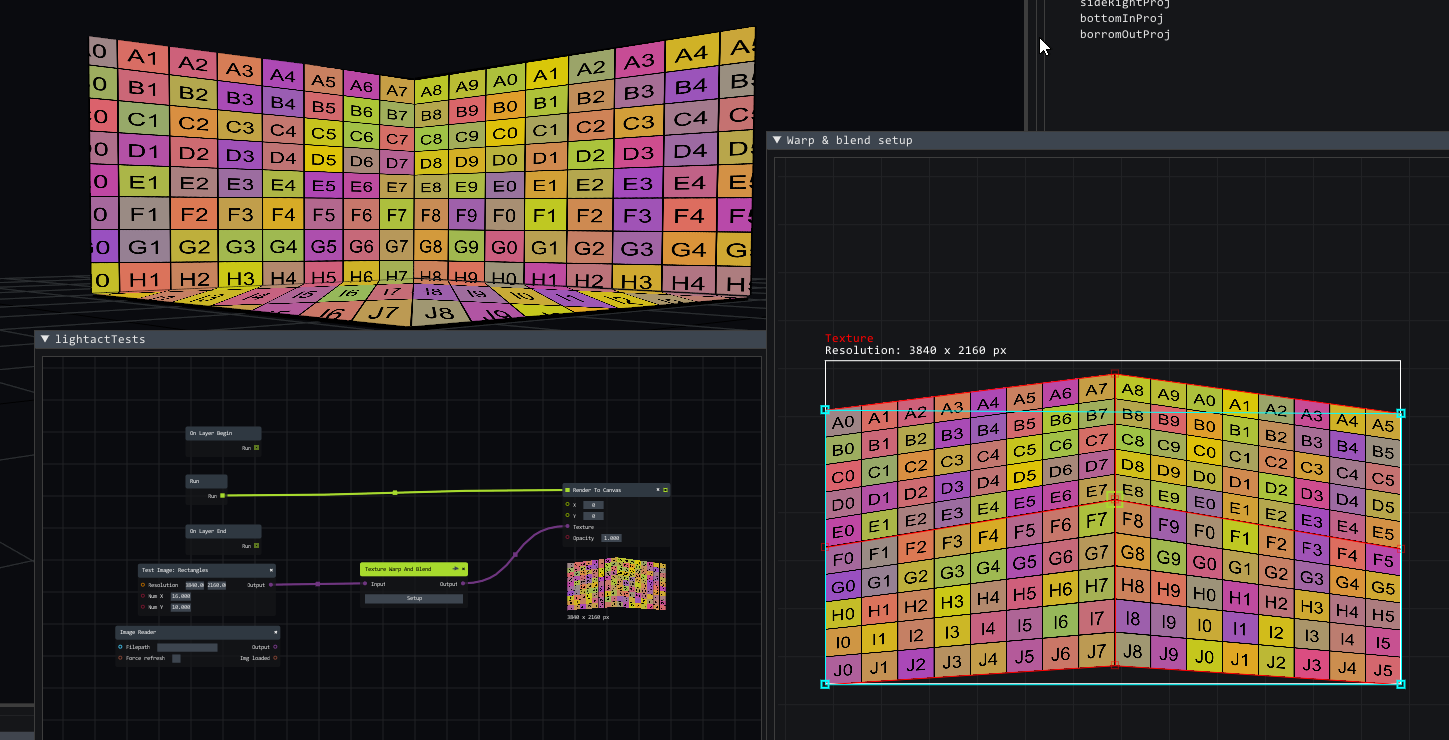
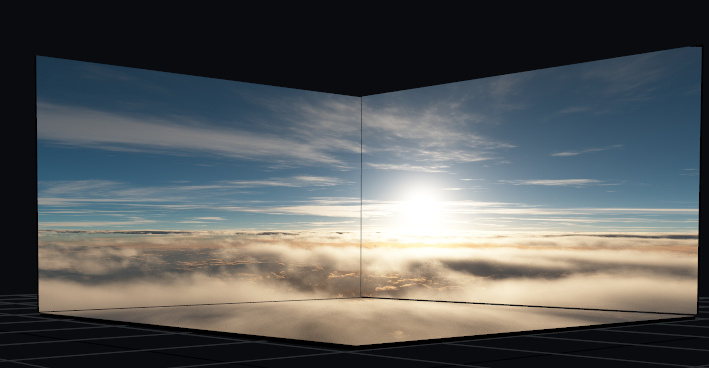
Now, the mapping is not perfect as you can see here:
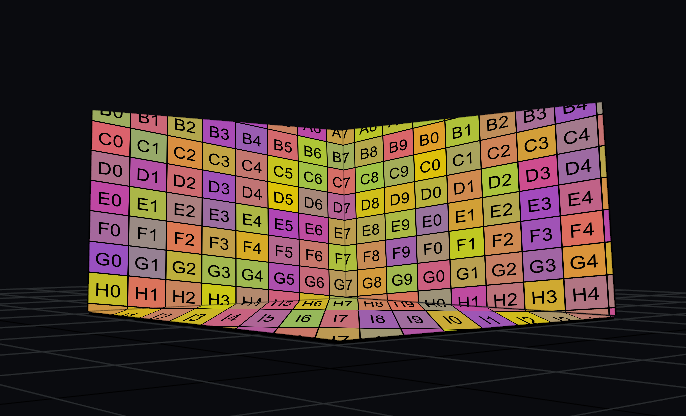
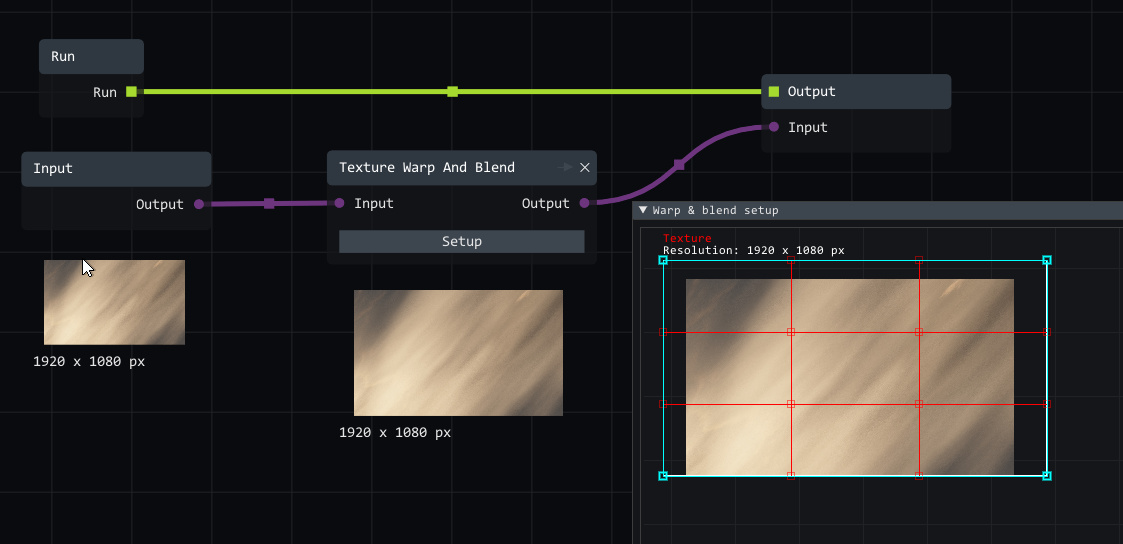
But, if we add a Texture warp and blend node between the source node and the Render to canvas node we can get much closer.
The way this works is that a single thrower throws the content to all of the objects that are assigned to it. In our case, its your 4 screens.
Please note there are some caveats to this as I’ll explain below, but first, let’s talk about how you can output the content of the screens.
Outputting the content
The first approach is to directly output the video screens without any additional blending or warping. If that works for you, that’s fine.
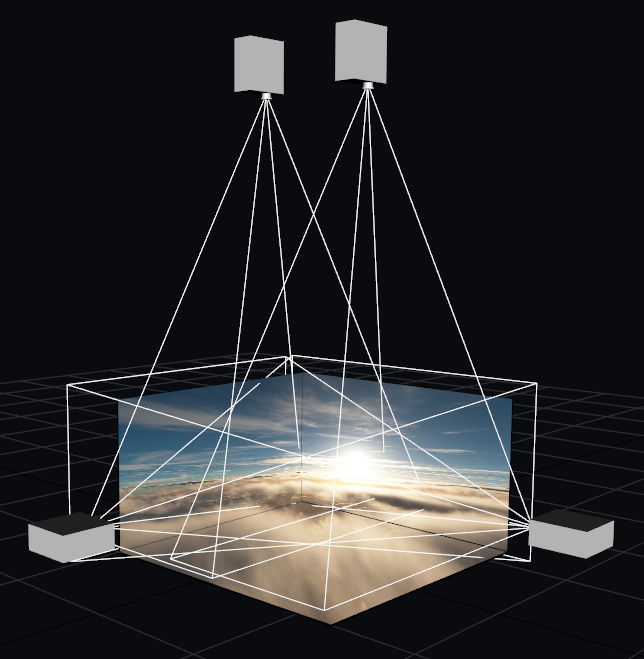
But if you want to do additional warping and blending then you’d have to position the projectors as they are positioned in the real-space (more or less).
Then you have to assign the corresponding video screens to each projector. Basically you tell Lightact from which video screen(s) each projector is grabbing the content from.
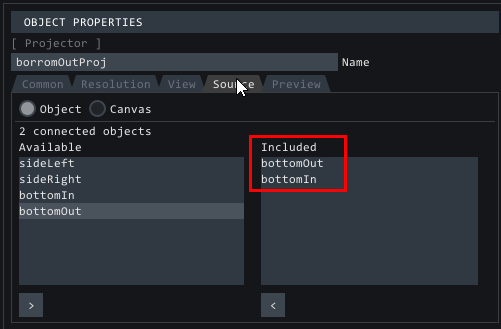
In the projector’s setup window, that you can open by double-clicking on the projector model in the Visualizer, you can further warp and blend the texture coming from the virtual projector before it gets sent out to the physical output.
I am attaching the project file I used for these screenshots.
190526-4Screens-mod.la (68.8 KB)
A tip: to get even better results you might want to add another thrower and use it for the bottom 2 screens
To get more information about this workflow, have a quick read-through of the 3 user guides in the Projection Mapping category starting with this article.
A 2nd tip: Another interesting way of approaching this would be:
- to create a 3D model of your CAVE system in a 3D modeling software (such as Cinema4D)
- to use that software’s UV mapping capabilities to map content onto your 3 walls in such a way that it is projected onto the whole setup. I am pretty certain C4D has this feature
- import the UV mapped model into Lightact and use the virtual projector workflow as described in the user guides.
The Caveat
You are probably aware of this, but these kinds of projection mappings really work only from a single vantage point. As soon as you move, the illusion is broken.
Looking forward to discussing this project.