In LightAct 4.10, we have included major improvements in the asset management with asset repositories, improved mapping workflow, better timeline syncing, introduced new LightNet roles and LightNet Workload Management, updated Notch layer with new dynamic Notch features, streamlined projection mapping for projection study, 3DCal, OptiTrack and Iris along with many other features which are explained below.
Assets
General
-
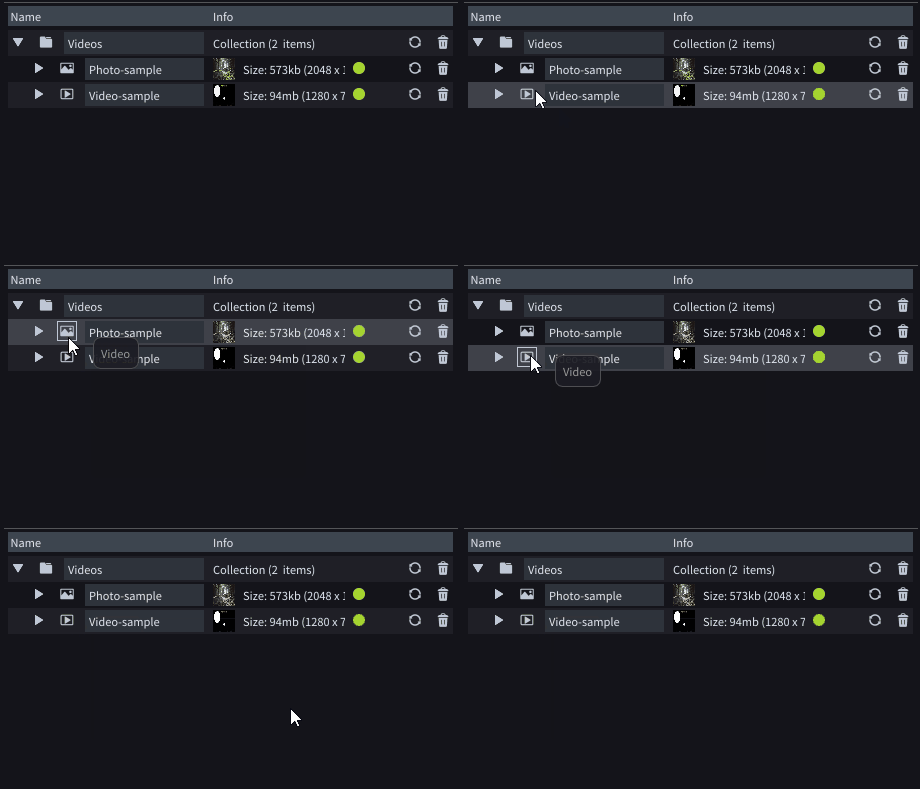
Video and Image asset types now both fall into the Video asset type for simpler management.
-
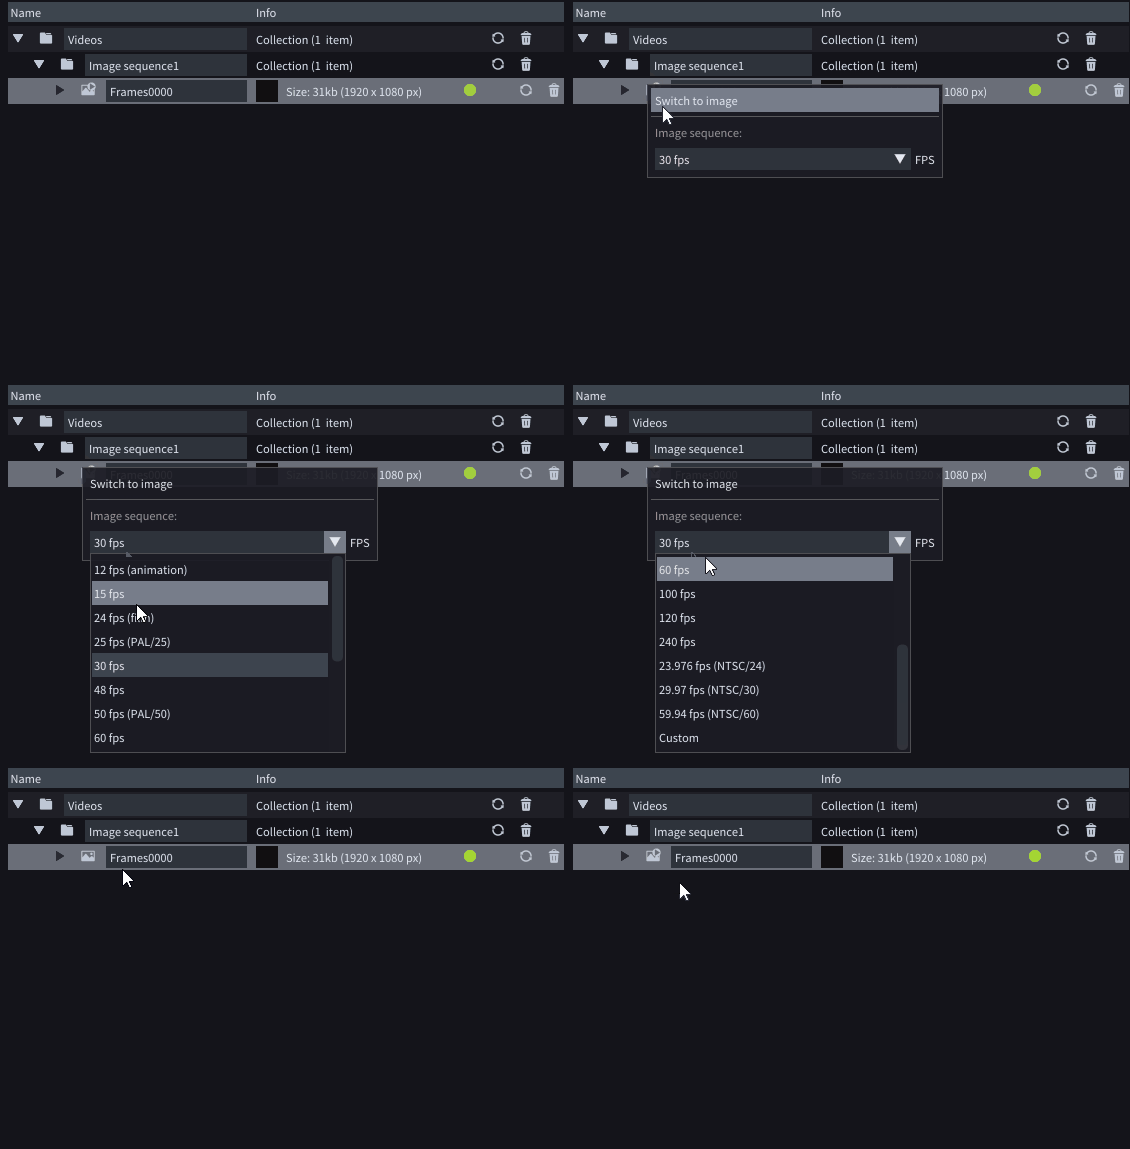
Asset versioning is possible for Image Sequences, as well.

-
You can convert images to Image sequence and adjust their Framerate via a drop-down menu.
Asset repositories
-
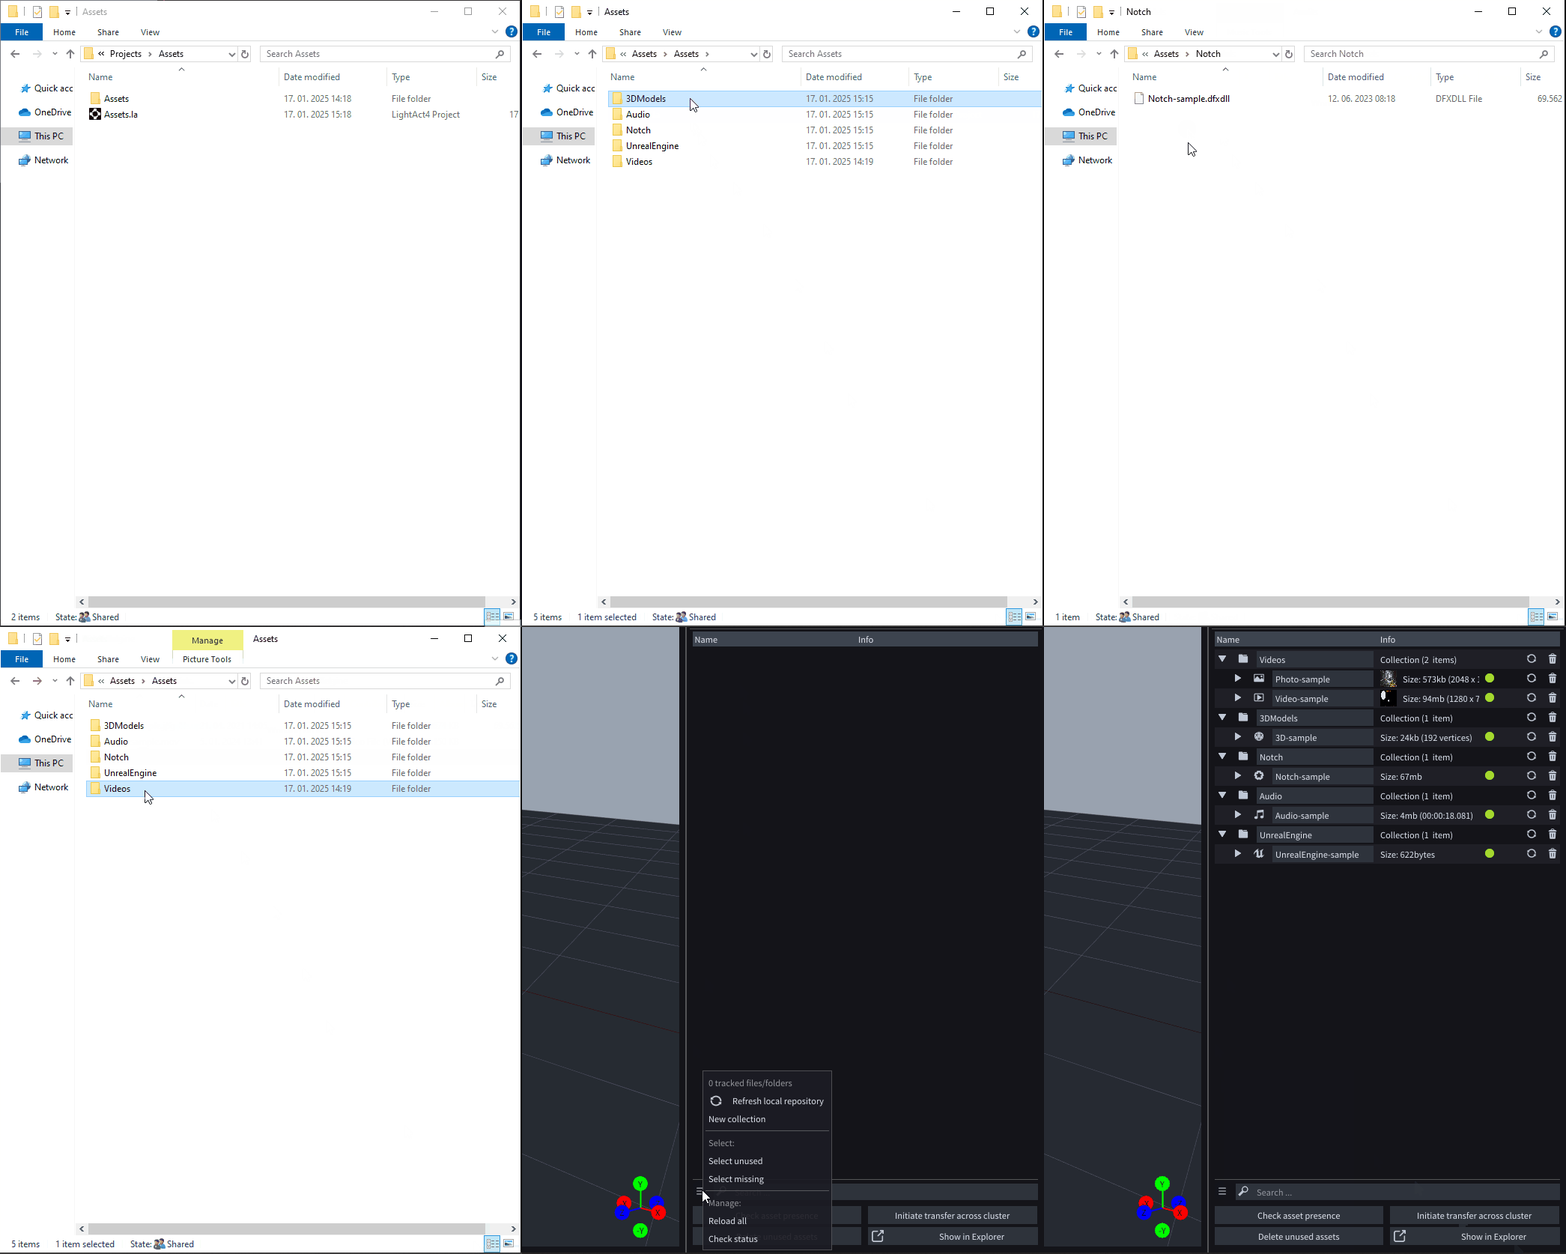
Local Asset Repository provides a more organized way to manage assets. By default, five folders - 3DModels, Audio, Notch, UnrealEngine, and Videos - are created inside the Assets directory located next to the project file.
In this workflow, all assets should first be placed in the appropriate folders, and then LightAct will detect the new files.
-
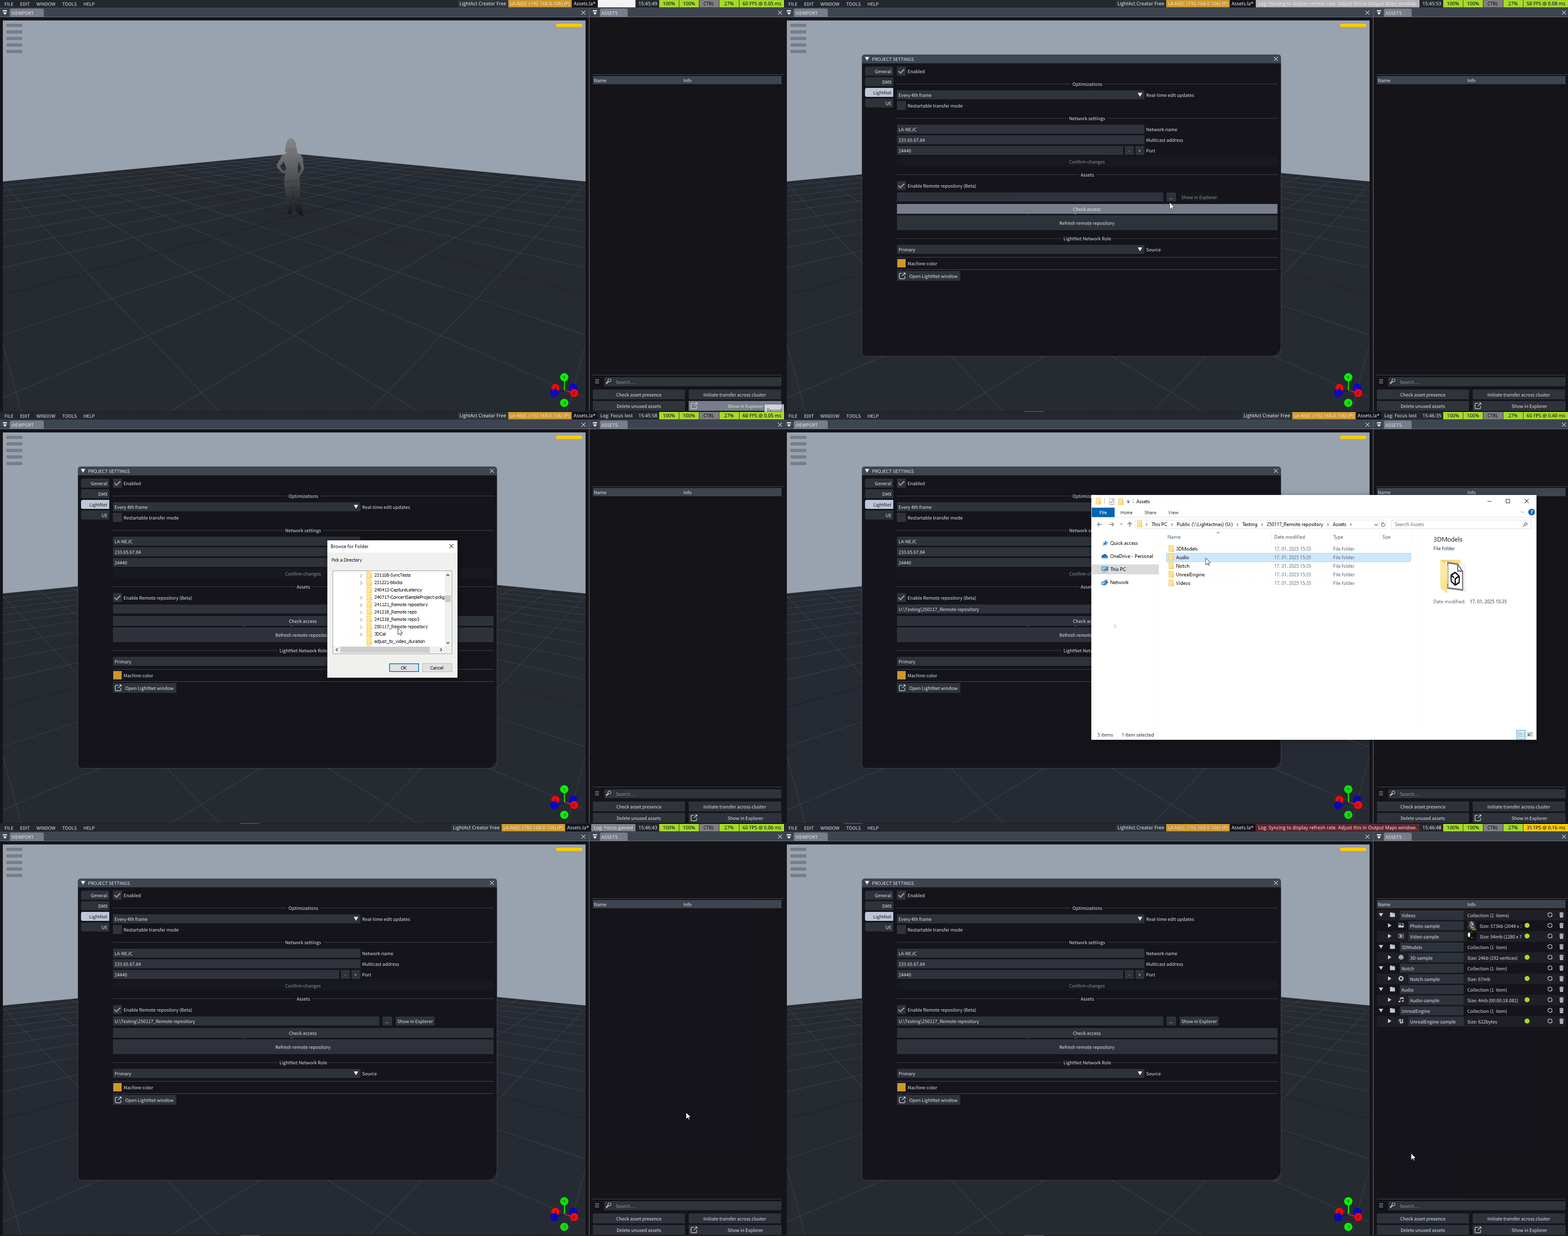
The Remote Asset Repository allows assets to be stored in a designated remote location, such as a NAS or another networked storage system.
Mapping
-
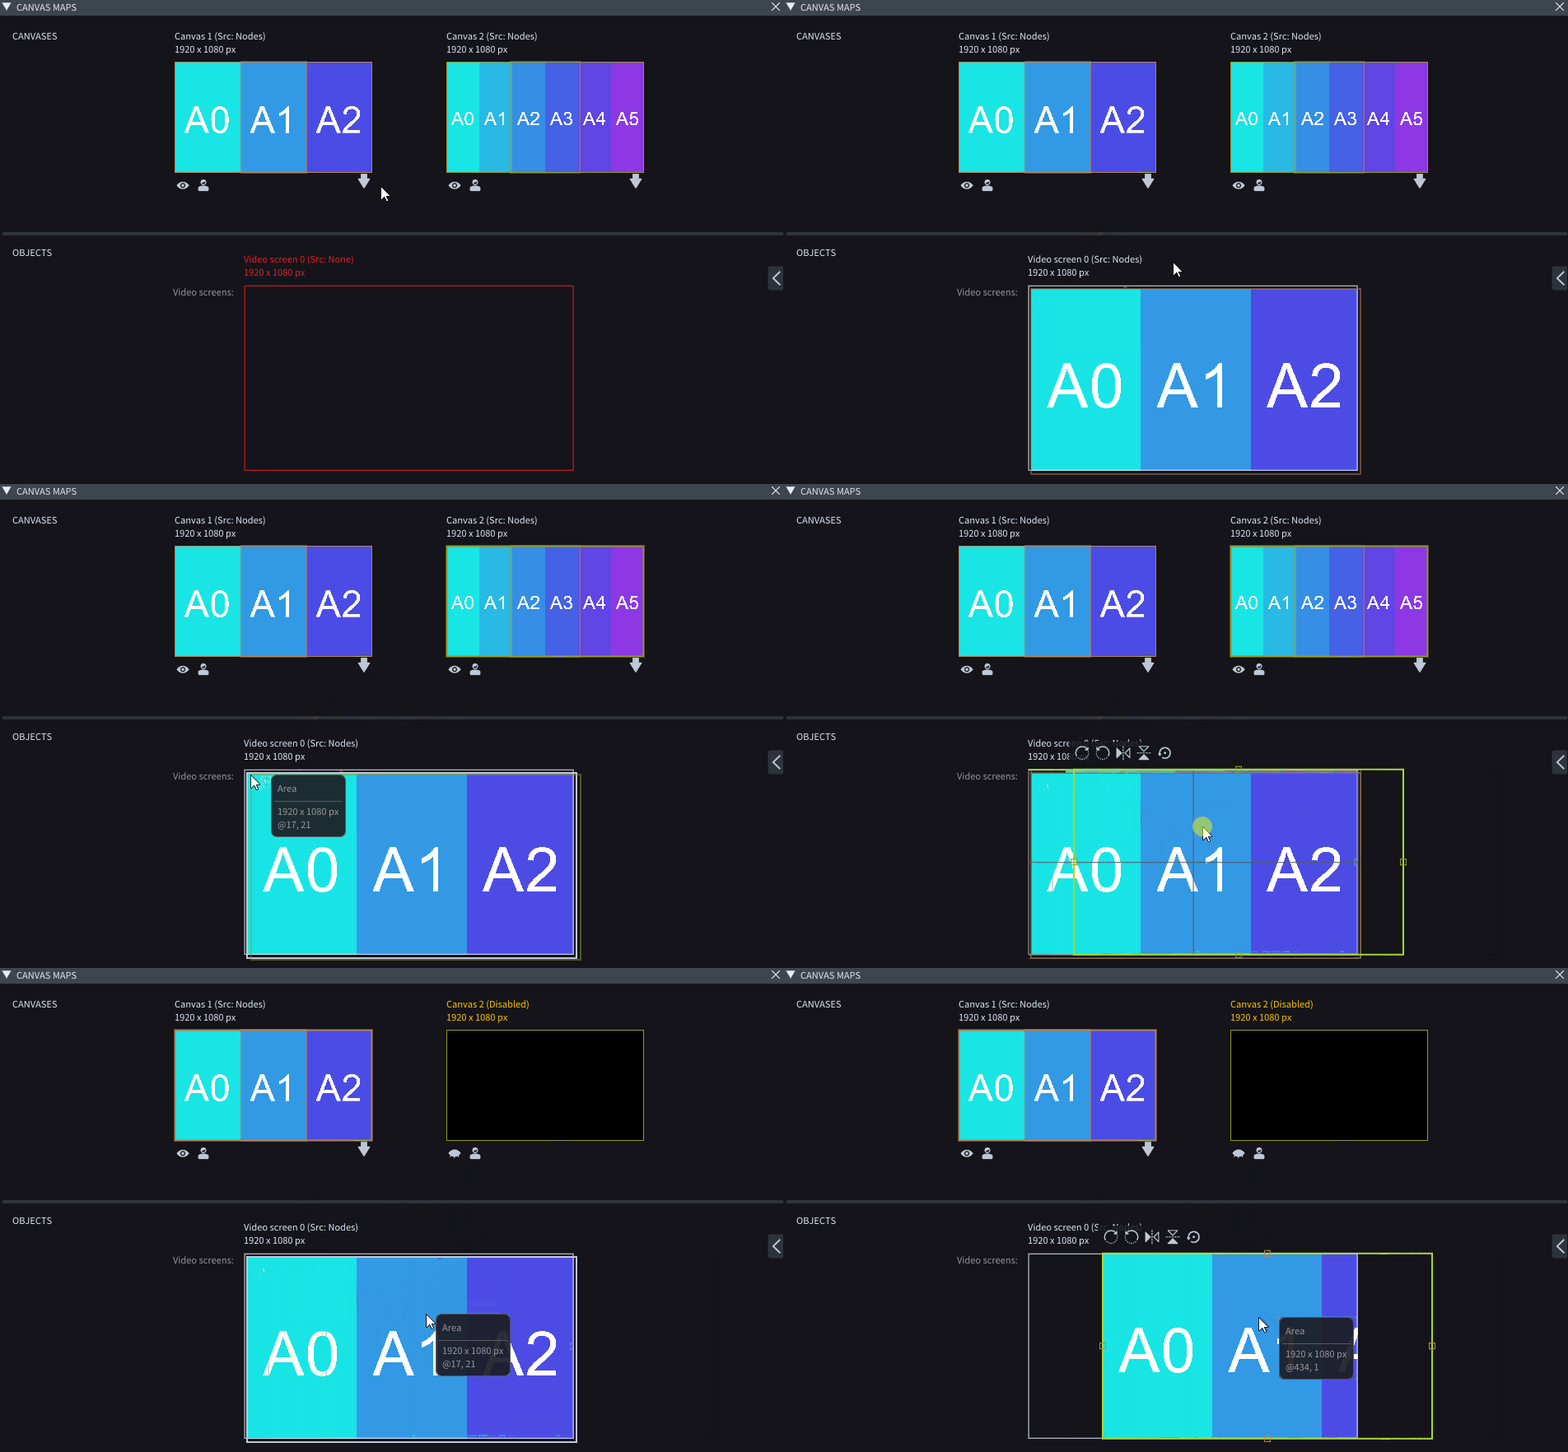
Canvases in the Canvas Maps window and Objects in the Output Maps window now have Solo/Eye icons, making it easier to select specific subareas among overlapping ones and access their right-click menu.
-
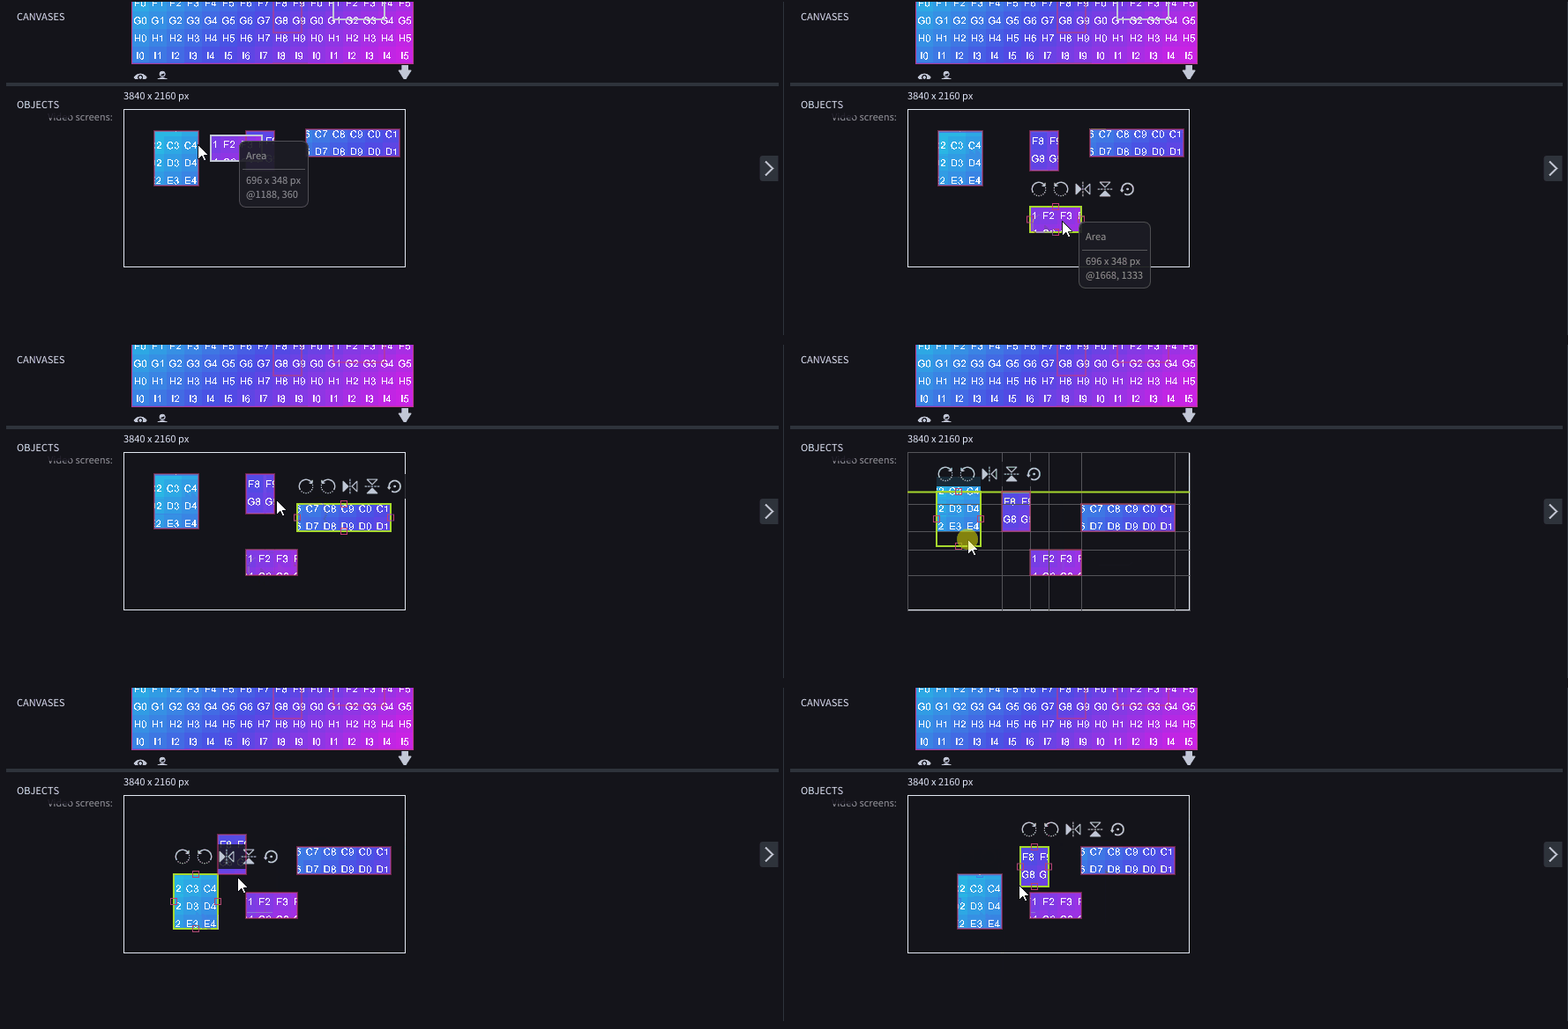
Visible snapping lines and color indicators help you reposition subareas with greater precision.
-
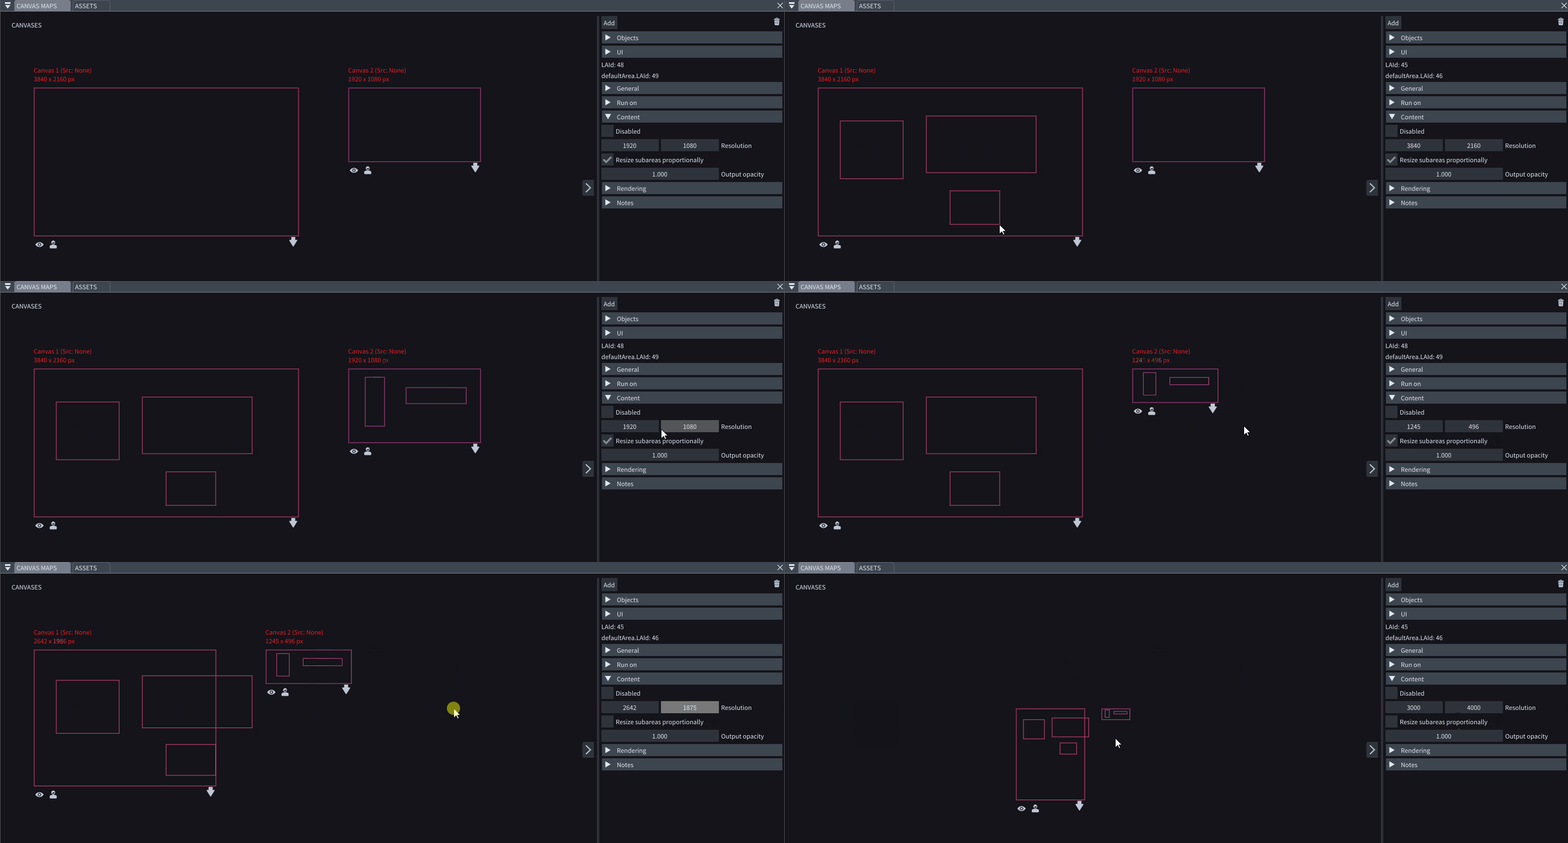
The Resize subareas proportionally checkbox can now be found in Canvas Maps. This checkbox allows you to either resize subareas proportionally when resizing a Canvas when the checkbox is Enabled or make the subareas independent from the Canvas size change when the checkbox is Disabled.
-
Changing the height and length of multiple subareas within the same Canvas simultaneously.

-
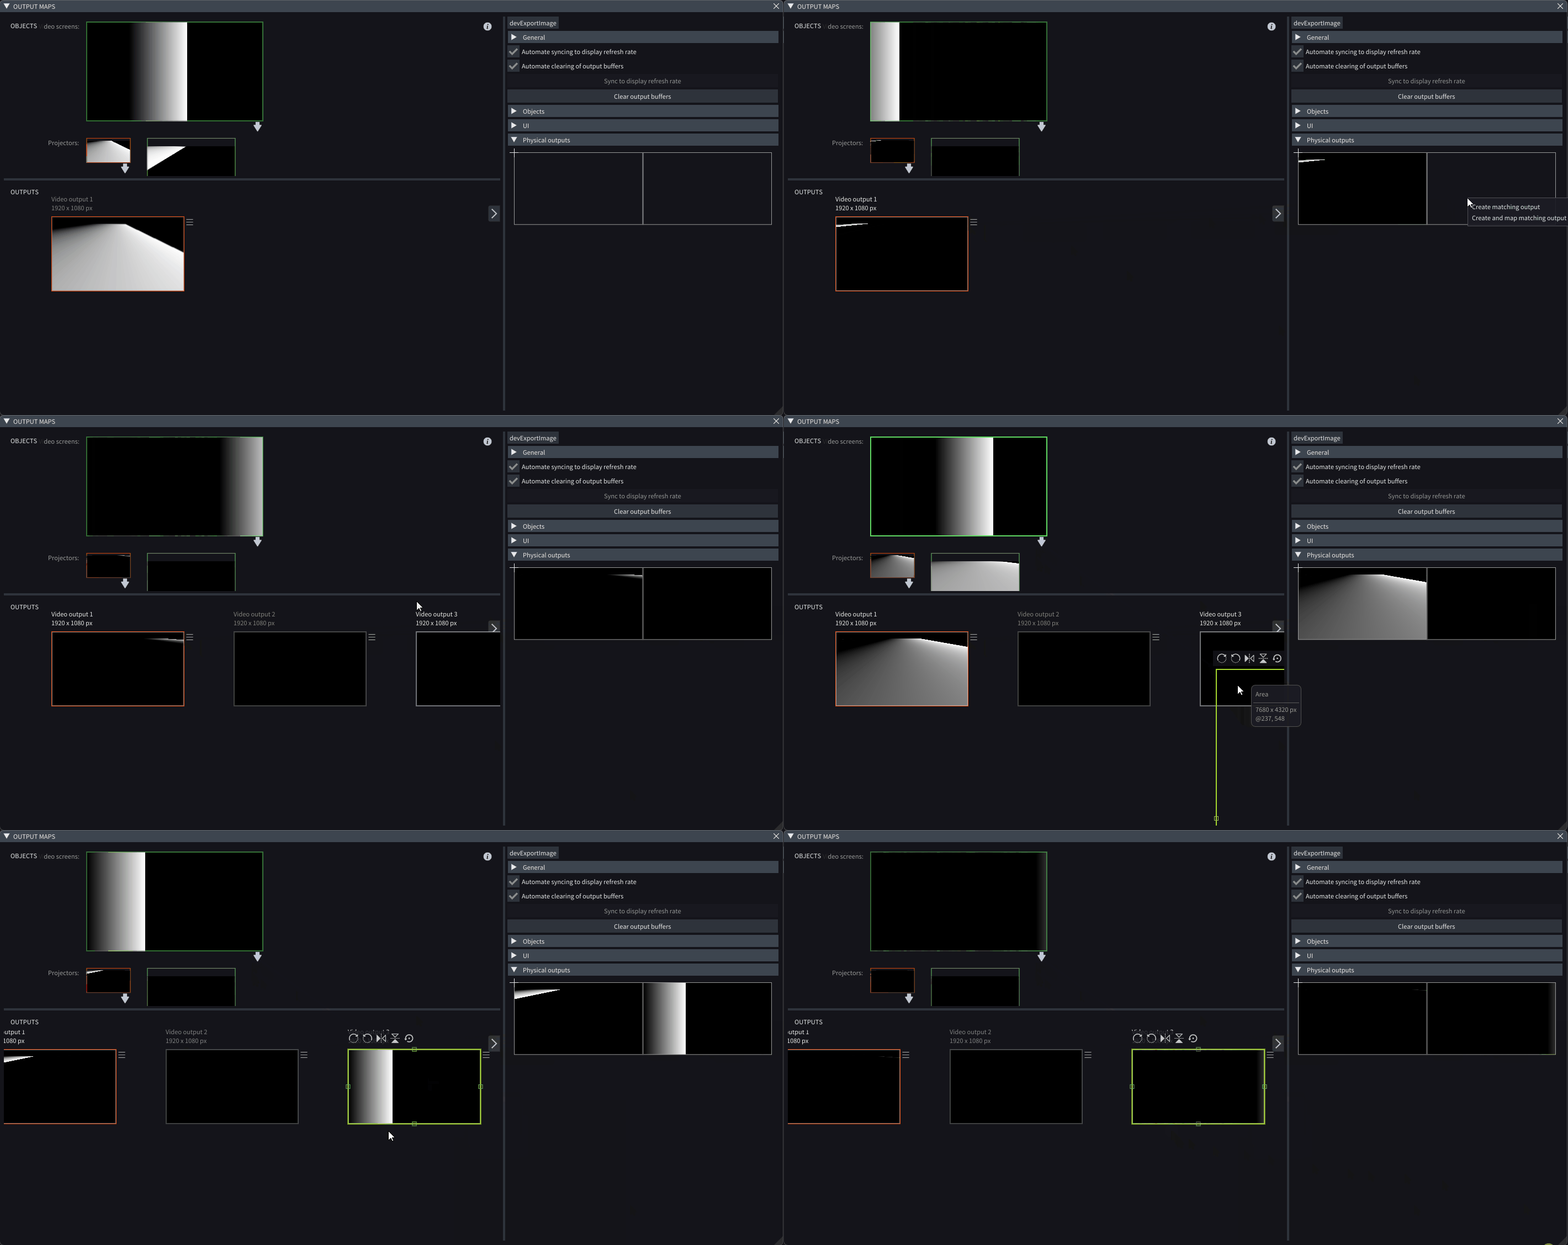
To add and map objects to physical outputs in Output Maps, drag from the three-lined menu to the desired physical output in the Physical output collapsible or double-click on the target physical output. Alternatively, right-click and choose Create Matching Output or Create and Map Matching Output.
Timeline Editor & Syncing
-
Layer states in the Timeline Editor window are indicated by color: no indicator for enabled, yellow for disabled, and blue for preview-only.
When the Track is disabled, all layers inherit the same state; otherwise, individual layer states apply. Change layer states in the Properties window of each Layer or adjust Track states by clicking on the Solo or Eye icons.
-
Switching Layer state between Enabled, Disabled and Preview only by clicking on the radio buttons and selecting Locked to lock it in place in your Timeline.
-
To sync a Timeline with incoming Timecode, select the Source in the Syncing collapsilable of Preferences window, then under the “Section TC Marks” switch from Automatic to Custom Type and enter the desired timecode to all Sections you want to trigger with the incoming TC.
Alternatively, you can also modify per Section in Preferences window of the selected Section.
-
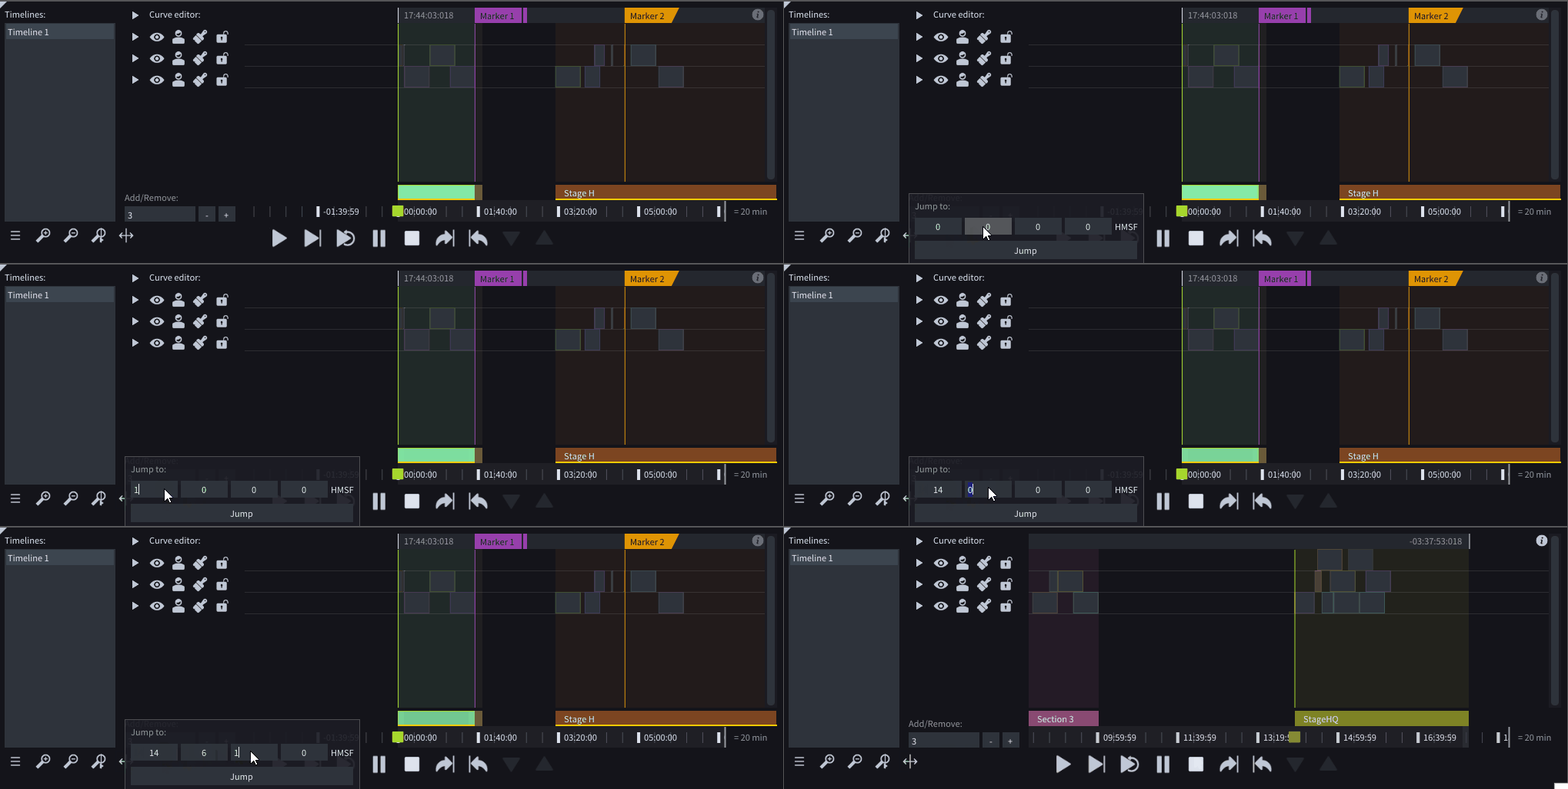
Once the Jump To function is triggered, the Timeline Editor window will adjust, so that the Playhead is in focus.
-
When the Curve Editor is expanded, you can now toggle icons linked to checkboxes located in the bottom-left side menu for Show Curve Values and Move Keyframes with Layer.
To view changes while dragging a layer, select the layer and hold CTRL as you drag its ends.

-
A Timecode Monitor has been added, allowing you to track incoming timecode from both Timelines and external devices that transmit timecode.

-
A TC offset control has been added to the Audio Input, MIDI Receiver in the Devices window, and the DMX Input window to apply a global offset to incoming Timecode data.
If the time + offset is less than 0, the result is set to 0.

Backup & Editor LightNet Role
-
The Backup LightNet role ensures that the Backup computer automatically takes over its role in case of server failure.
-
With the Editor LightNet role, you can modify the project on a less powerful server or laptop without transferring assets.
-
With LightNet Event nodes you can trigger various actions in case of server failure.
LightNet Workload Management (BETA)
-
LightNet Workload Management window gives you an overview of how the workload is distributed across the machines in a given LightNet cluster, based on the Run on property of each LightAct element.

-
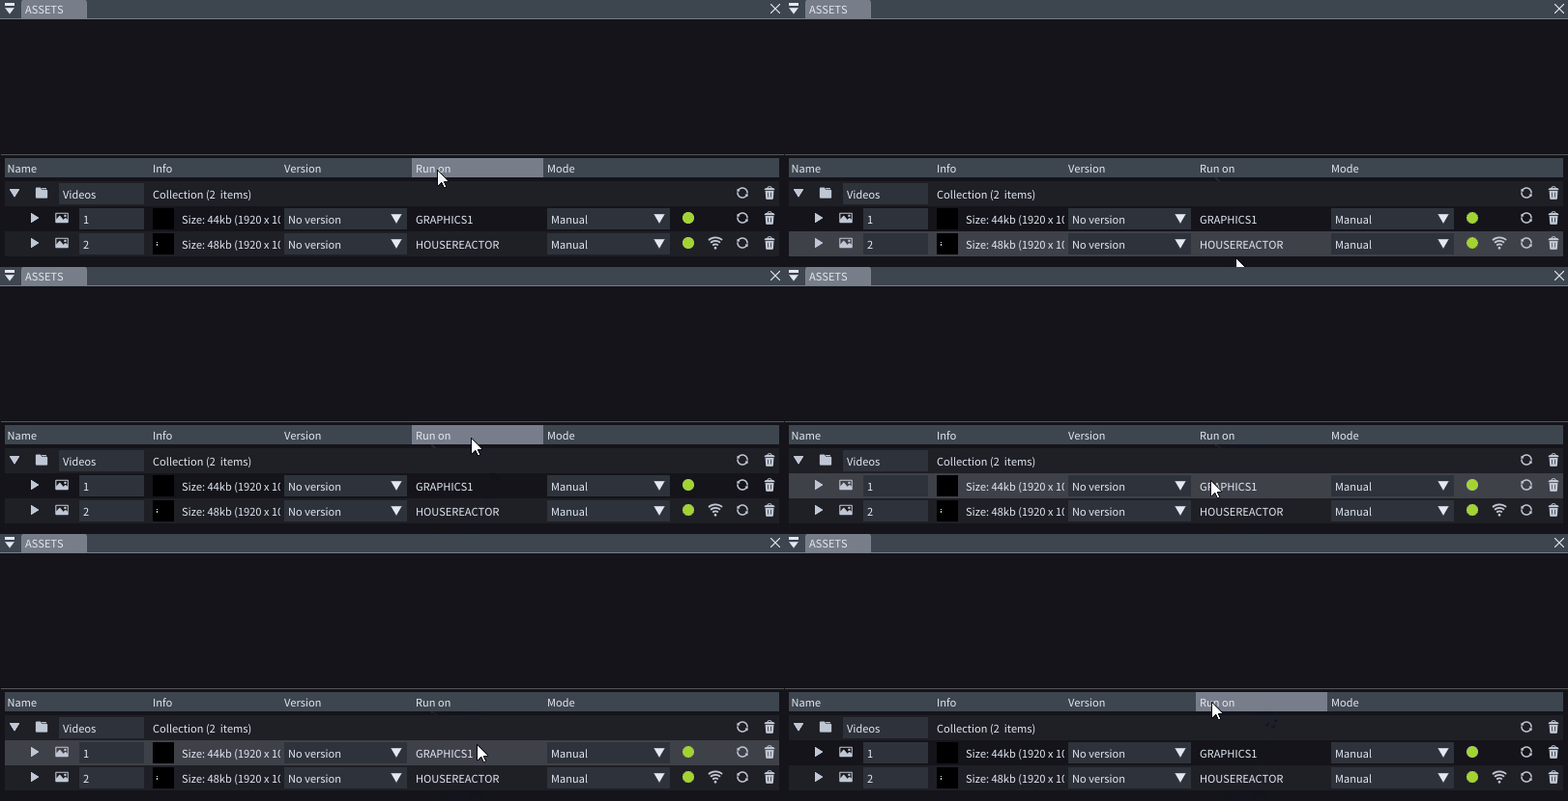
For Assets, the LightNet workload distribution is visible directly under the Assets window, in the Run on column.
-
The upgraded Assets window provides improved visibility and management of Assets across the LightNet cluster.

-
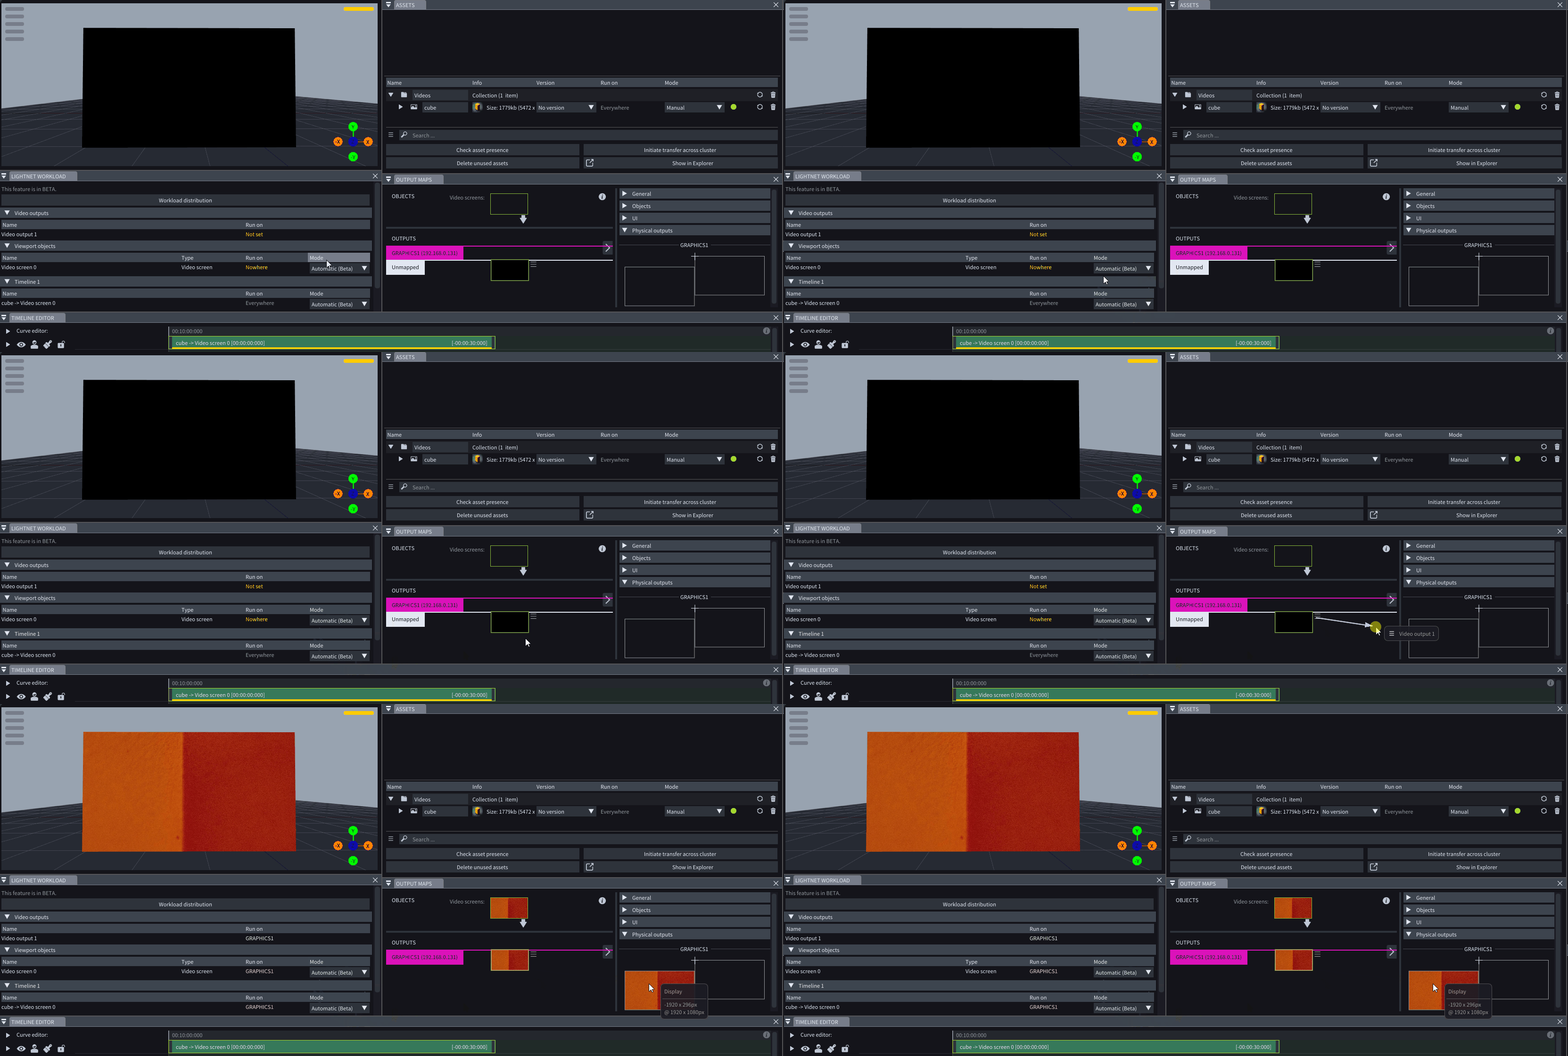
The Run on property now includes an Automatic option. When all LightAct elements are set to Automatic, their assignment will depend on the mapping of the final Video Output.
For instance, in a pipeline structured as Asset → Layer → Video Screen → Video Output, once the Video Output is mapped, all elements within this pipeline will automatically be assigned to the machine corresponding to the mapped Video Output.
-
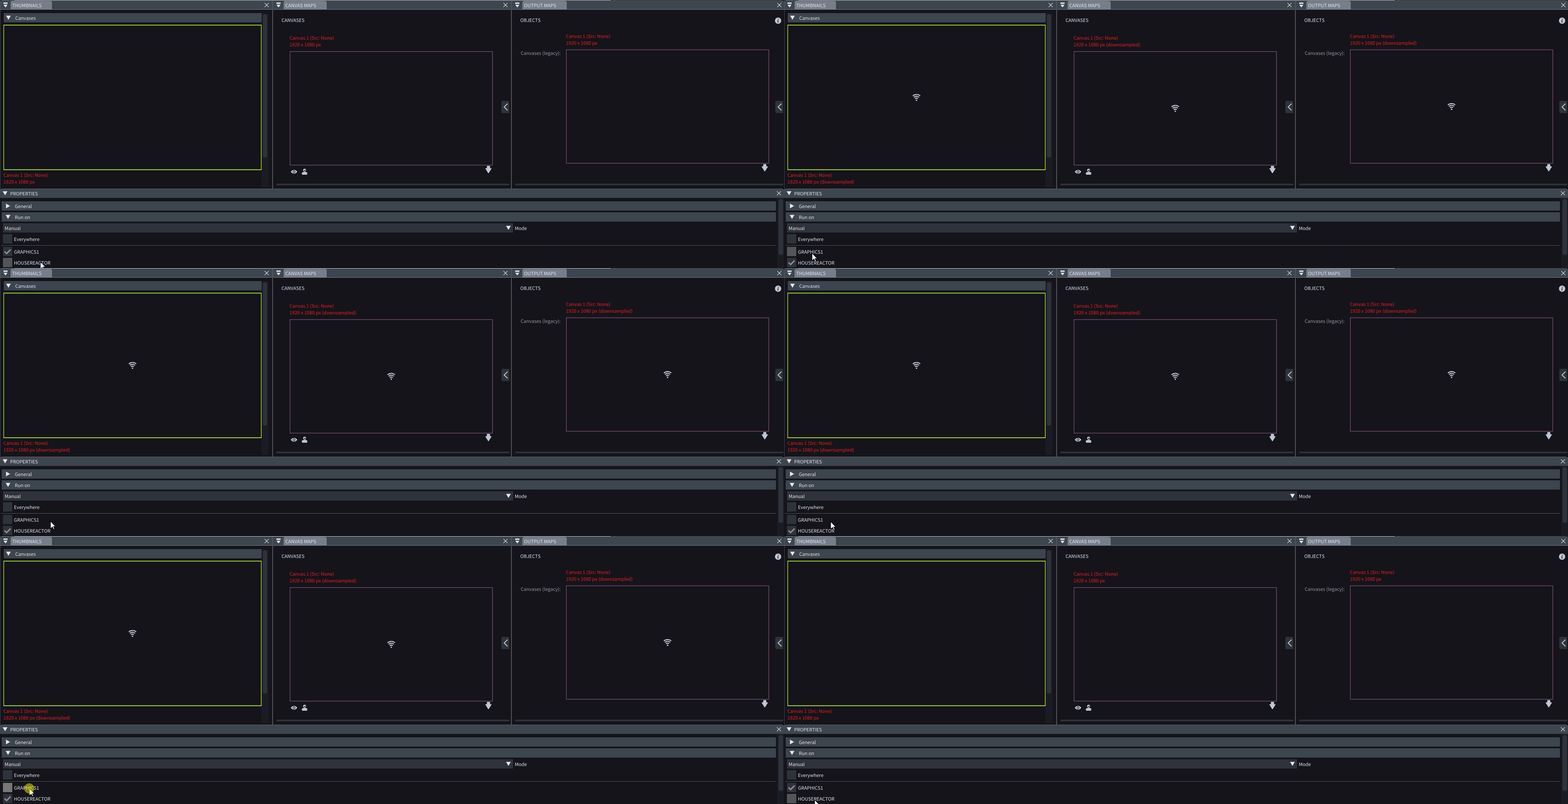
The WiFi icon, indicating the Canvas or Object is running on another machine is now visible in the Canvas Maps and Output Maps windows, as well.
-
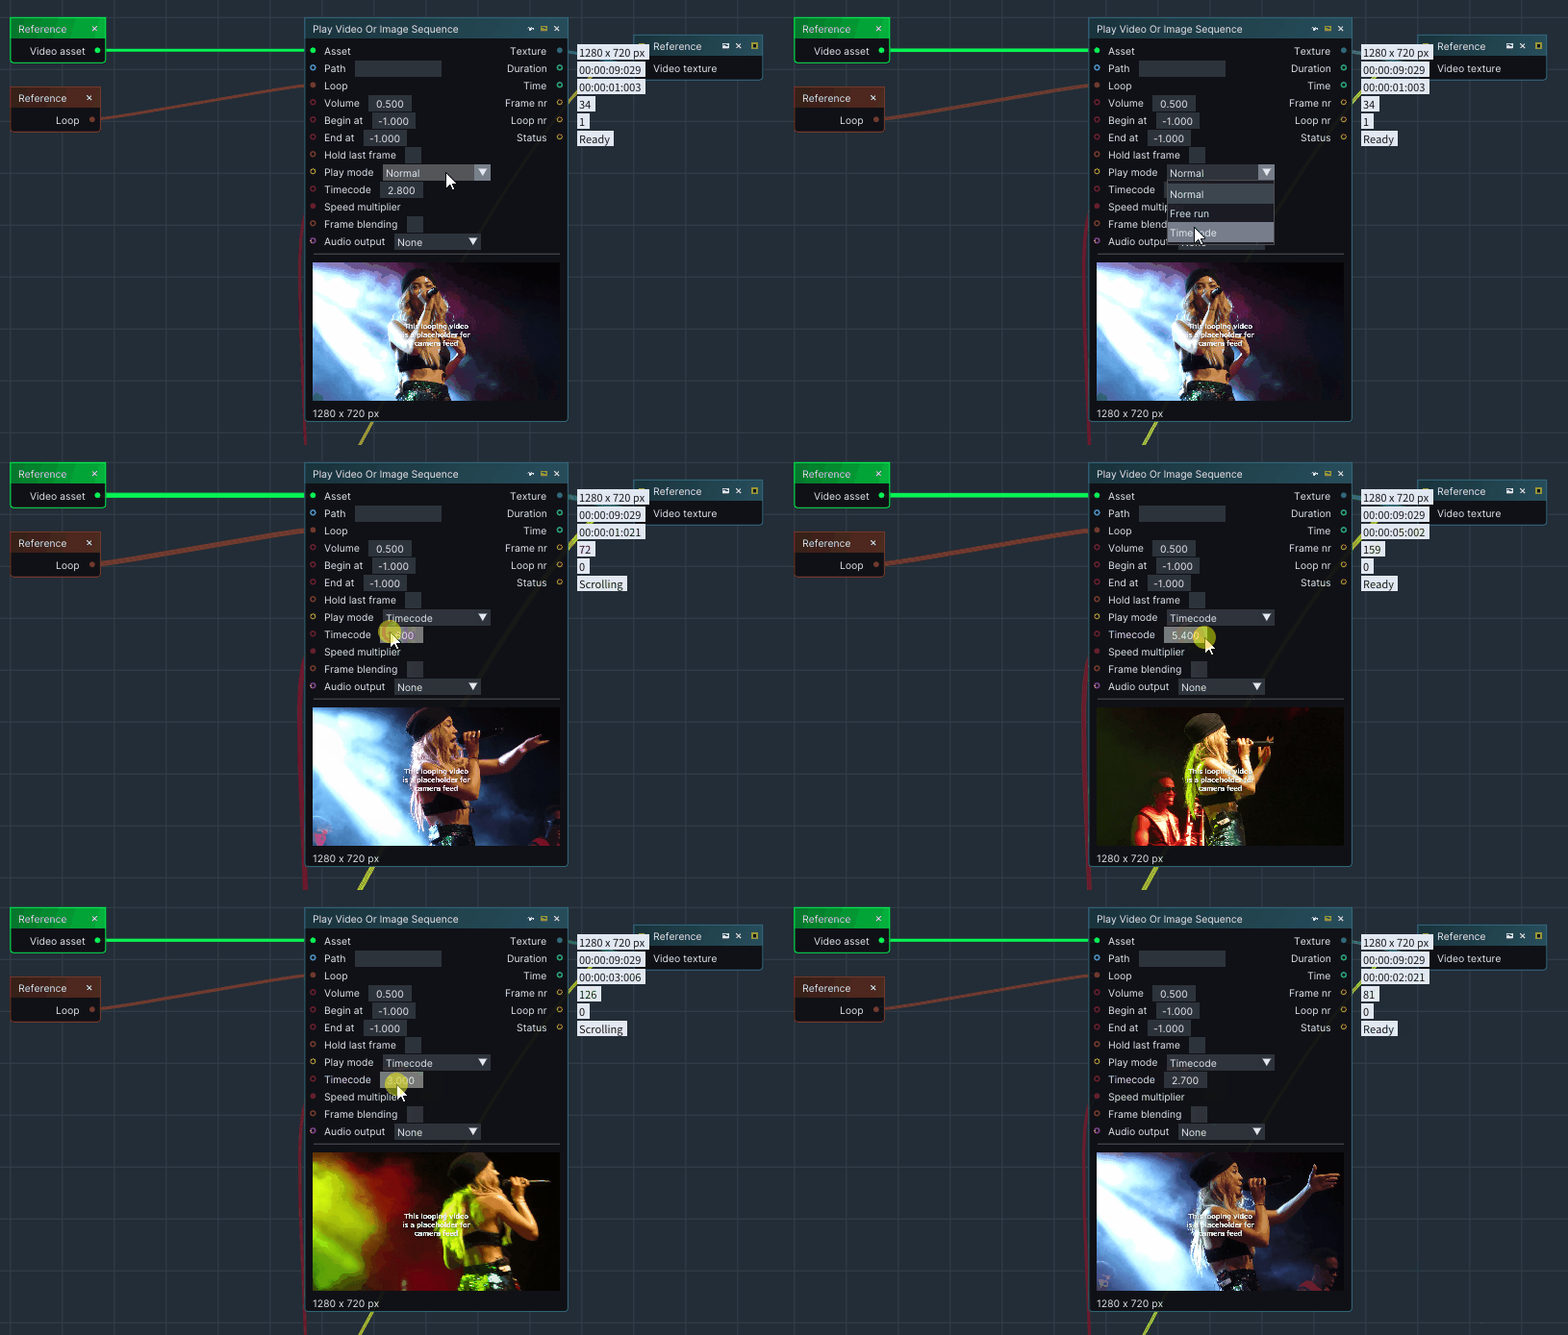
You can change the Play Mode of a Play Video and Image Sequence node by selecting the desired option, such as Normal, Free Run, Timecode, from the dropdown.
When Play Mode is set to Timecode, the node ignores layer time and uses the Timecode input.
-
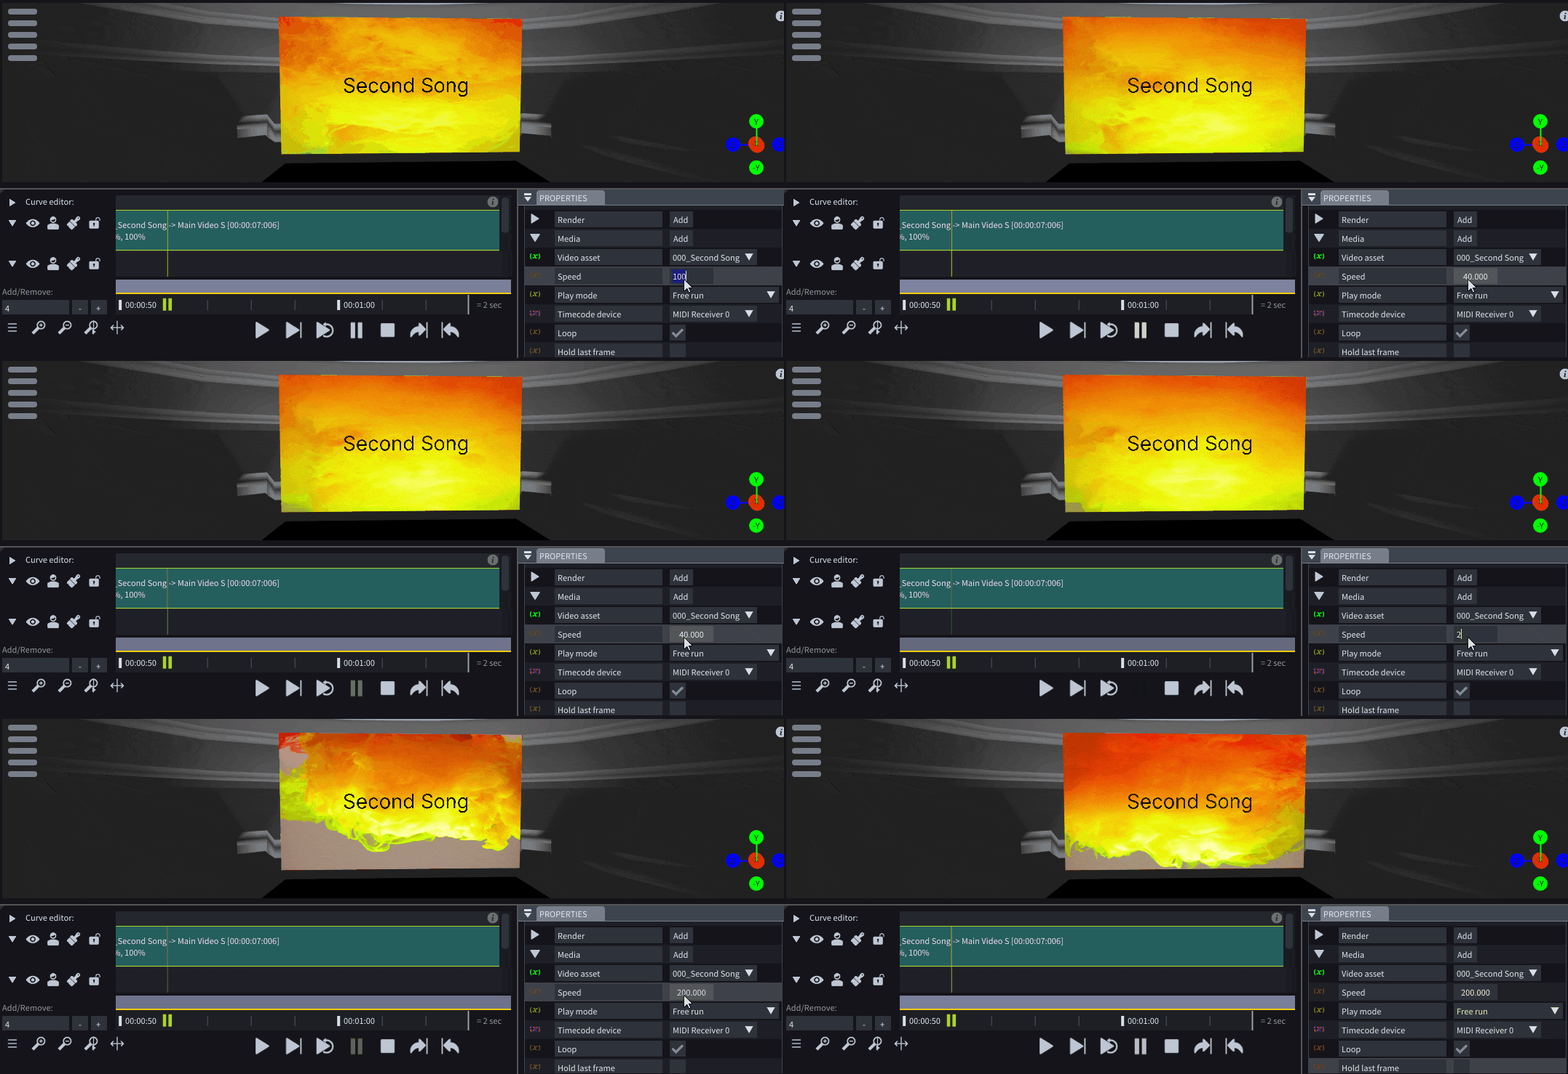
Change the speed of the video output while playing the Video.
Notch
-
Support for Notch 1.0.

-
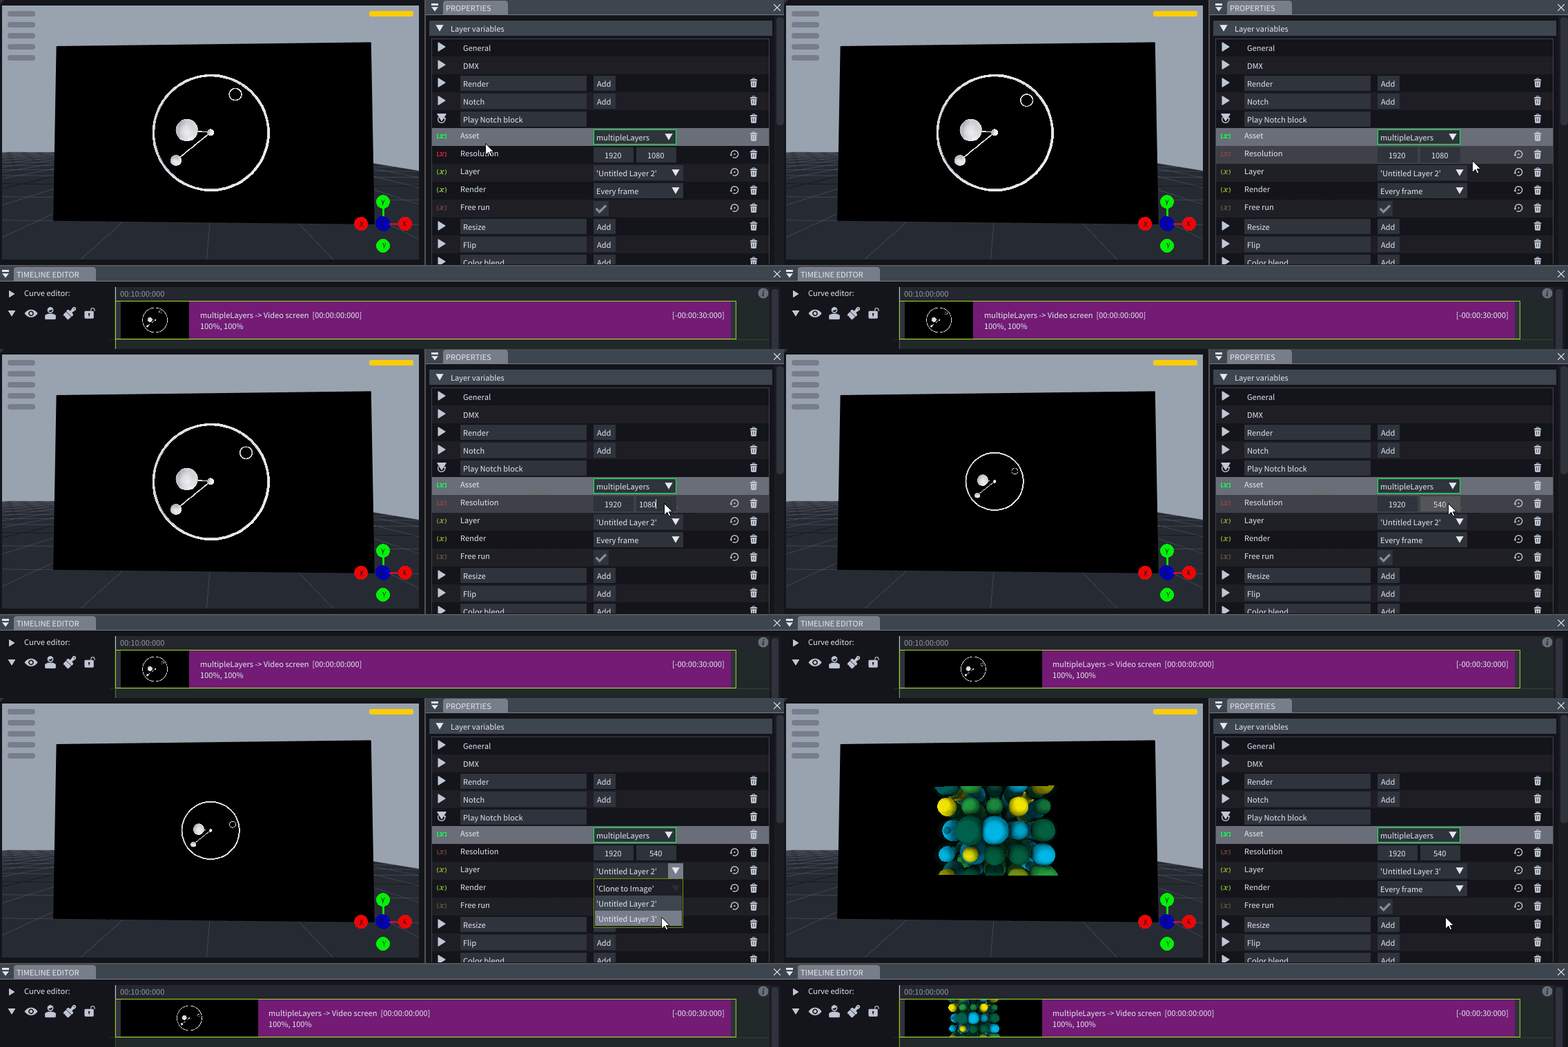
Updated Play notch block node, which allows you to change the Resolution, Layer, and Render policy of the Notch texture while the node is running.
-
The Play Notch Block node automatically rebuilds itself whenever you change the asset.

-
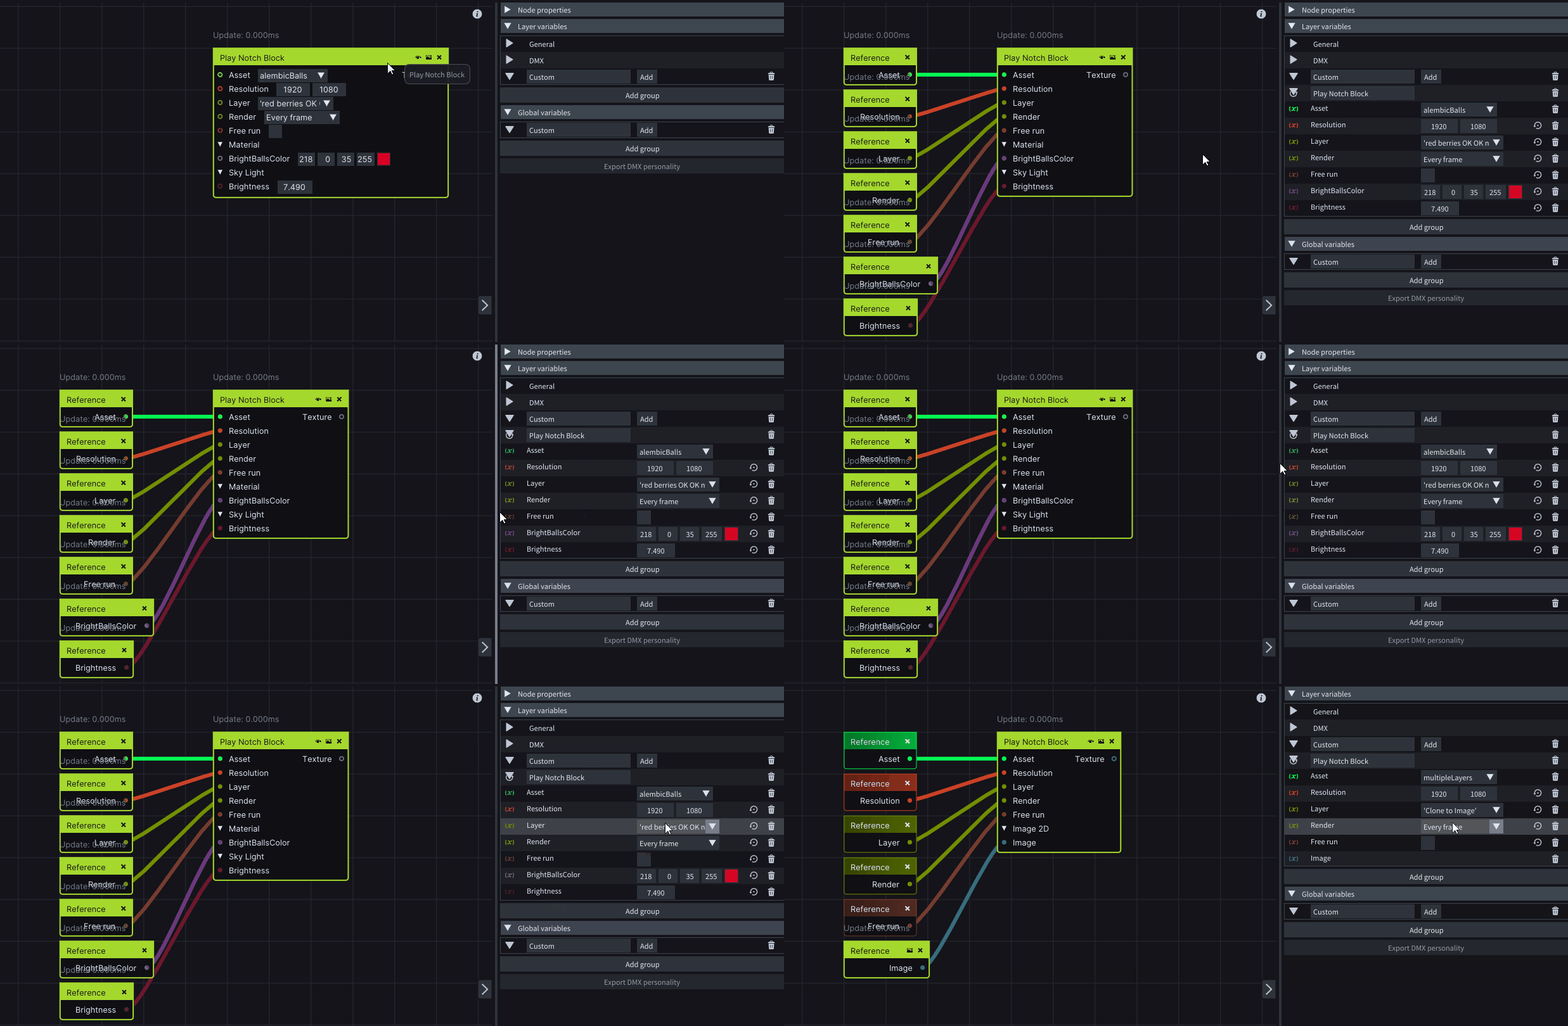
Right-clicking on a Play Notch Block node allows you to Create a Dynamic Variable Group. This automatically generates a variable for each of the node’s inputs and places a Getter node connected to the corresponding input pin.
The advantage of using Dynamic Variable Groups is that they ensure the variables linked to the input pins update automatically whenever the node’s input values change.
-
An updated Notch layer template that utilizes Dynamic Variable Groups. Whenever you change the Notch asset, the variable group updates automatically to match the parameters of the selected asset.
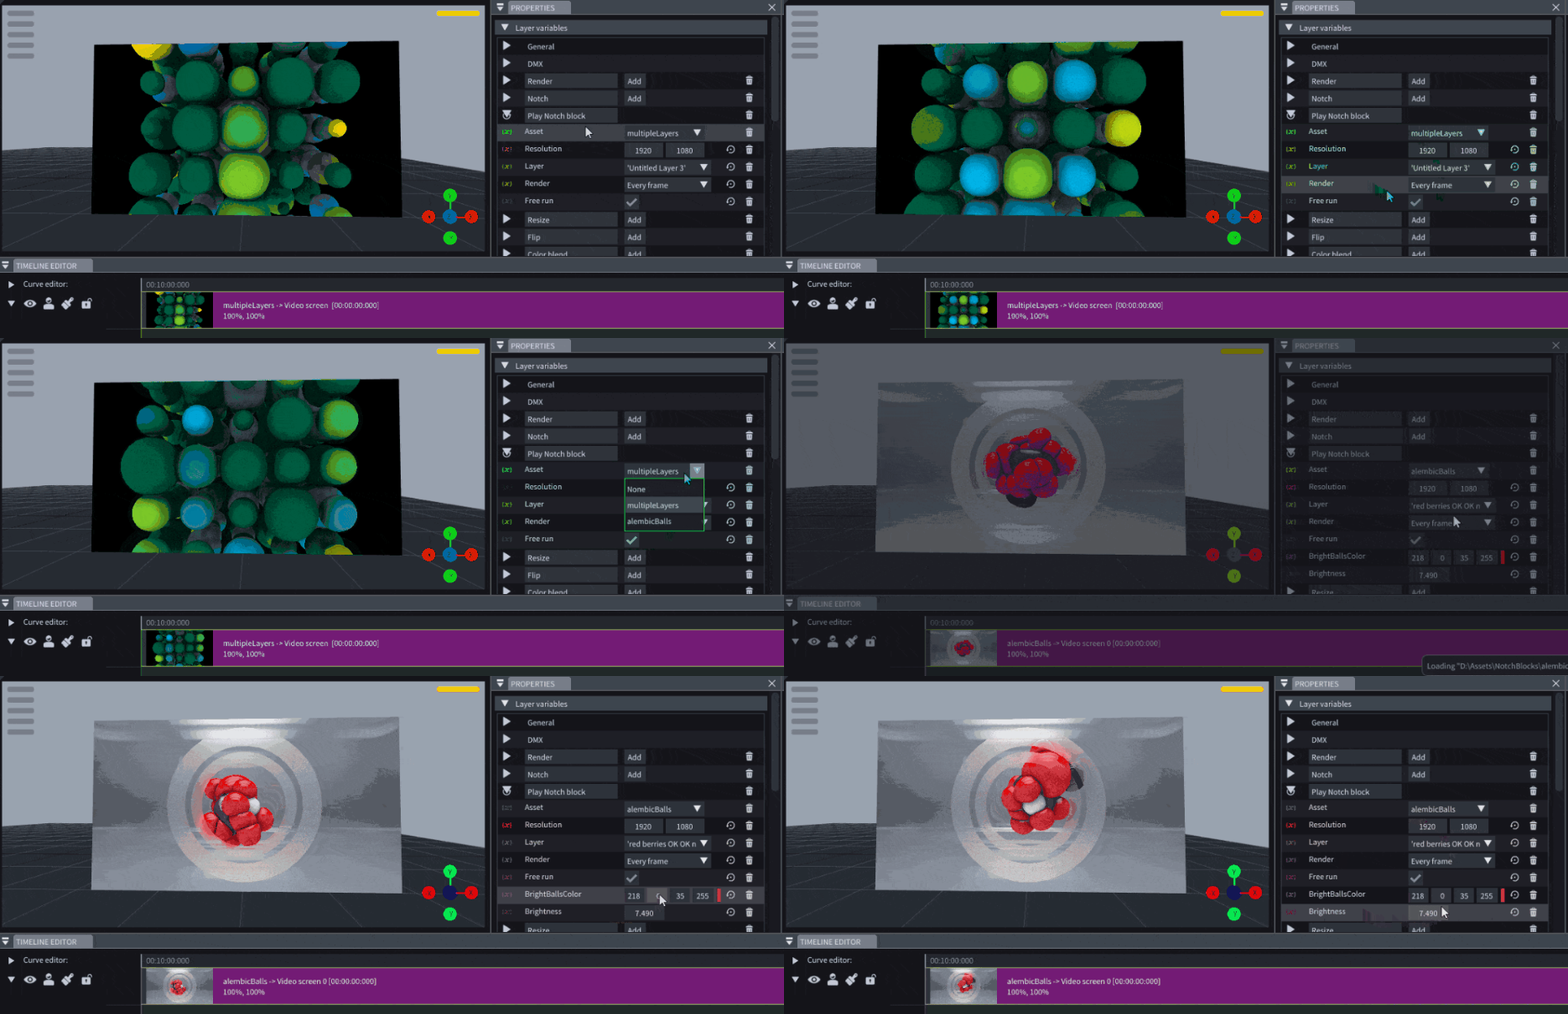
-
Variables for Notch’s exposed parameters, created using the Create a Dynamic Variable Group option, should automatically inherit the same Min and Max values as defined in Notch Builder.
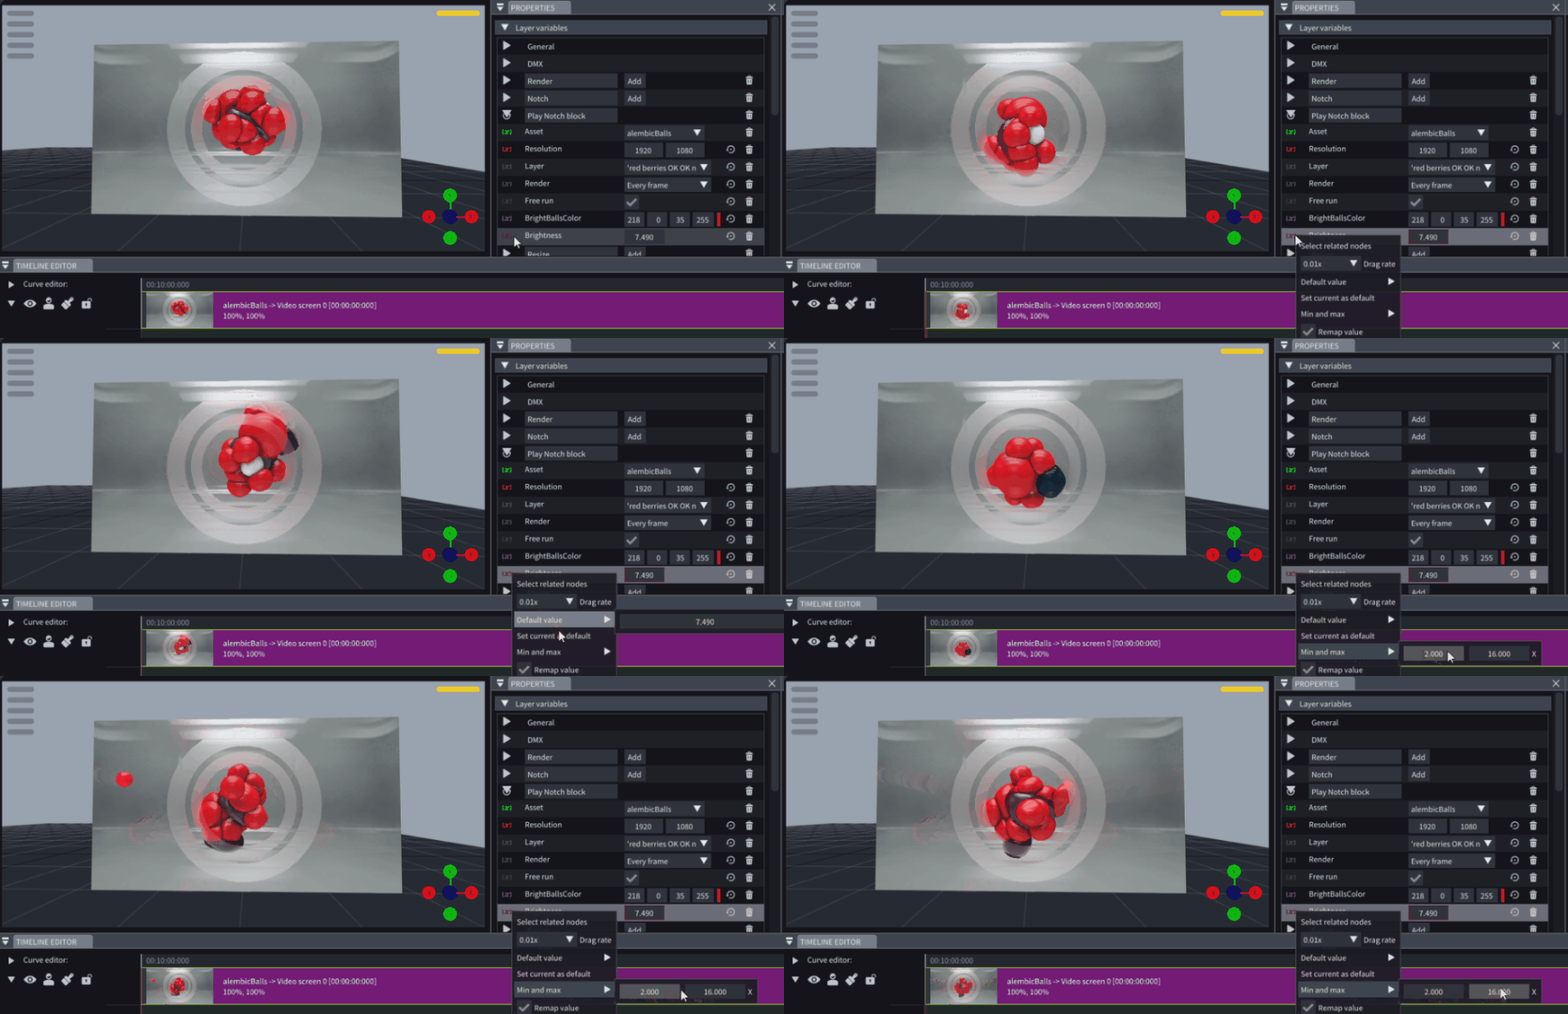
Projection Mapping
Projection Study
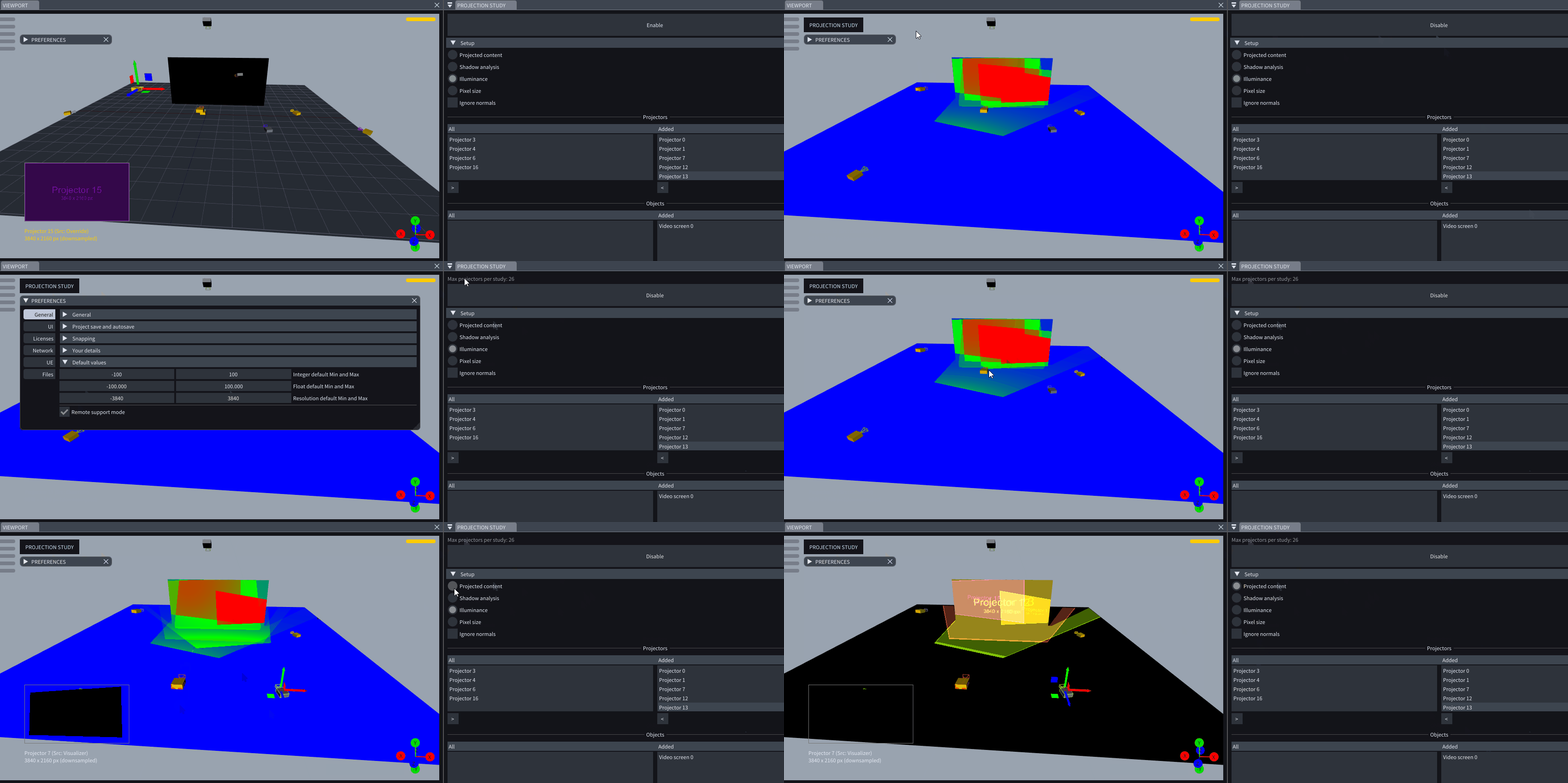
- More projectors can now be added to the Projection study. To learn the maximum capabilities of your hardware, head to the Preferences window and select the checkbox Remote support mode.
3DCal
-
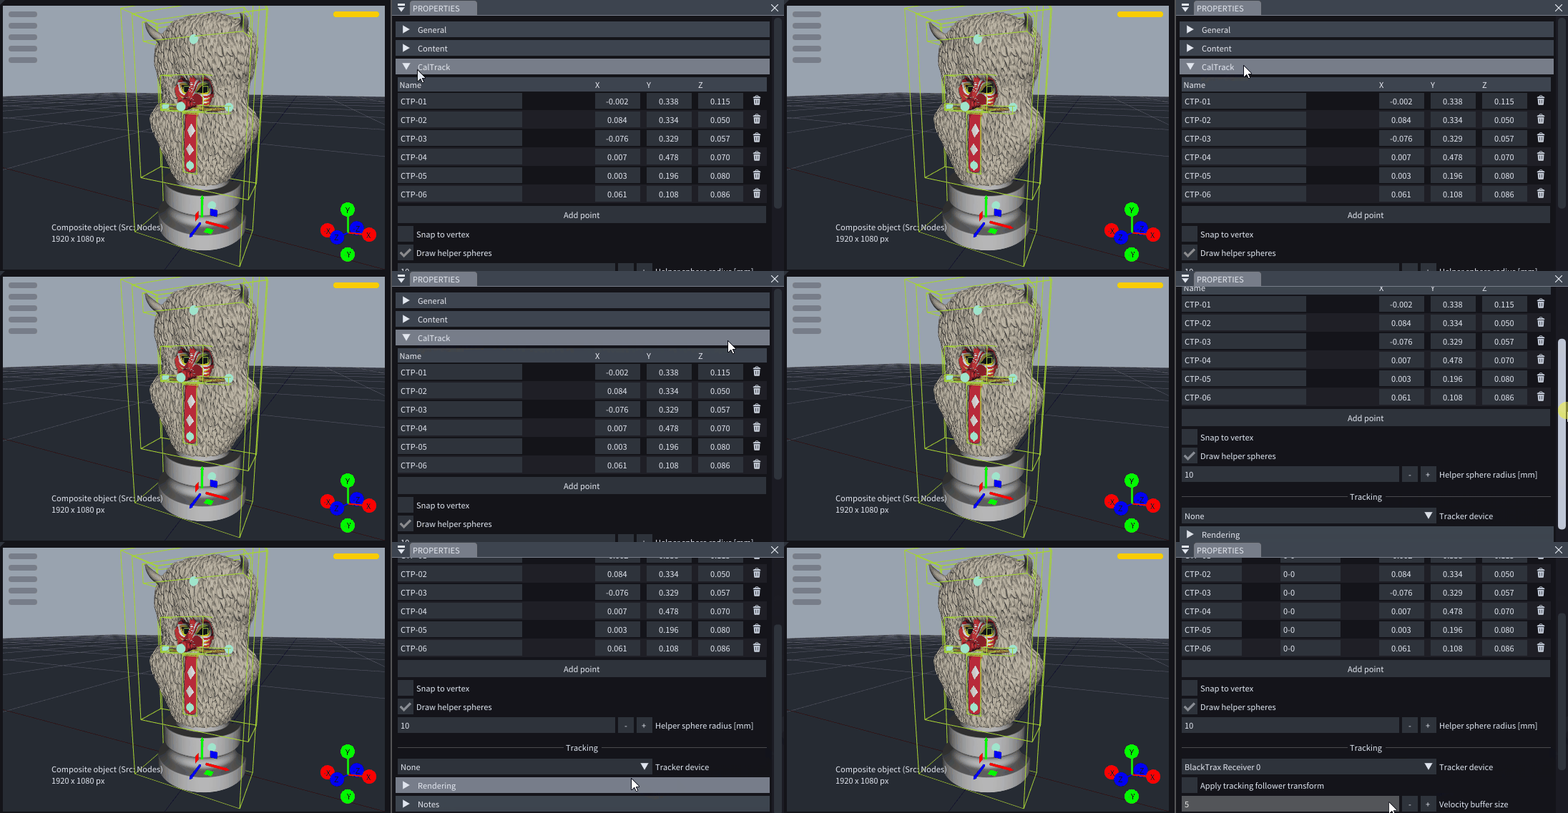
You can now pick calibration points for a 3D model directly in the Viewport and use them as Virtual points for 3DCal calibration.
To add calibration points, click Add point under the CalTrack section in the Properties of the 3D Model.
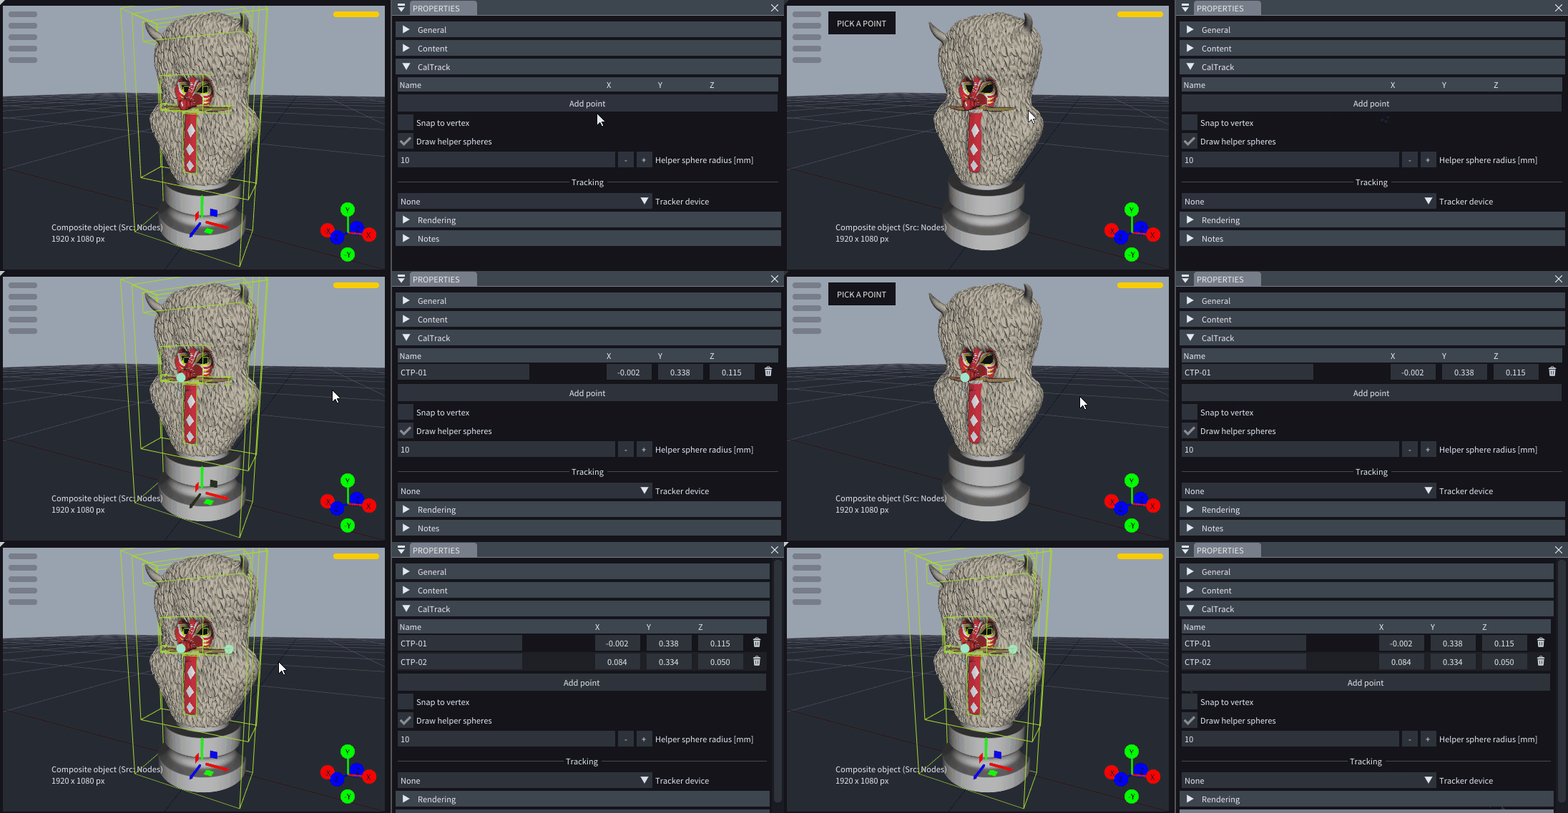
-
Points added in the CalTrack section can also serve as Tracking points, utilizing LightAct’s Tracking Follower feature.
These tracking points can further be used as Virtual points for 3DCal.
-
To use CalTrack points as virtual points for 3DCal, you must click on the Grab all calibration points button in the 3DCal window of the chosen Projector or Iris camera.
If you add virtual points in the 3DCal window directly, you can later pair the Virtual point to a CalTrack point by selecting it in the dropdown.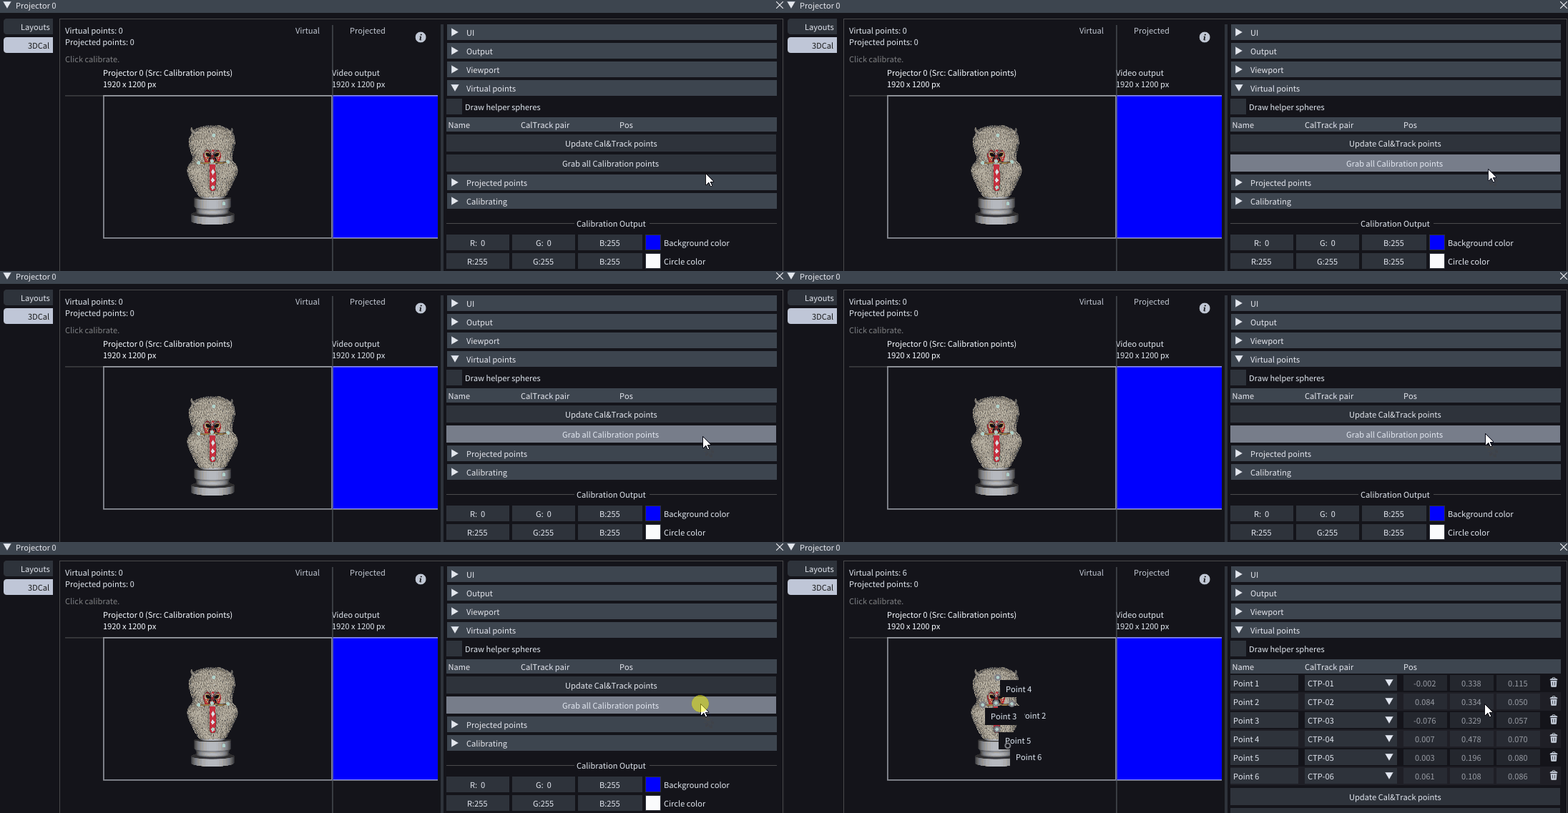
-
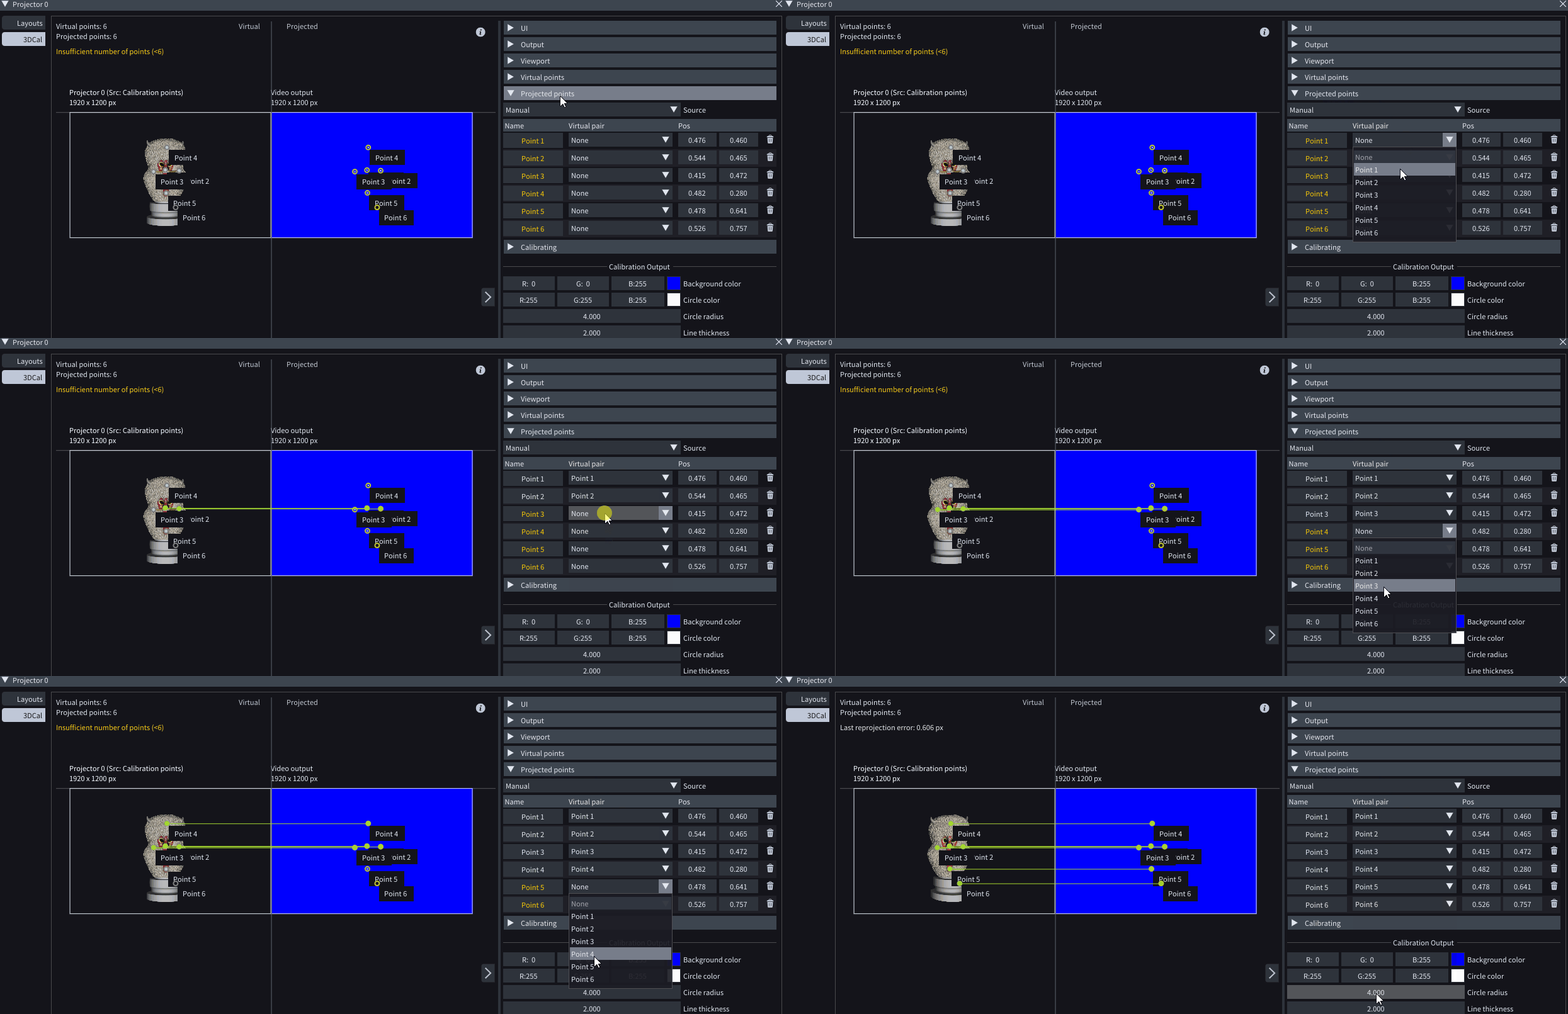
To pair virtual and projected points, you must choose the fitting virtual point for each projected point in the dropdown.
OptiTrack
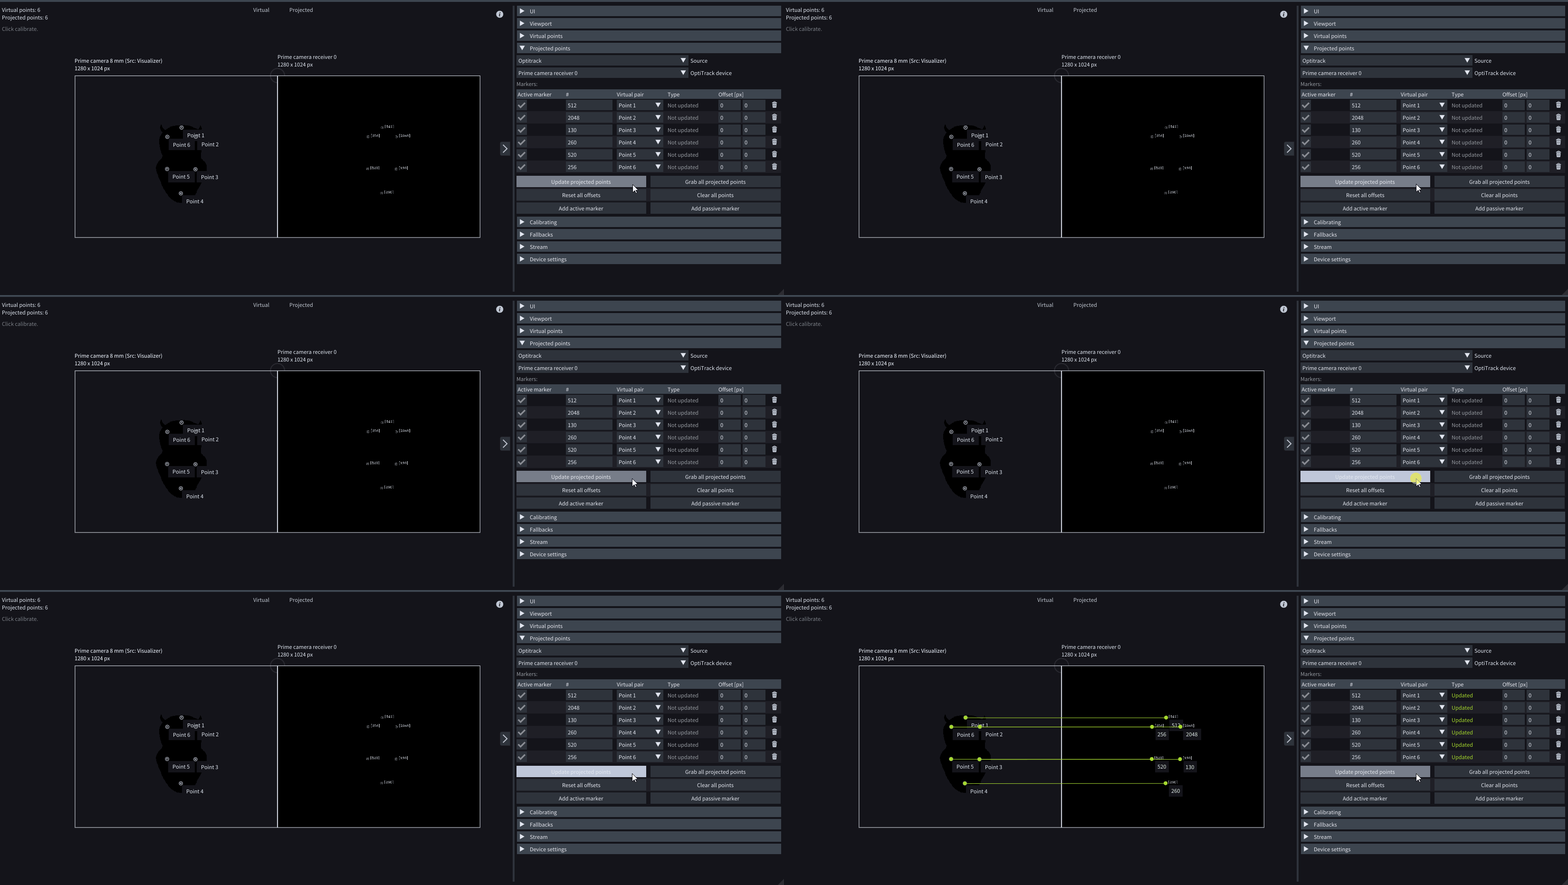
- Better OptiTrack cameras integration for 3DCal.
Iris
-
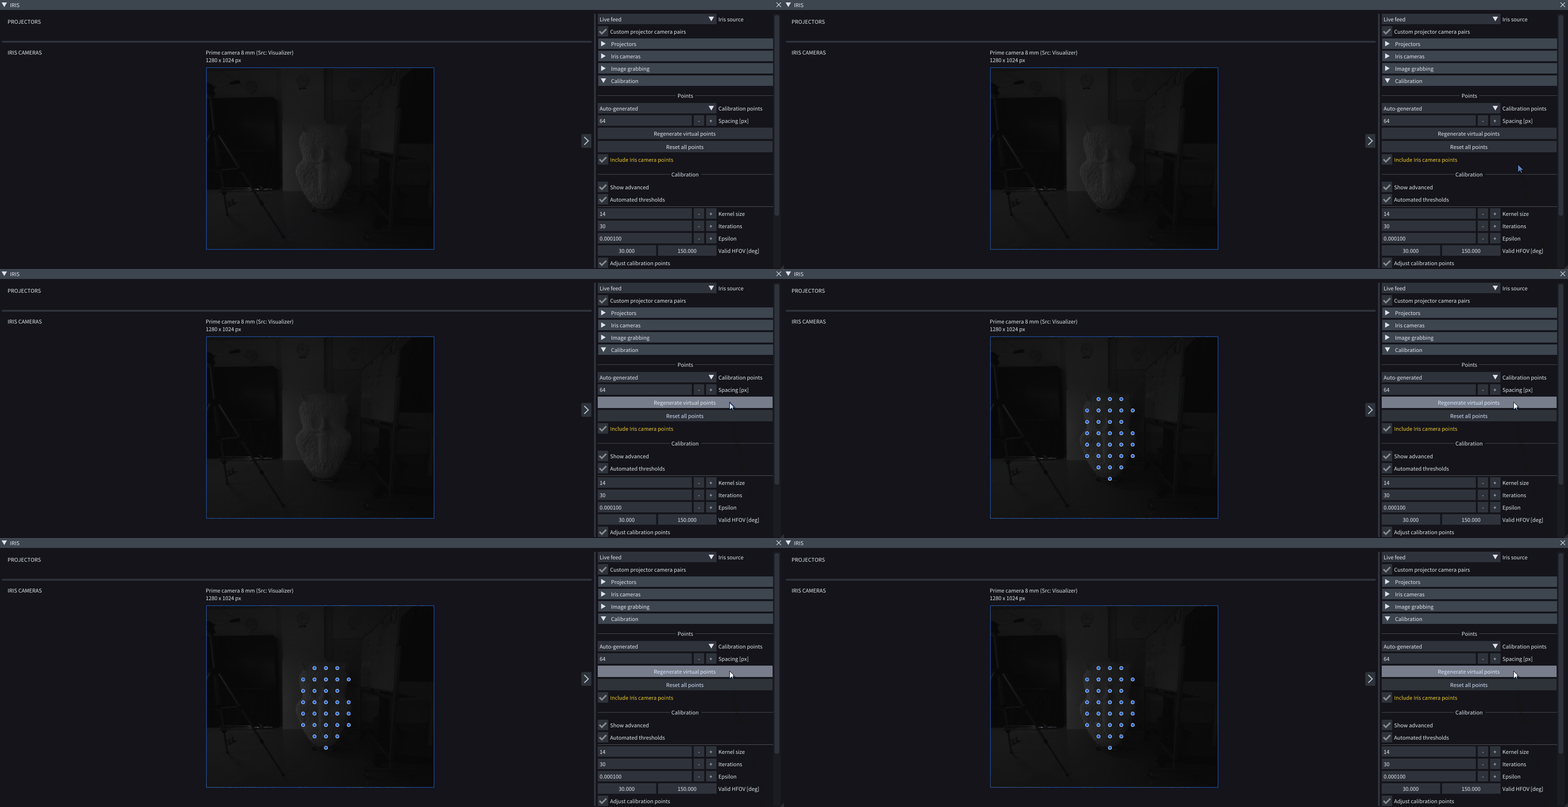
To (re)generate points for Iris calibration, you must click on the Regenerate points button.
-
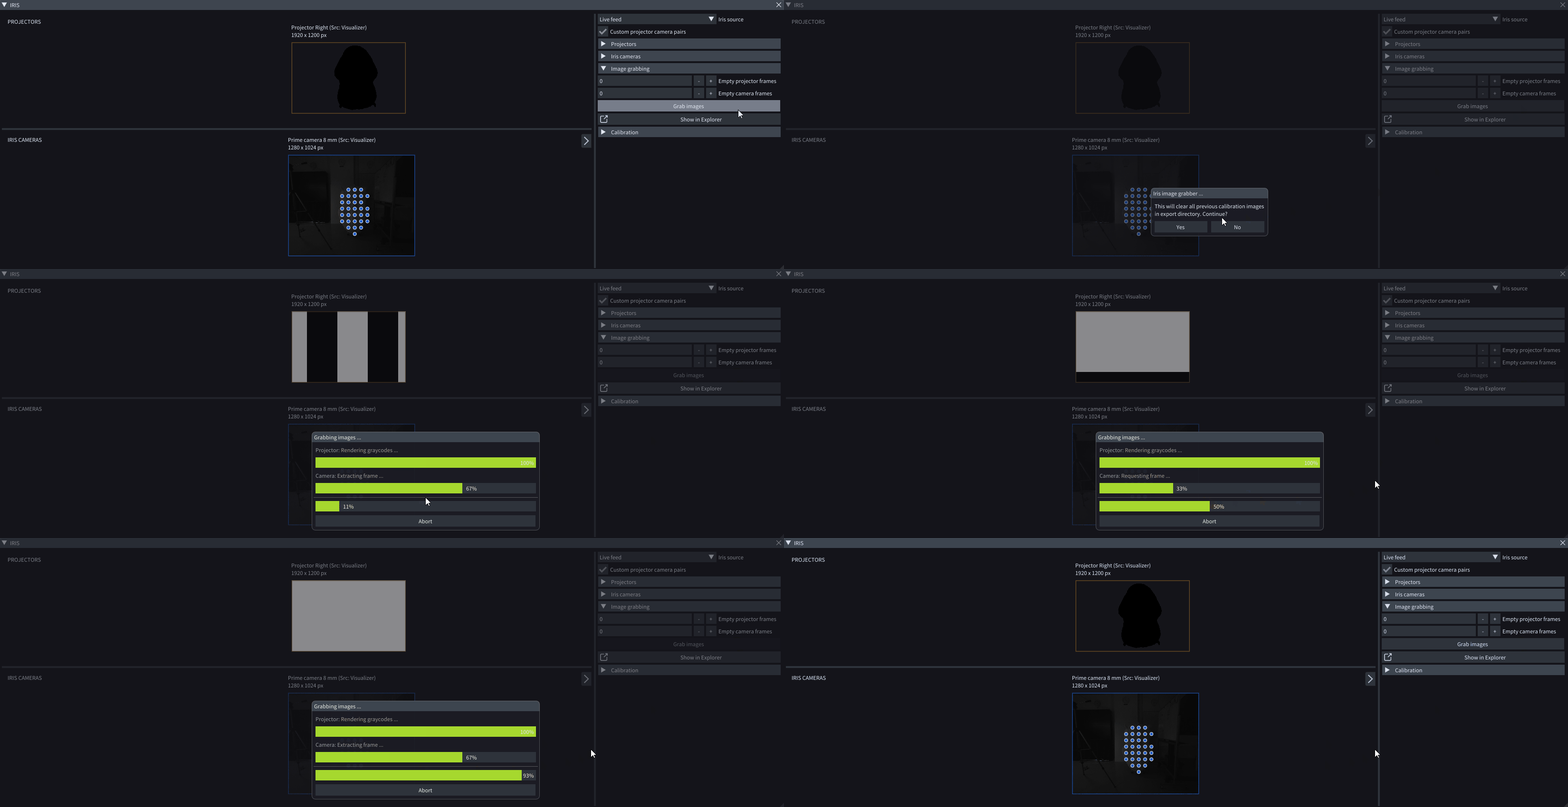
You can now Grab images for each Iris camera once and use them as offline images to calibrate the Projectors as many times as you would like. This feature is helpful when setting up parameters for Iris Calibration.
-
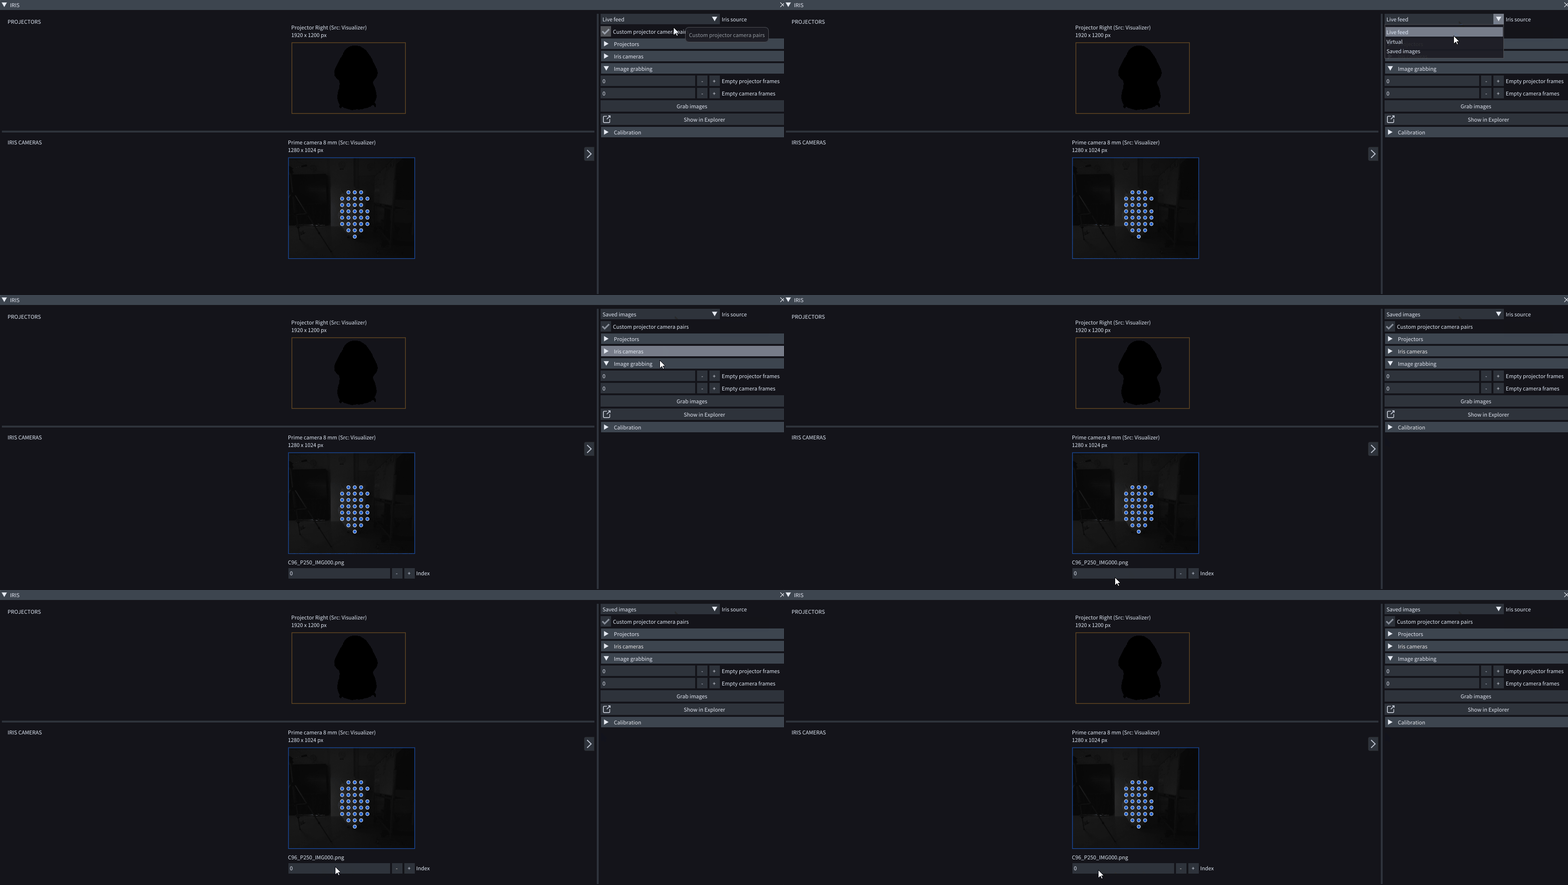
You can visualize and scroll through offline Iris images for each Iris camera by choosing Saved images as Iris source.
-
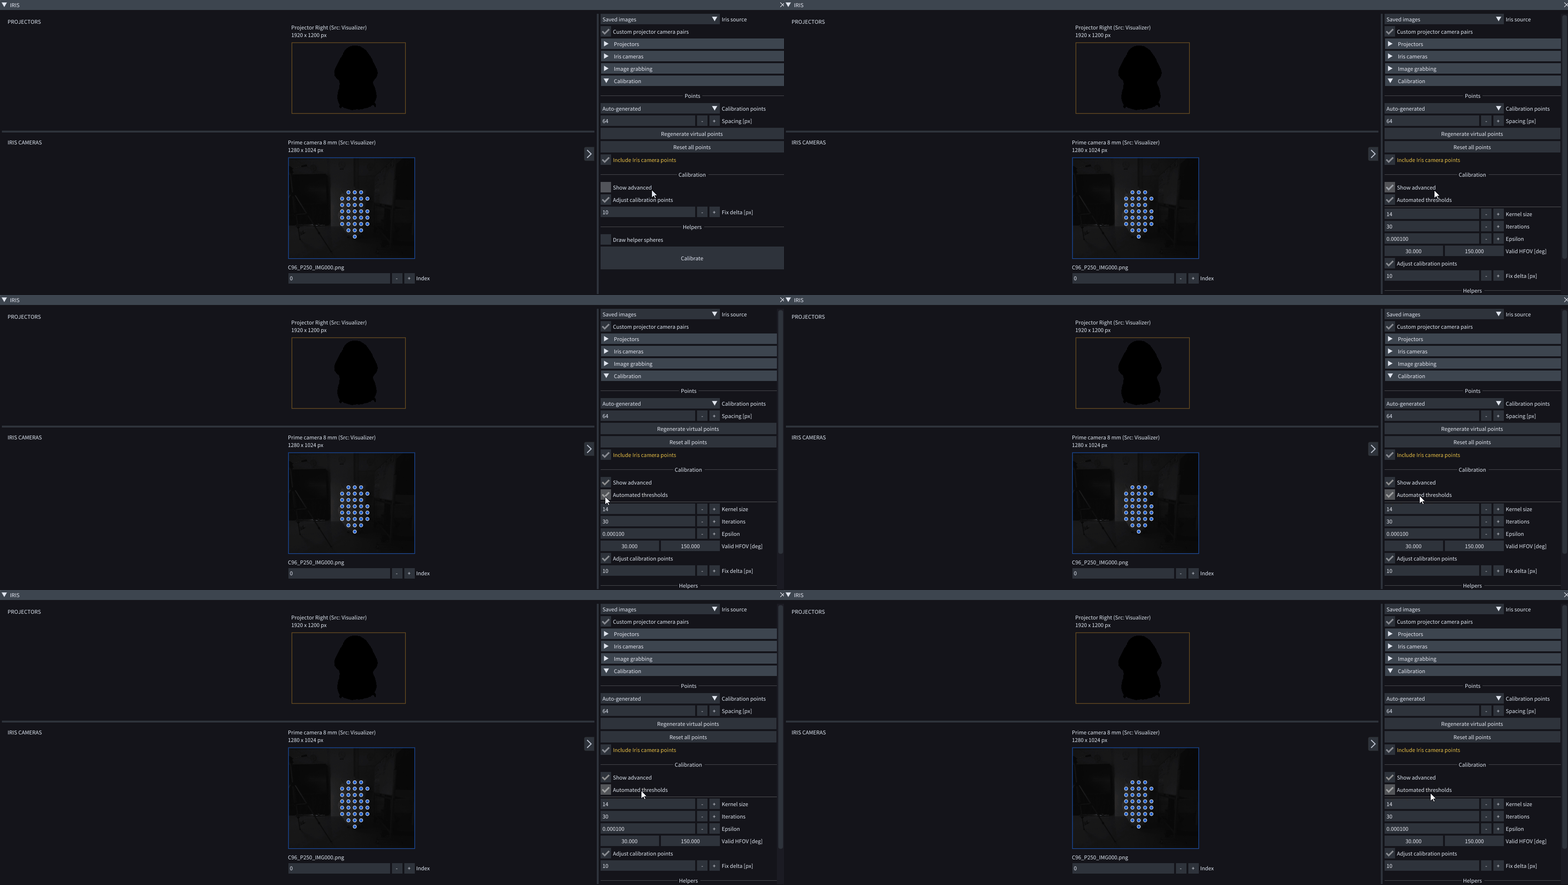
By default, the IRIS window now uses Automated thresholds for calibration.
-
More logs when calibrating Projectors via Iris workflow.
Nodes
-
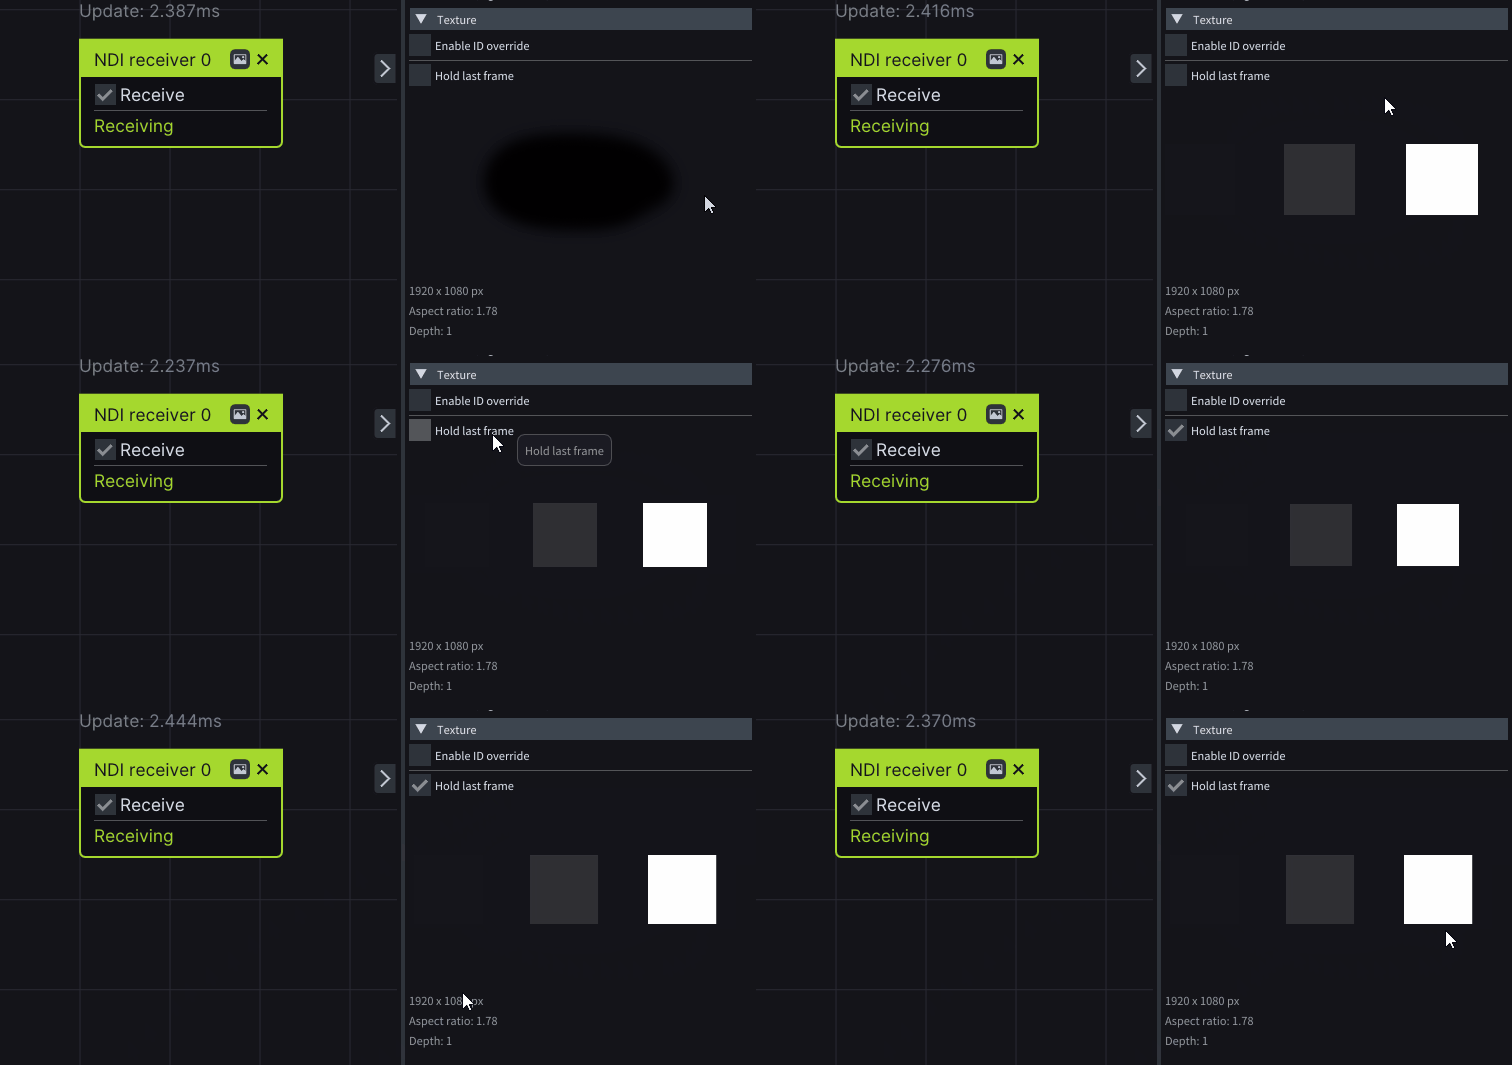
NDI allows you to receive Alpha and to retain the last frame when no new frame is received through the NDI receiver by selecting Hide last frame checkbox in the Devices window.
-
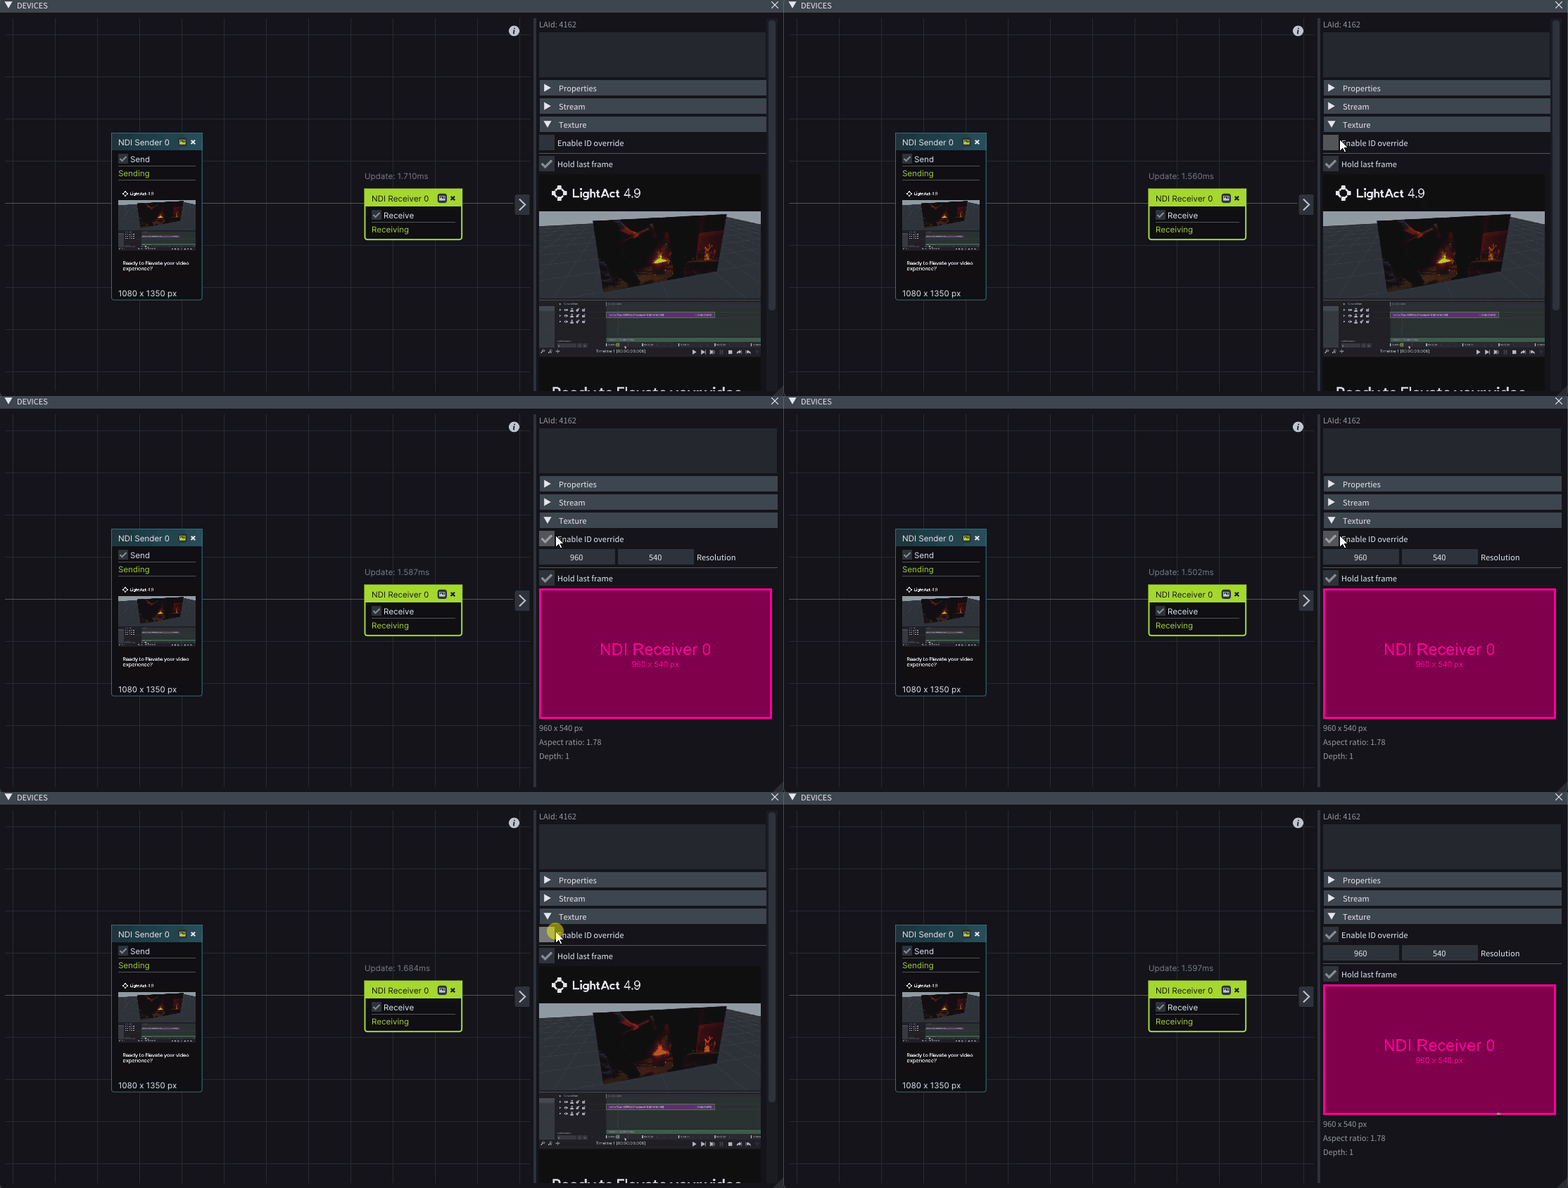
Identify where your content input device is ultimately mapped by clicking on the Enable ID override checkbox in the Texture collapsible of the Devices window.
-
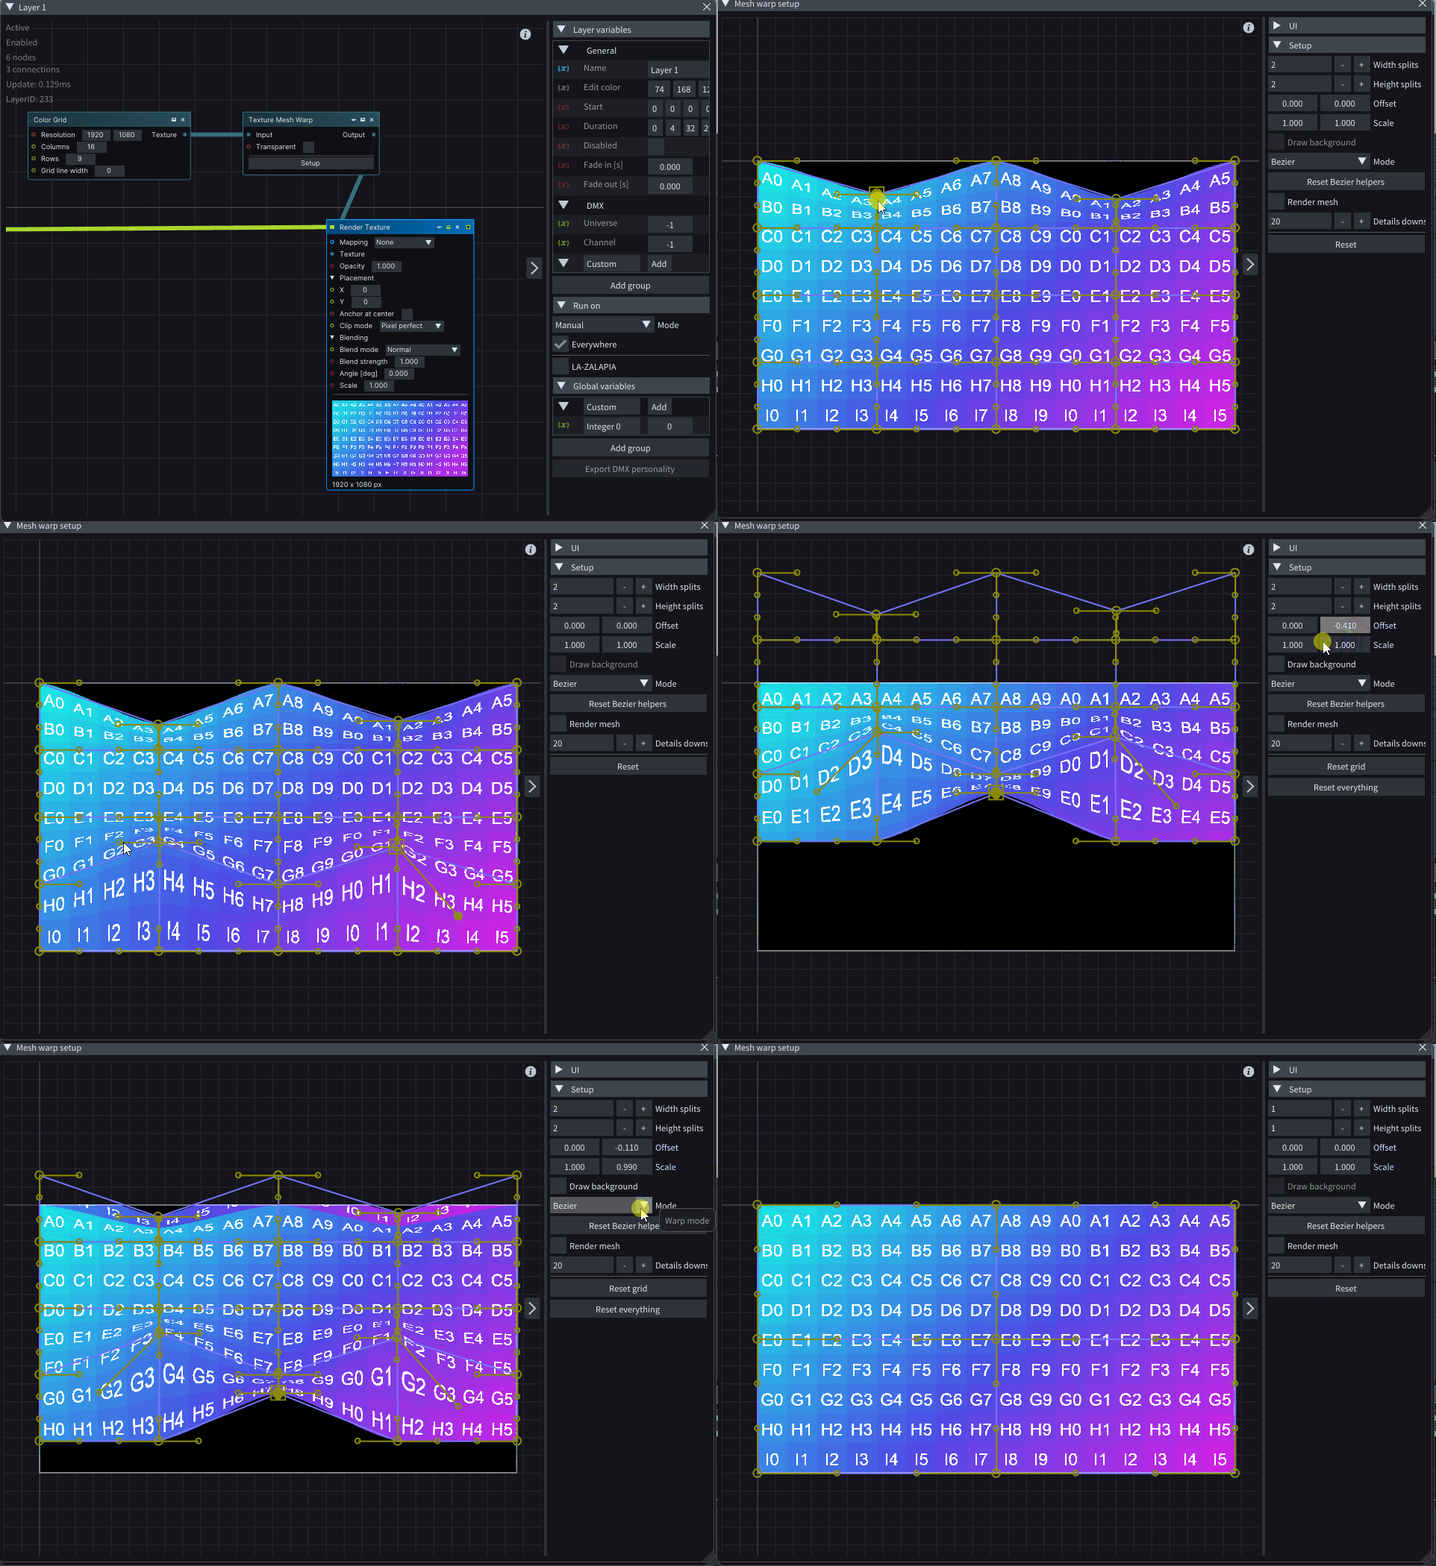
Improved warp and blend tools now support three warp modes: Linear, Catmull-Rom, and Bezier. In the Texture Mesh Warp node’s setup layout, select your preferred warp mode and adjust it further using available controls.
When Bezier is selected, additional Bezier helpers appear, allowing you to fine-tune the curvature of the warp between two points.
-
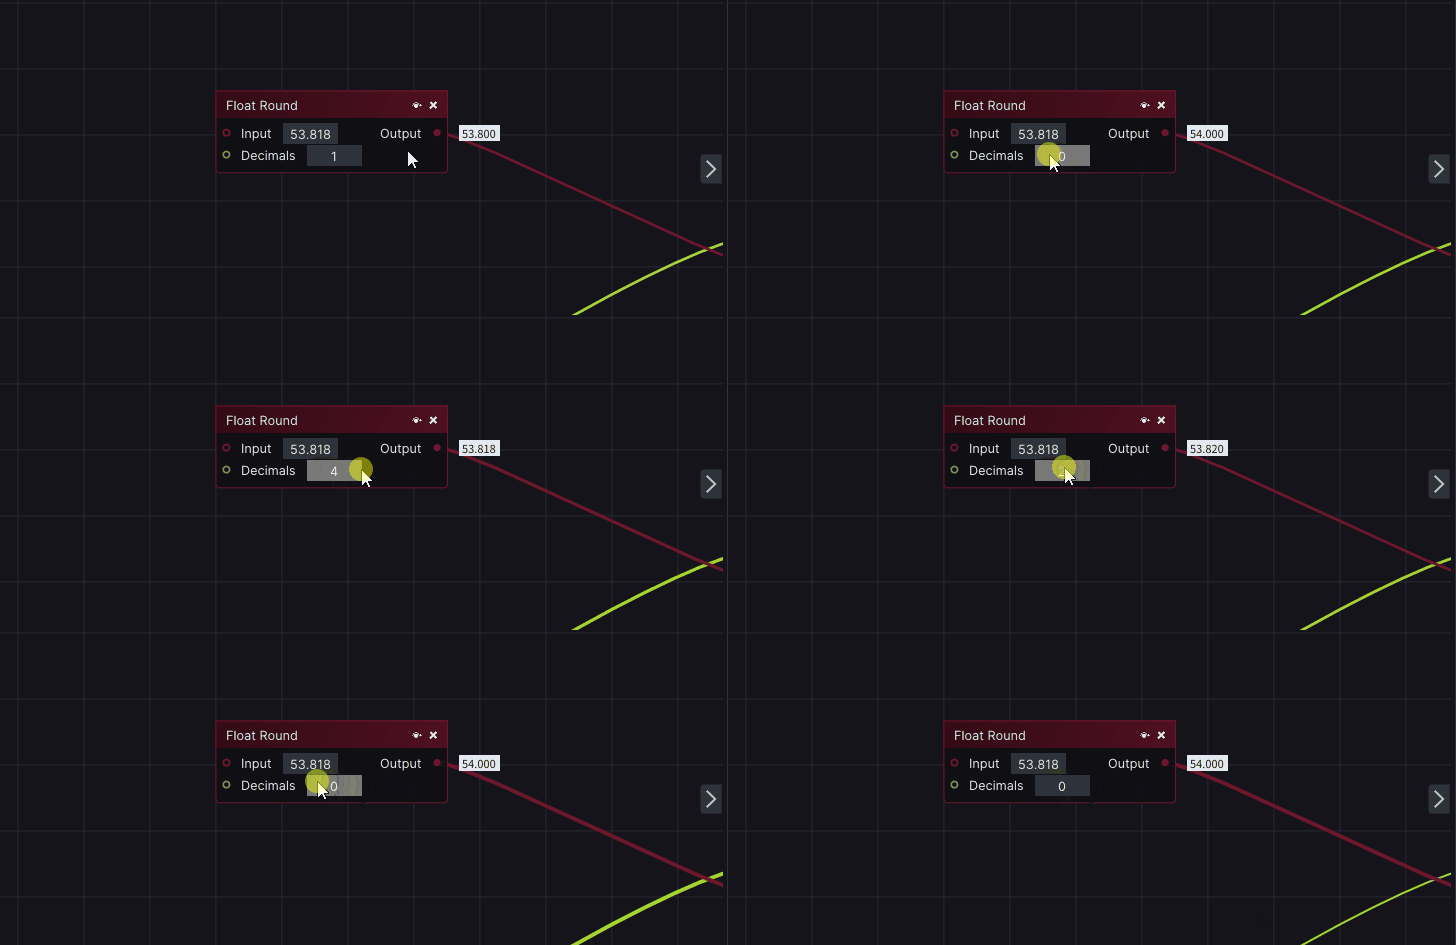
New Float Round node rounds input float values to the desired number of decimal places.
-
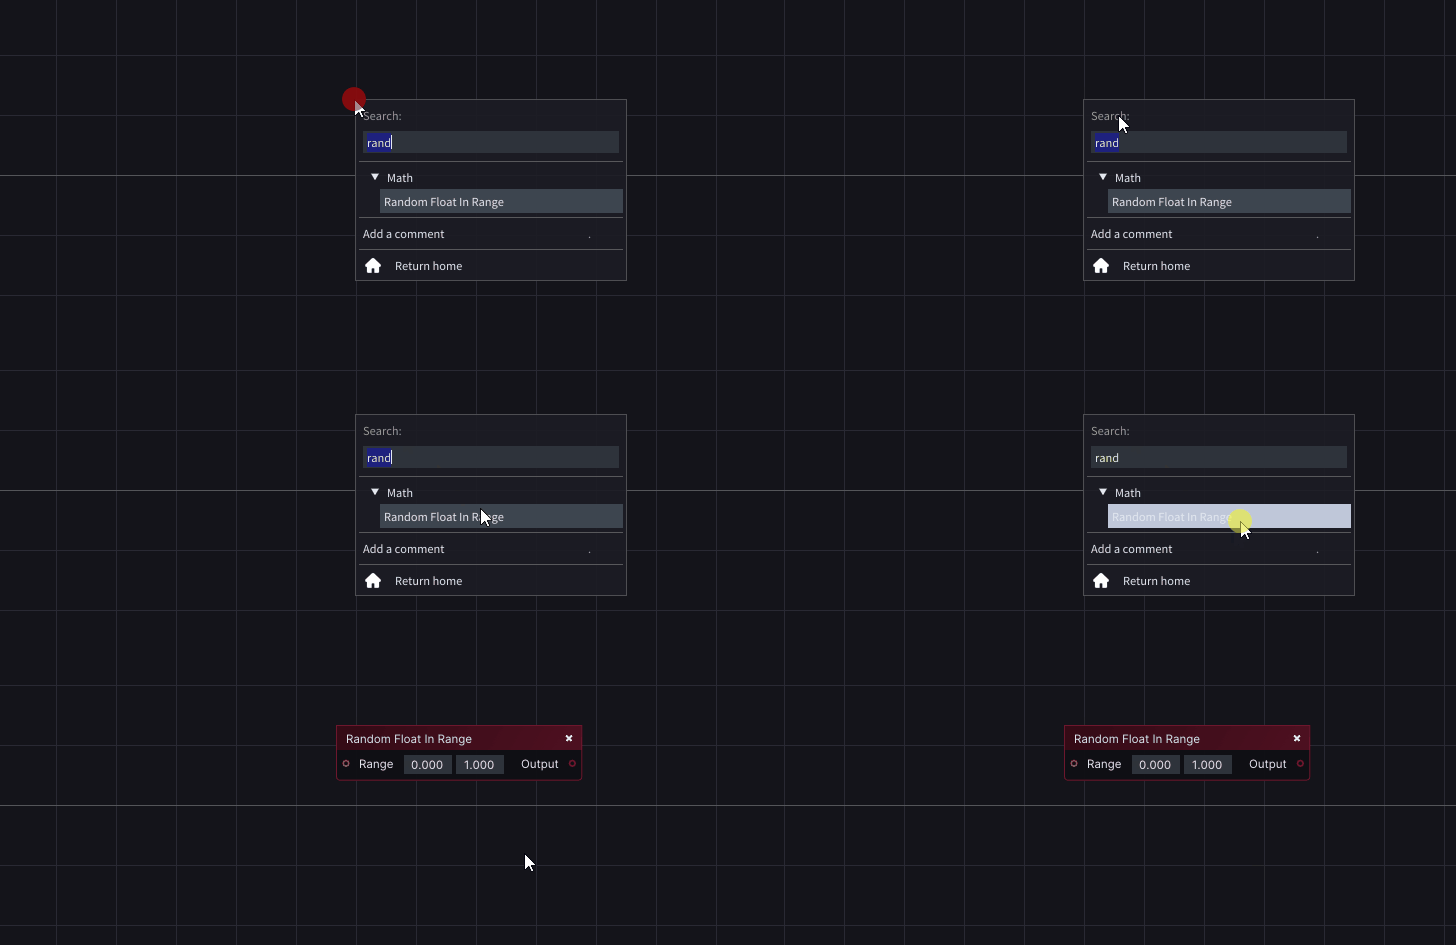
Rand node is now called Random Float in Range.
-
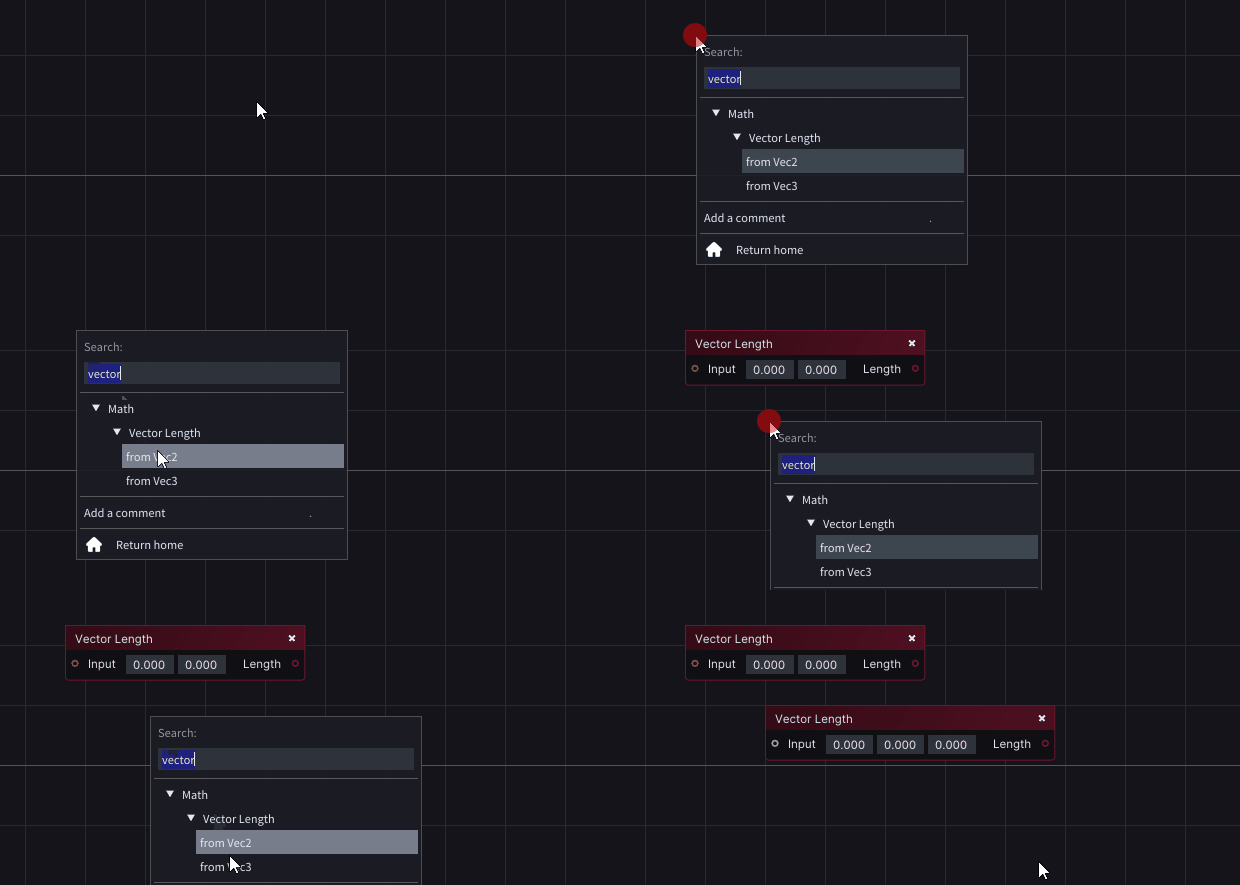
New Vector Length nodes.
-
GetData nodes from both Mapping resolution and Mapping name have been merged into a single GetData node that returns data for Mapping. Similarly, GetData nodes from Device have been merged into a single GetData node that returns data for Device.

-
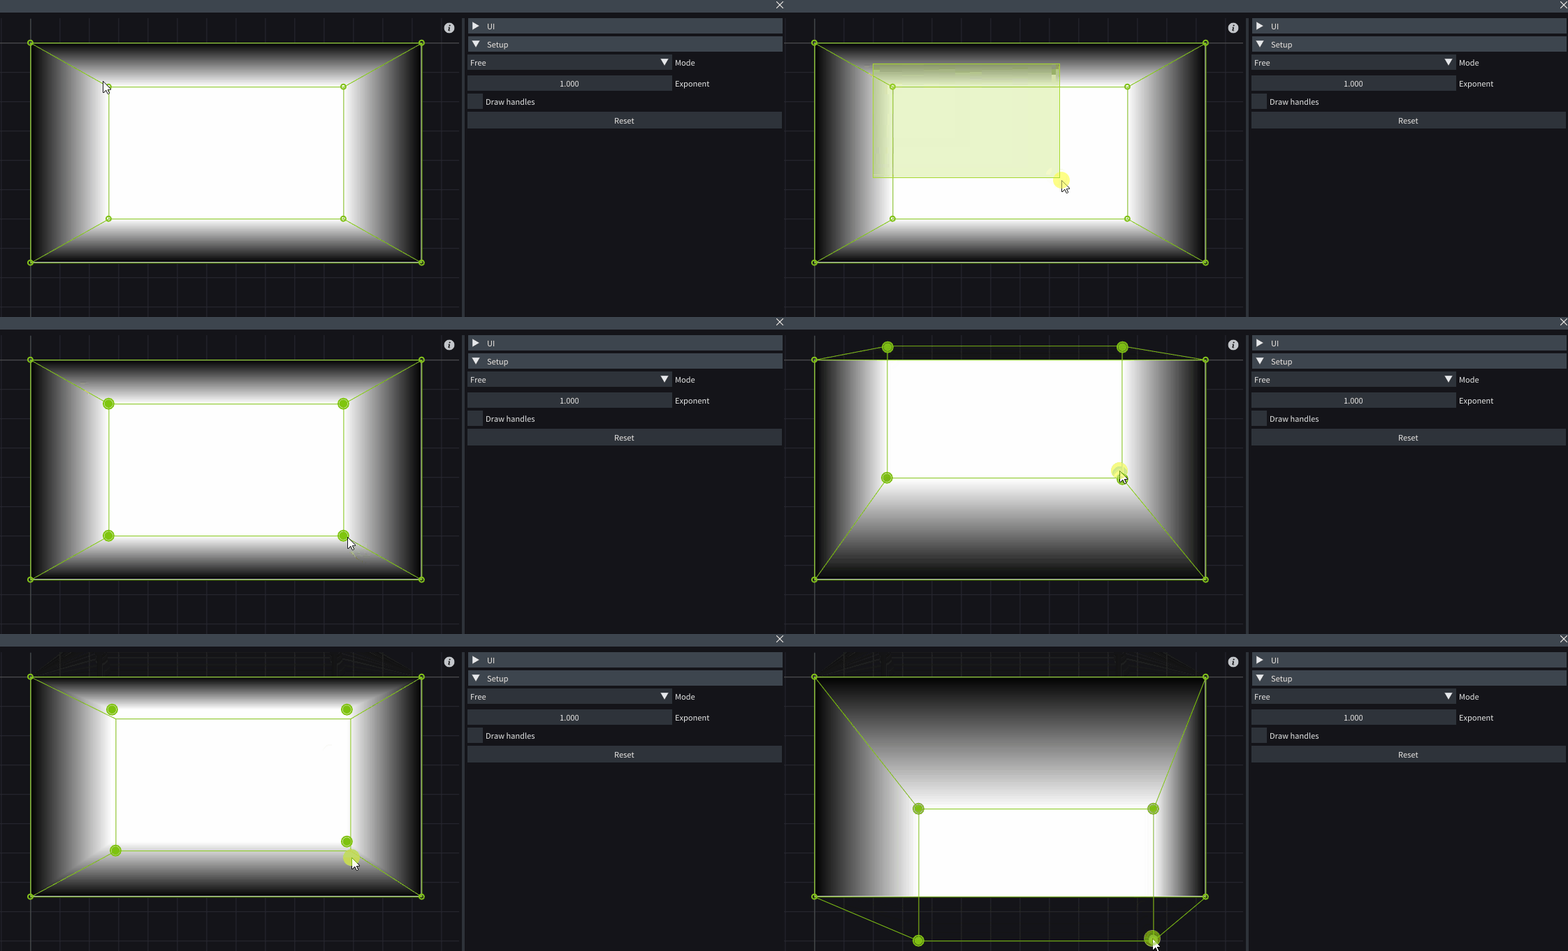
Updated Softedge node for Free Mode.
-
Run Iris calibration node has a new boolean input pin.

-
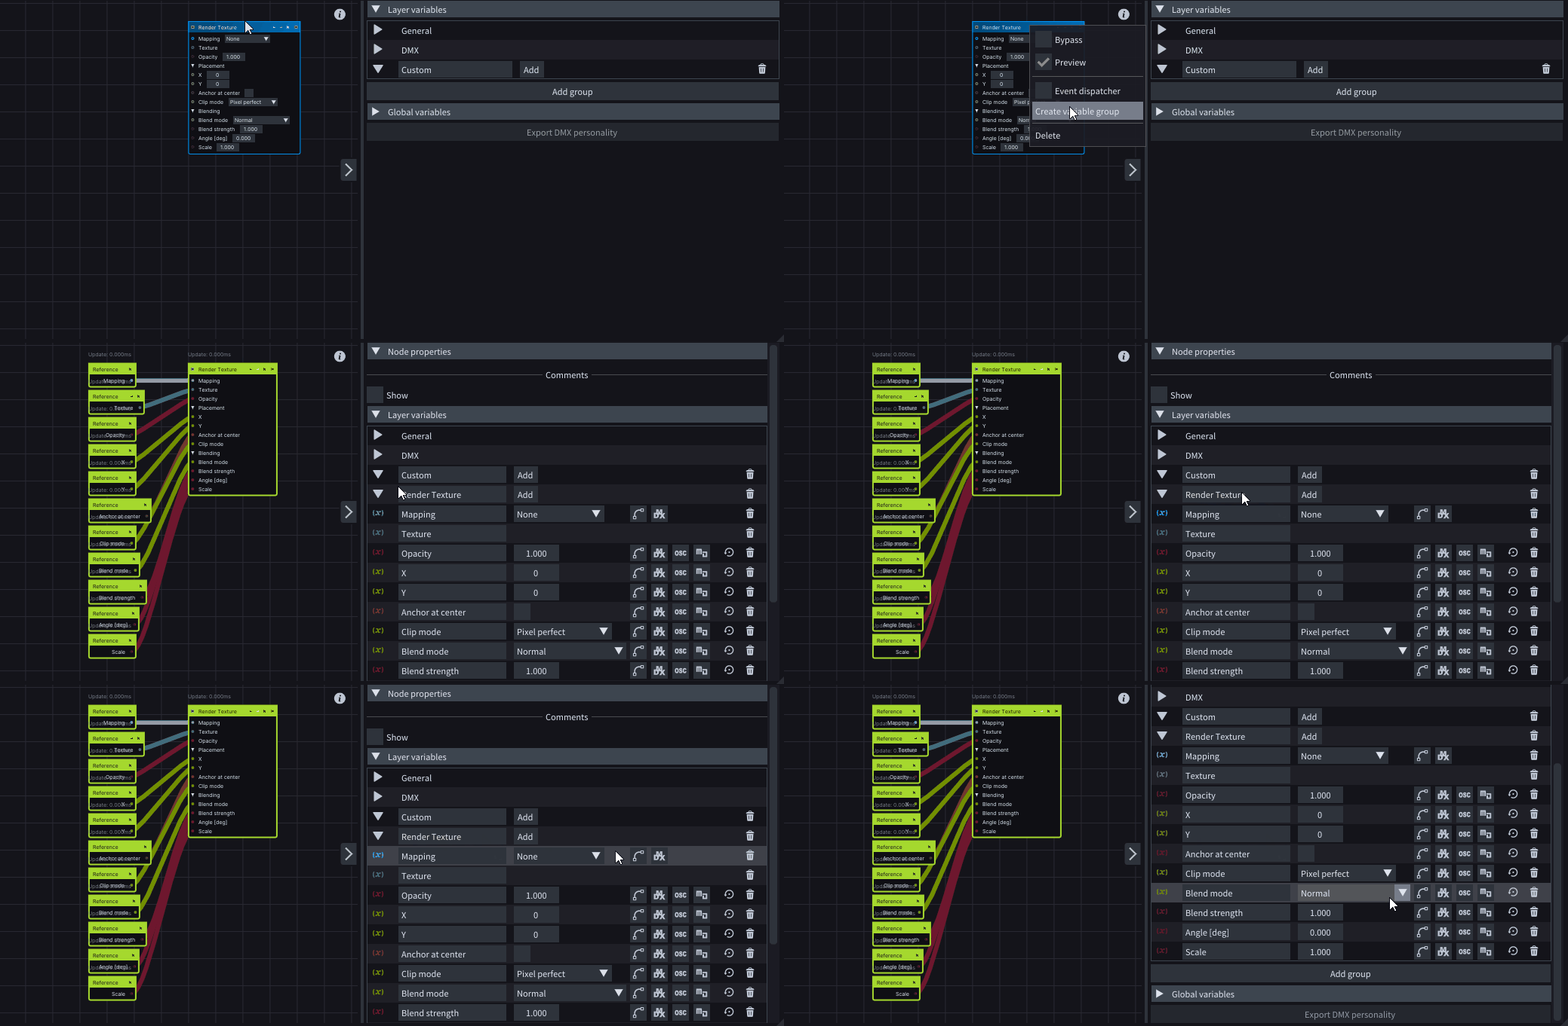
Right-clicking on a node’s header now allows you to select Create a variable group. This creates a new variable group that includes a variable for each of the node’s inputs and adds a Getter node connected to the corresponding input pin.
-
Easier Node search.
Other
-
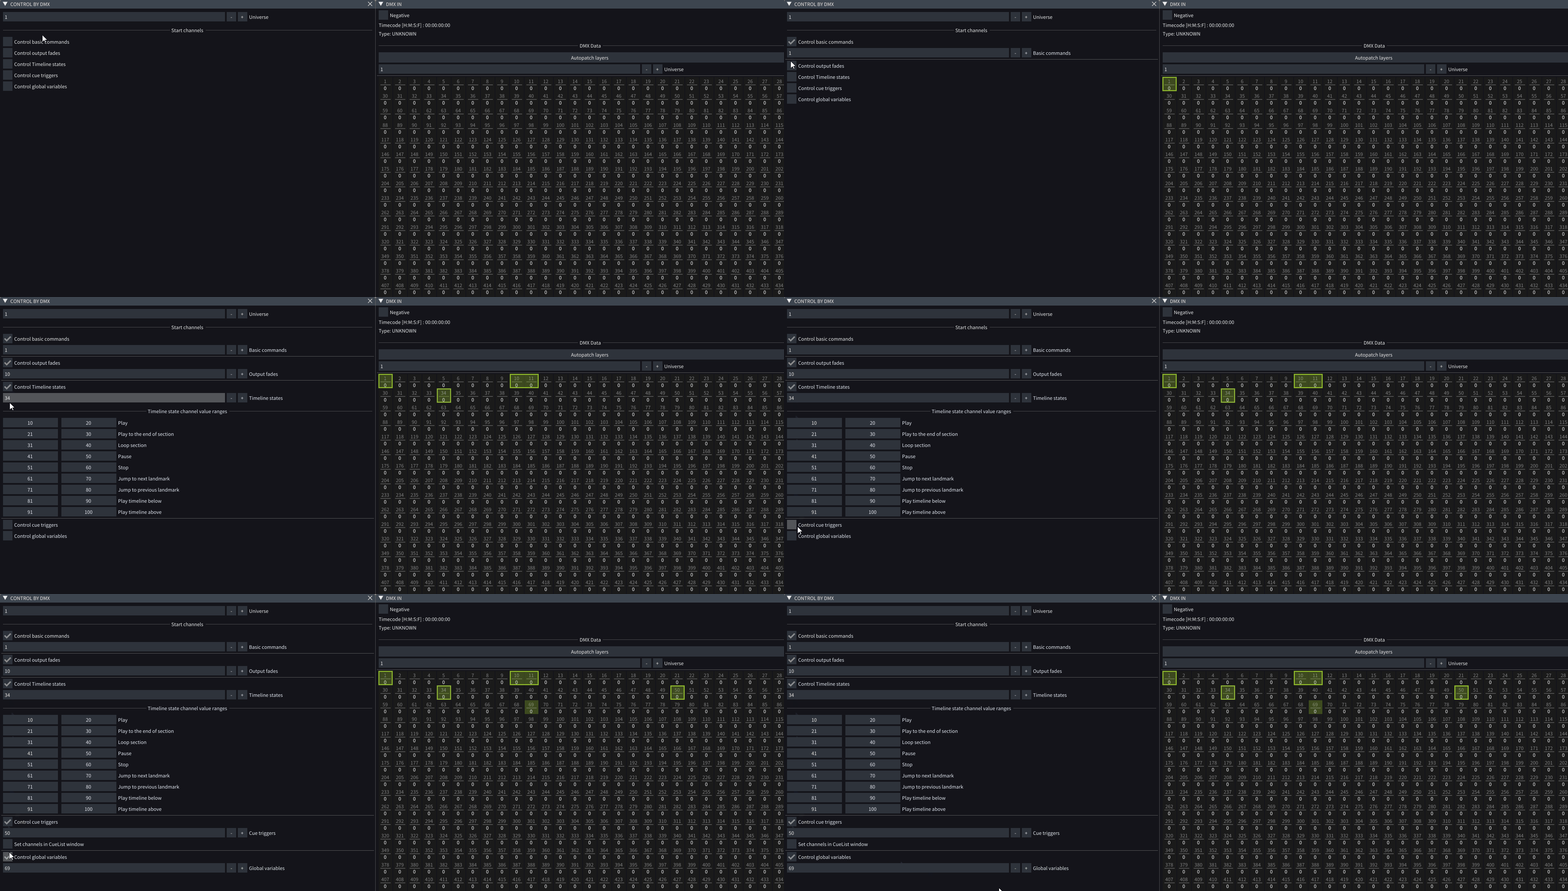
Get the ability to enable and disable properties of DMX separately by opening Control by DMX window. Enable or Disable checkbox next to each DMX control to expose certain properties.
-
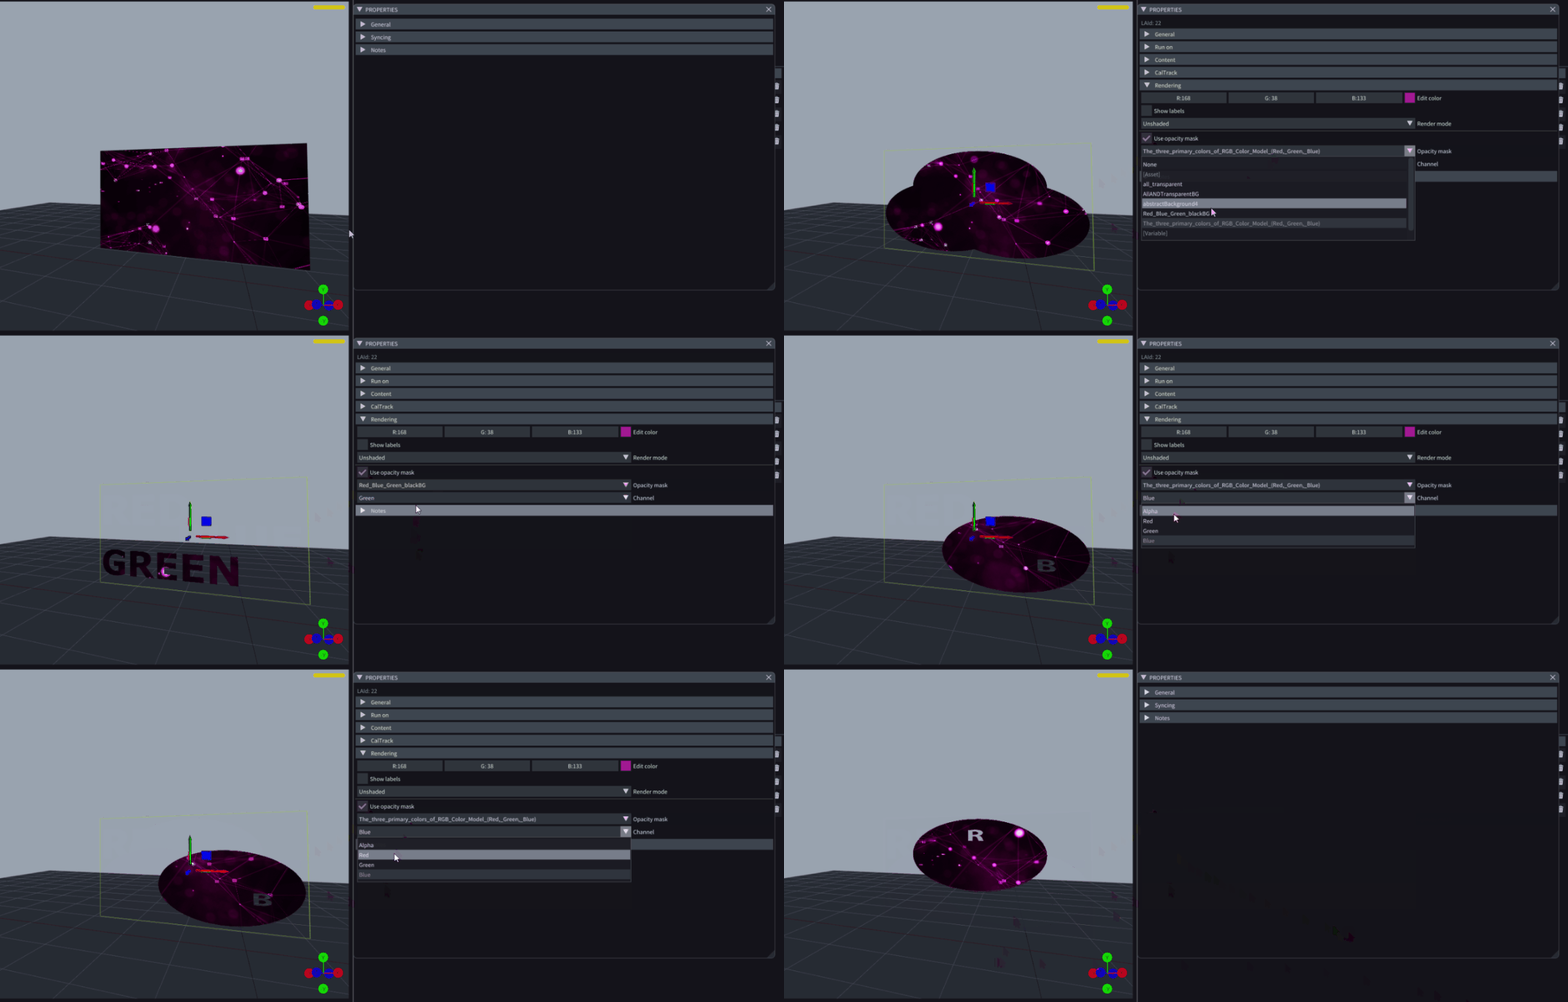
The Opacity mask in the Properties window of the selected Video Screen has been updated. You can now select the desired mask from your Assets and choose the masking channel (Alpha, Red, Green, or Blue).
-
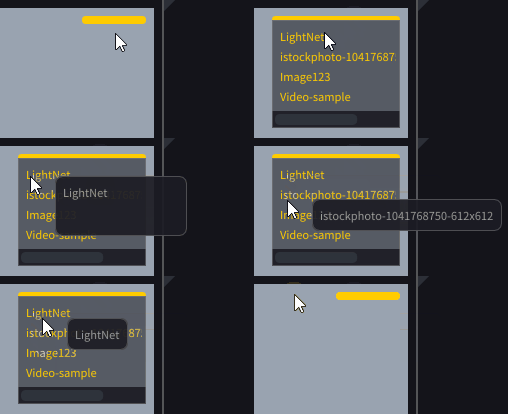
The Viewport warnings window is now clearer, more informative, scrollable and collapsible.
-
Find improved and updated Antialiasing in the Properties window of your selected Projector.
-
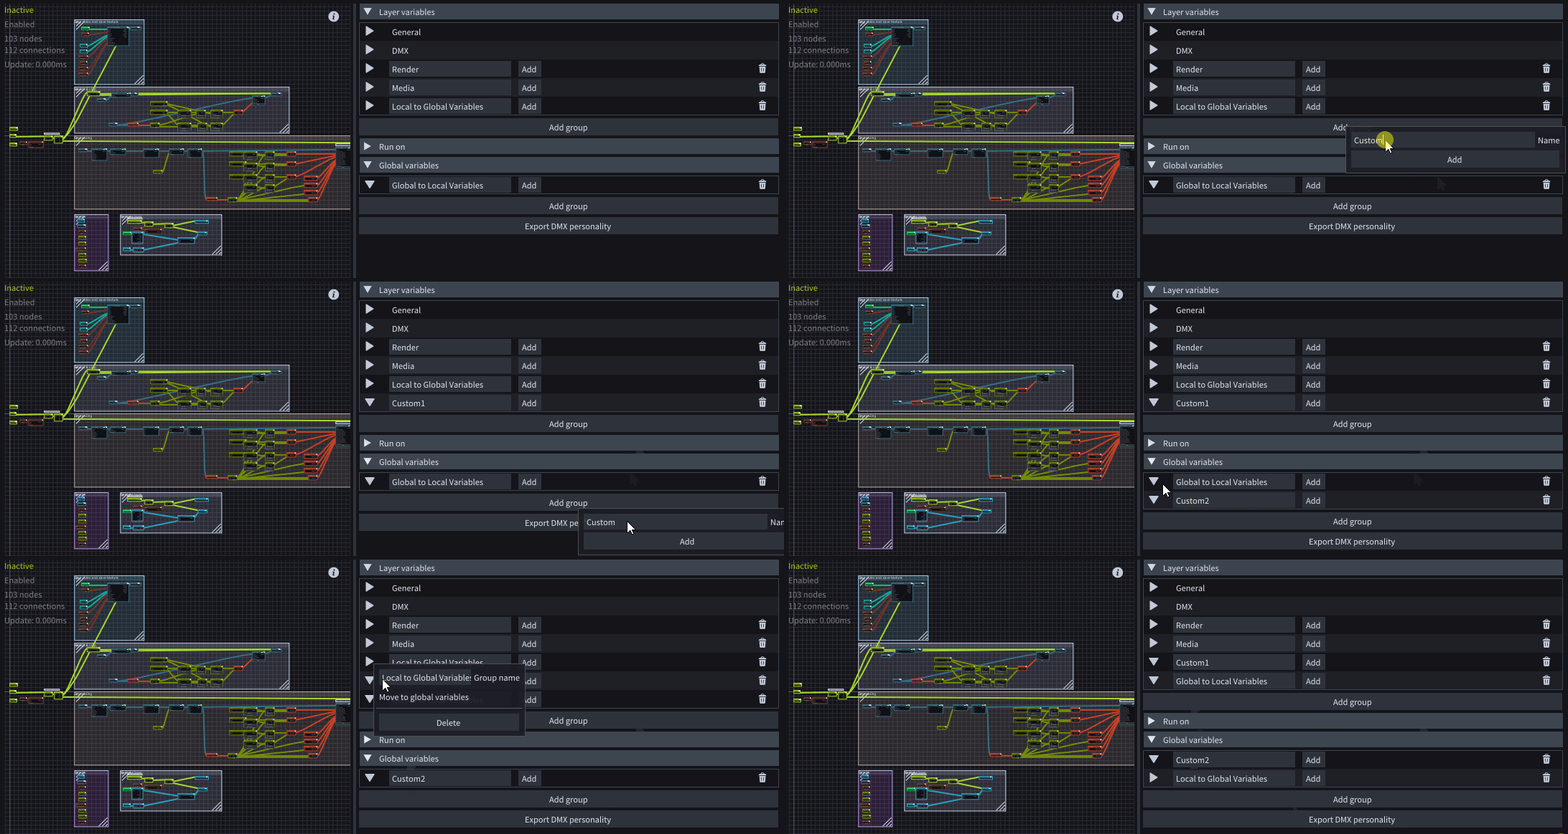
With Move to local variables and Move to global variables option, you can now move previously created variable groups between Local and Global variable locations.
-
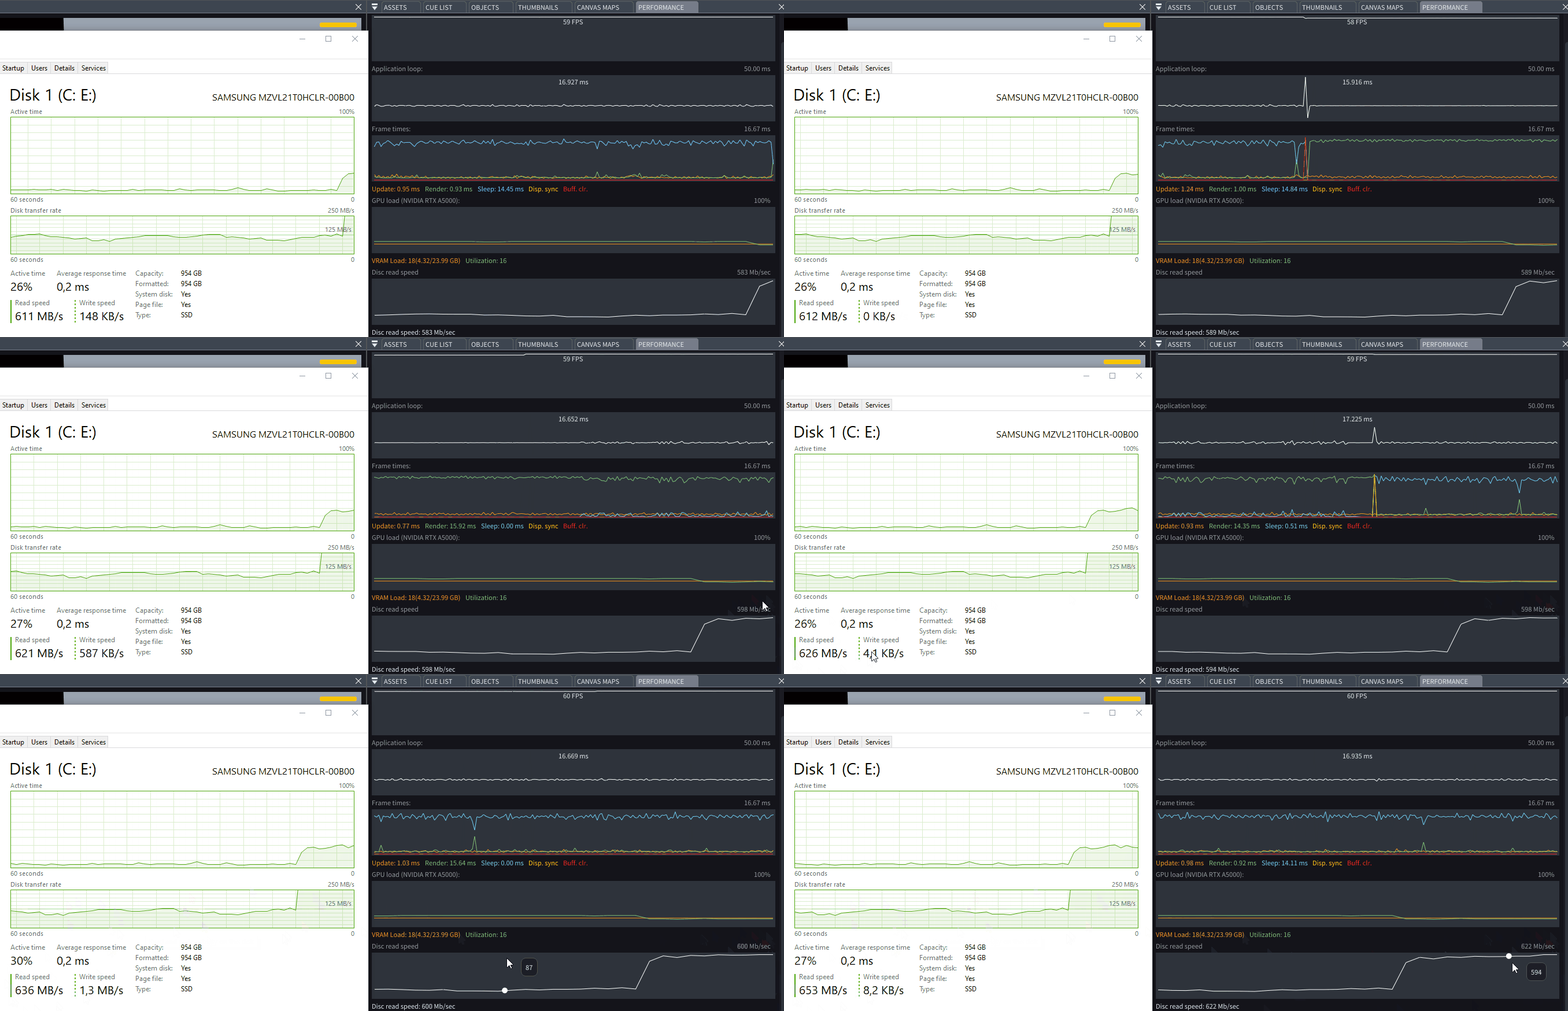
Track your Disk read speed in the Performance window without navigating from LightAct.
-
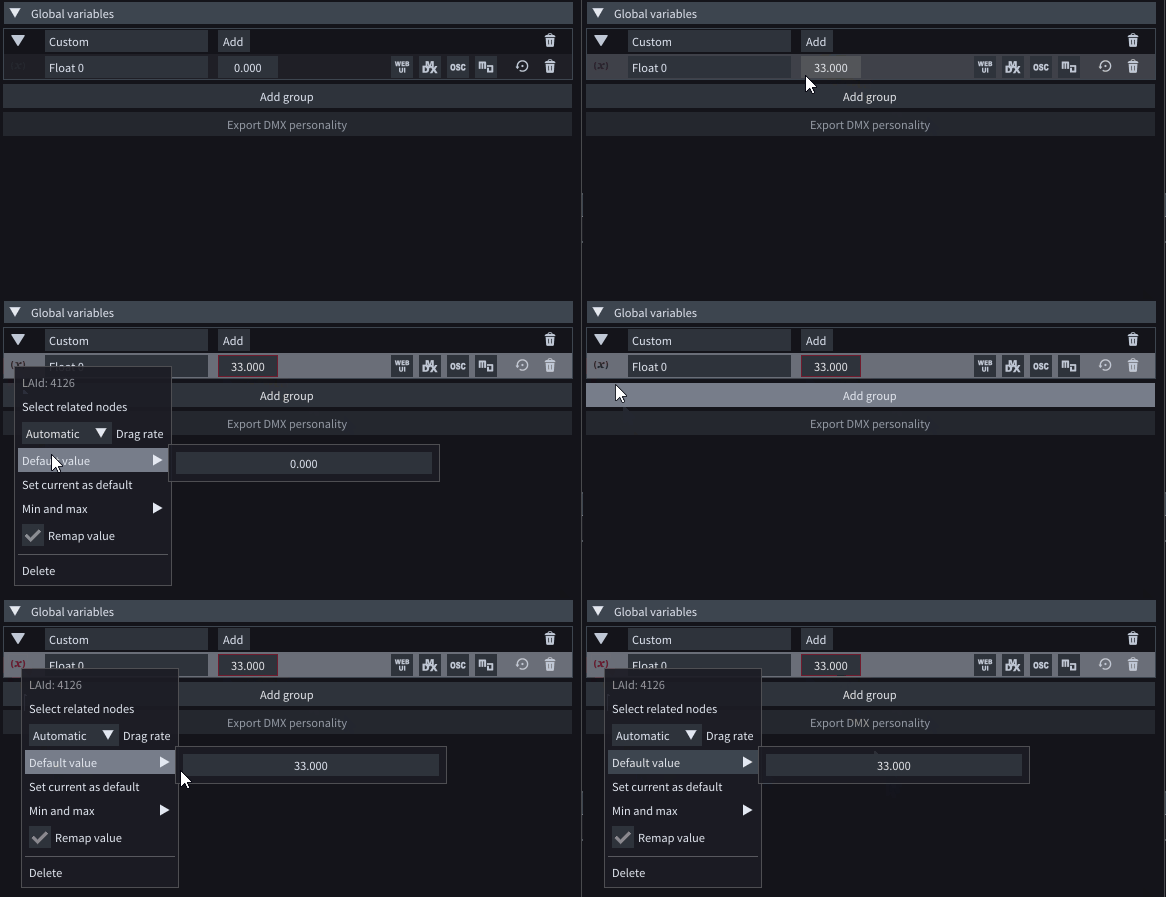
Define the current value of a variable and click Set current as default from the right-click menu.
-
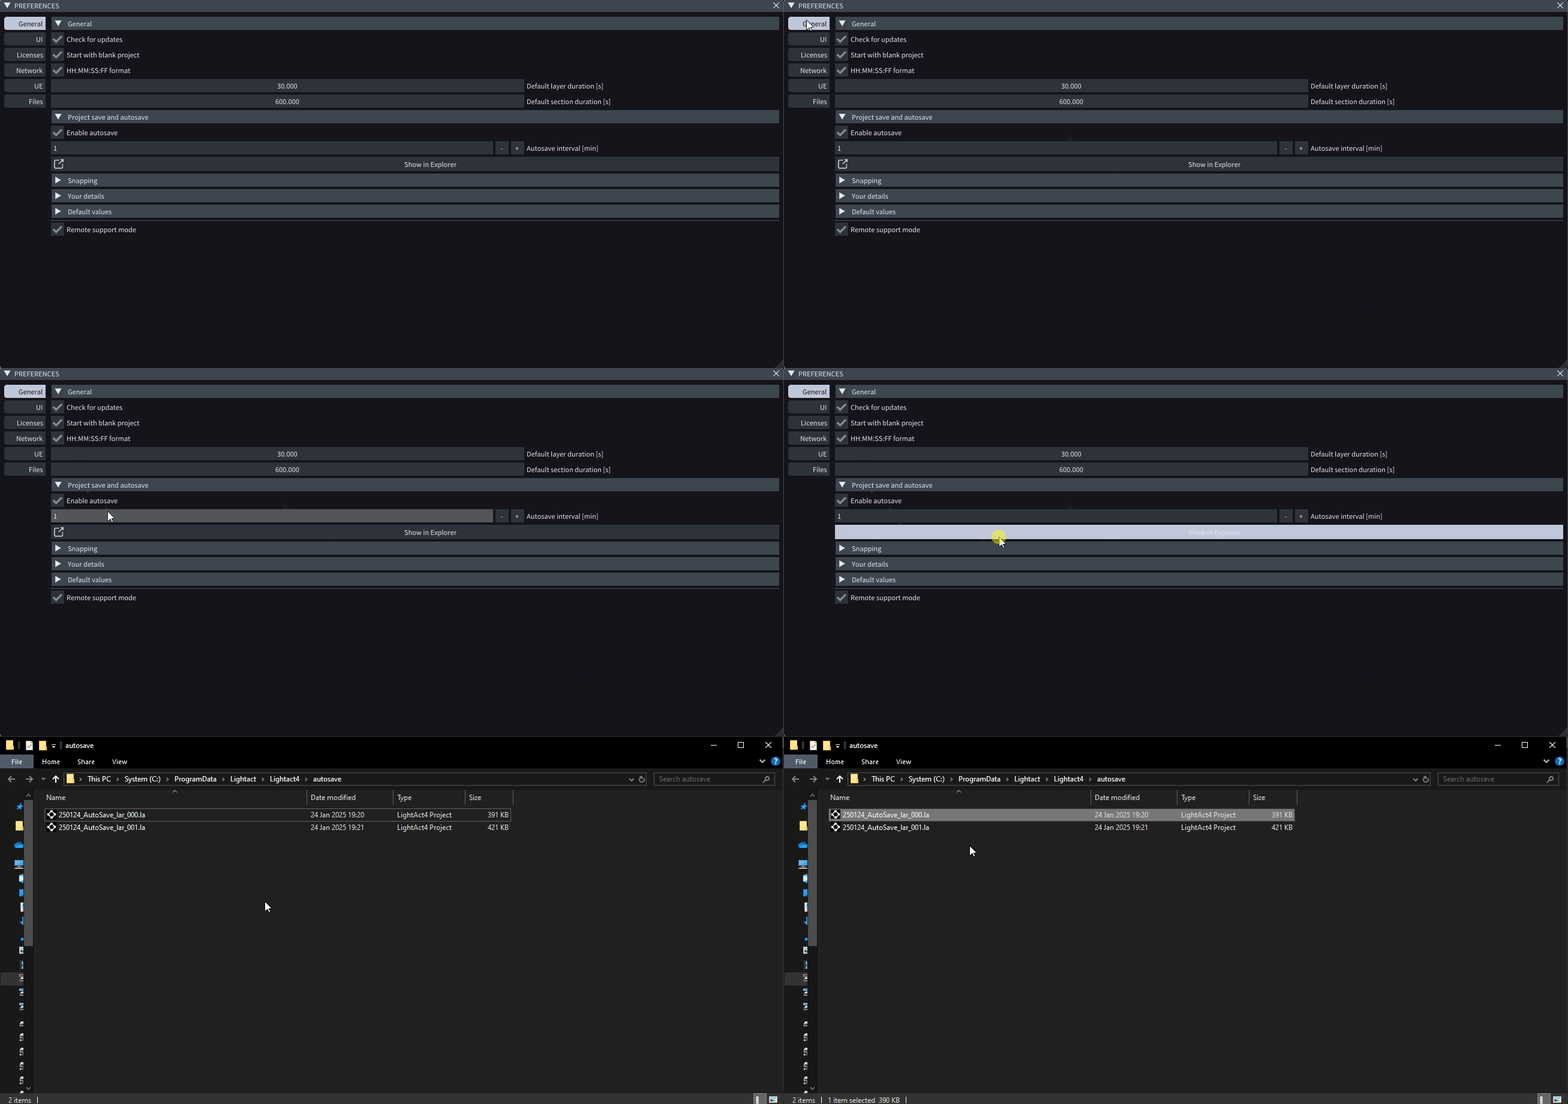
Head to Preferences → *General and click on Show in Explorer button to locate your Autosaved files folder.
-
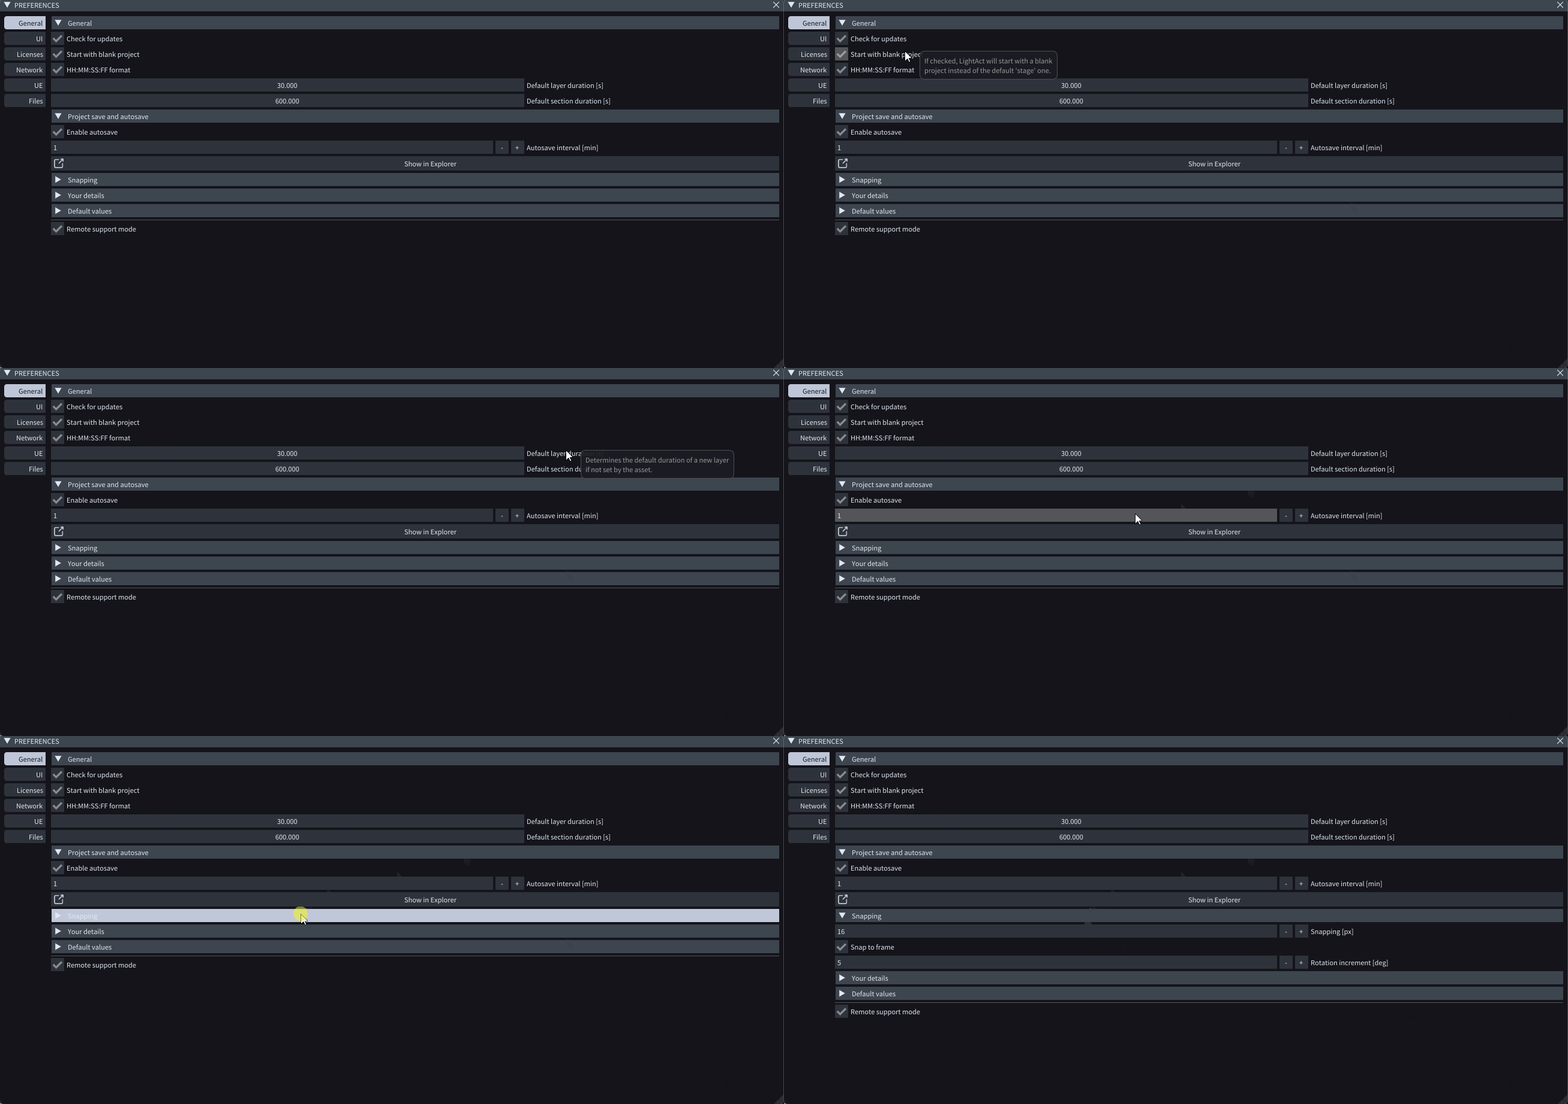
Added tooltips in Project settings, Properties, Preferences, and Mesh warp window to offer better understanding and some guidance.
-
Updated right-click menus.