LightAct 4.6.0 brings more streamlined programming for live events, more intuitive timeline syncing, faster control of LightAct with DMX, and new and updated layer templates.
Sequencing
-
Each Timeline in the Timelines window has been expanded with Play to end of section and pause and Play to end of section and loop icons. If you hold Shift + left-click on one of these icons, all other Timelines will stop playing, allowing the action of the selected icon to begin executing.

-
The Play to end of sequence and pause and Play to end of sequence and loop play states will remain active even if you manually relocate the Playhead.

-
To determine how the Timeline behaves once the Playhead reaches the end, you can modify the At the end dropdown in the Timeline Properties.
-
The duration between two grey lines on the Timeline is now displayed at the bottom right corner of the Timeline window.

-
Snap playhead checkbox in the Timeline Properties ensures the Playhead snaps to the Layers, Markers, or Sections when we manually drag it within the selected Timeline.

-
The Section labels now have their own track in the Timeline, which is separate from the Playhead track.
-
The Apply negative time checkbox now operates independently for each Timeline.

-
You can center the Playhead on the Timeline by left-clicking the icon at the bottom left of the Timeline window. If Scroll timeline window during play is enabled, the Timeline will scroll when the Playhead is in the center or left side of the window.
-
The last view of the Timeline is preserved when jumping between different Timelines.
-
The default framerate of a Timeline is now 30fps instead of 60fps.
-
Clicking on a Section in the Go To menu will cause the Timeline to pan so that the selected Section is in focus.
-
When Apply to fade is enabled, Timeline fades occur even when the Playhead changes its playstate from Stop to Pause and from Pause to Stop.

-
The Jump icons in the Timeline window now allow you to Jump to the next landmark or previous landmark, such as Markers, the beginning of Sections, and the start or end of the Timeline.
-
You can now find Playhead behavior properties in the three-lined menu on the bottom left of the Timeline window.
Layers
-
You can resize or edit the properties of multiple selected Layers at the same time.
-
You can adjust the duration of a Video Layer to match the duration of the video itself by clicking on the Adjust duration to video option in the layer’s right-click menu.
-
In the right-click menu of a Timeline, under Select menu entry, you can quickly select all Layers, Sections, and Markers on the right, left, or all together.
-
To determine the default length of newly created Layers, you can adjust the Default layer duration property in the Preferences window, under the General tab.
-
You can drag Objects and Assets onto Layers, after which they populate the first compatible and available variable.
-
A label has been added to the top left corner of each Layer, helping you determine the status of the Layer quickly.
-
Comments have a Title and a Description section.
-
The Layer Layouts section in the Search menu has been divided into two sections: Action flow and Triggers and Actions.
Layer Templates
-
Old Layer templates automatically get replaced with new Layer templates.
-
The Fades layer template allows you to trigger Fade actions, which change the opacity of a Black texture that is always rendering on top of the Canvas. This template was designed to facilitate content fade-outs irrespective of the current position on the timeline. It must always be placed on top of all the Layers that are rendering on the same Canvas, which you would like to affect.
-
The Audio Layer template allows you to play an audio file.
-
The Image layer template allows you to render an image and apply different resizing, cropping, warping, blending, and color modifications.
-
Content layer templates, such as Video, Notch, and Device texture, have been upgraded with new Render Texture nodes, allowing for new clipping and blending options.
Nodes
-
Render texture nodes now offer various Clip modes and an option for anchoring the texture in the center.
-
Render texture nodes have been expanded to include Blend Modes.
-
The Read MIDI CC node filters incoming MIDI data based on the chosen Control input.
-
The Read MIDI Note node filters incoming MIDI data based on the chosen Note input.
-
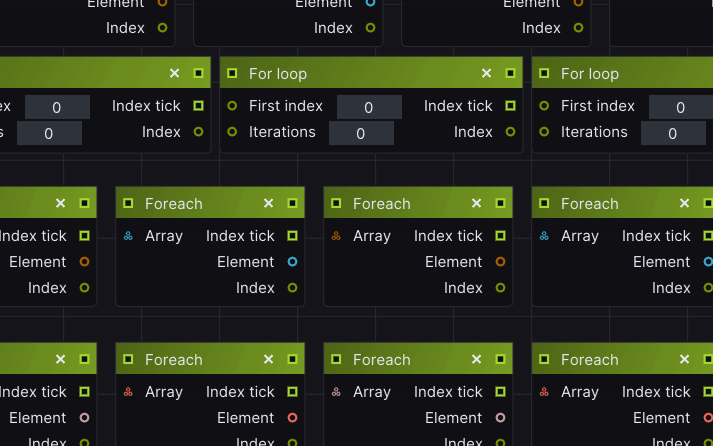
New For loop and Foreach nodes.
-
Sobel edge detection node sharpens edges by applying filters to estimate the intensity gradient.
-
A batch mesh path Set data node allows you to replace an imported 3D viewport object during runtime.
-
You can move all node connections at the same time by pressing Ctrl + dragging the connections towards the desired node pin.
-
You can disconnect all connections from a pin by using the Alt + left-click shortcut.
-
Node warnings are displayed at the bottom of the node. Hovering over them provides you with more information about the issue.

-
You can enable Watch on the output pins of all selected nodes by pressing the W key.

Variables
-
The new Event type variable can trigger events independent of the Timeline time. Global event variables can also appear and be triggered in the WebUI or Cue list window by pressing the corresponding Trigger button.
-
Float variables that represent Time, such as Start and Duration, can change their appearance to Time variables.
-
Integer variables can change their appearance to act as Dropdown menus.
-
You can adjust the drag rate of numerical variables by right-clicking on the Variable icon and choosing the desired Drag rate.
-
Variables can now be multi-selected. Enabling the control button of one Variable will affect the control buttons of all selected Variables. Additionally, a given variable can have both DMX and OSC control buttons enabled at the same time.
-
You can drag an Asset or Viewport object directly to a Variable.
DMX
-
If Control by DMX is enabled, you can control software-level properties such as Master fade, Video output fades, Timeline play states, Cue triggers, and Global variables through DMX.
-
You can export the DMX Personality of any Layer that uses DMX to control at least one Variable.
-
Using the DMX by UV node, you can send DMX data based on absolute UV coordinates to a CSV file.
Other
-
You can Hide selected Viewport objects by pressing the H key, and Show them by pressing the Shift + H keys.
-
Press Shift + F on a selected Thrower to modify its location, so it’s looking at its Target.
-
You can obtain the aspect ratio while resizing or changing the resolution of different objects if you press Ctrl + drag on one of the values.
-
The Top Menu has been reorganized.
-
The UI tab of the Preferences window has been updated.
-
More logs for different actions, better labels for certain properties, and new warnings have been added.
-
Other minor improvements.